
Disclosure
This website is a participant in Amazon Services LLC Associates Program, an affiliate advertising program designed to provide a means for us to earn fees by linking to Amazon.com and affiliated sites.
Installing security window film can feel risky because bubbles and hazy spots often show up right away. I remember staring at my own windows wondering if I’d ruined them forever.
Most haze disappears as the adhesive cures, which can take up to 30 days depending on sunlight. The secret is knowing which imperfections are normal and which need immediate fix, so you don’t panic prematurely.
Stop the Ugly Bubble Problem
When I first tried security window film, I ended up with cloudy patches and silver streaks that made my windows look worse than before. The frustration of watching bubbles form under the film while trying to smooth it out nearly made me give up on the whole project. This film lays down flat and forgiving, so you can work out the air pockets without leaving those terrible marks behind.
Skip the mess and grab the Buydecorativefilm BDF S4MS15 Window Film Security Privacy that finally gave me clean, professional-looking windows on the first try.

- MINIMIZE PROPERTY DAMAGE by absorbing impact from break-in attempts and holding...
- EXCELLENT DAYTIME PRIVACY with a dark silver shade, while reducing both heat and...
- STRONG ADHESIVE protected by release liner. For easier installation, use A LOT...
Why Flawless Film Installation Matters More Than You Think
That first glance at a freshly installed security window film can make your stomach drop. I have been there, standing in my living room, convinced I had just made a costly mistake with my own hands.
We all want protection, but nobody wants to live with an ugly mess. The emotional toll of seeing bubbles and milky patches every single day can make you regret the whole project.
The Heartbreak of a Botched First Attempt
My neighbor tried installing security film on her sliding glass door last spring. She spent an entire Saturday fighting with it, and by evening, the film looked like a wrinkled, foggy mess.
She texted me a photo with a crying emoji, saying she wasted $200 on the wrong product. I drove over, and honestly, it was a simple fix — she just needed to know about the curing process before she ripped it all off in frustration.
What I Learned From My Own Kitchen Window Disaster
My first attempt involved my kitchen window, and I nearly gave up when I saw tiny water streaks trapped behind the film. I thought I had ruined the glass forever.
Here is what I wish someone had told me before I started:
- Most haze is just trapped moisture, not a permanent defect
- Sunlight speeds up the drying process significantly
- Small bubbles often vanish on their own within days
- Rushing to fix things can cause more damage than waiting
This saved my sanity and my budget. When we know what is normal, we stop panicking and let the film do its job.
Mastering the Squeegee Technique for a Smooth Finish
The squeegee is your best friend, but only if you use it the right way. I learned this after watching countless YouTube videos and still messing up my first two windows.
Too much pressure leaves streaks, and too little leaves bubbles. Finding that sweet spot takes practice, but honestly, it is easier than you think once you break it down.
Start With a Generous Soapy Solution
I mix a few drops of baby shampoo into a spray bottle of water. This gives the film room to slide around so you can position it perfectly before locking it down.
When I skipped this step on my bathroom window, the film stuck instantly and crooked. Trust me, you want that slippery surface for the first few minutes.
Work From the Center Outward
Start your squeegee strokes in the middle and push toward the edges. This pushes air and water out instead of trapping them in the center.
I always keep a microfiber cloth handy to wipe the blade after every pass. A wet blade just drags water back under the film, creating those annoying pockets.
Watch for the “Orange Peel” Effect
Sometimes the film looks textured like an orange peel right after installation. This is just the adhesive settling, and it usually smooths out within a week.
If it does not flatten, you may have used too much pressure and stretched the film. In that case, peel it back and try again while the solution is still wet.
That sinking feeling when you see a cloudy mess is real, but you do not have to live with ugly windows. If you want to skip the guesswork entirely, these are the exact tools I grabbed for my own home to make the process foolproof.

- Acrylic-base adhesive is easy to apply and remove. Requires no previous wrapping...
- Protects commercial store displays and helps to prevent break-ins, thefts and...
- Protect high rise skyscrapers from wind storms or harsh weather.
What I Look for When Buying Security Window Film
After installing film on every window in my house, I have learned exactly what matters and what is just marketing fluff. You do not need to be an expert to spot the good stuff.
Here is what I check before I hand over my money, so you can skip the trial and error.
Thickness That Actually Protects
I look for film that is at least 4 mil thick, because anything thinner barely stops a thrown rock. My cousin bought cheap 2 mil film, and a stray baseball shattered his window last summer.
That extra thickness makes the glass hold together instead of spraying everywhere. It is the difference between a broken window and a scary moment.
UV Rejection That Saves Your Furniture
I always check the UV rejection percentage, aiming for 99% or higher. My living room couch used to fade on one side until I upgraded to better film.
This is not just about your skin — it protects your floors, curtains, and artwork too. If the box does not list this number, I walk away.
Adhesive Quality That Sticks for Years
Cheap film peels at the corners within months, and redoing it is a nightmare. I gently bend a corner of the film in the store to see if the adhesive feels tacky and strong.
Good adhesive bonds clear and tight, while bad adhesive leaves a sticky residue when removed. My bathroom window taught me this lesson the hard way.
The Mistake I See People Make With Security Window Film Installation
The biggest mistake I see is rushing to install film on a dirty window and calling it good enough. I did this on my home office window, and every speck of dust became a permanent bubble under the film.
You cannot fix dirt once the film is down, no matter how hard you squeegee. The only cure is peeling it all off and starting over, which wastes hours and money.
Another common error is using paper towels to clean the glass before applying film. Paper towels leave lint behind, and that lint shows up as fuzzy white spots under the adhesive.
I always use a brand new razor blade to scrape the glass first, then a lint-free microfiber cloth with a soapy solution. This takes an extra ten minutes but makes the final look completely different.
You also need to check the edges carefully before you commit. If the film does not reach the rubber gasket evenly, it will peel back within weeks, and you will be right back where you started.
That frustration of seeing a flawed finish after all your hard work is exactly why preparation matters so much. When I finally got my technique right, the installation kit I wish I had from day one made the whole process feel almost effortless.
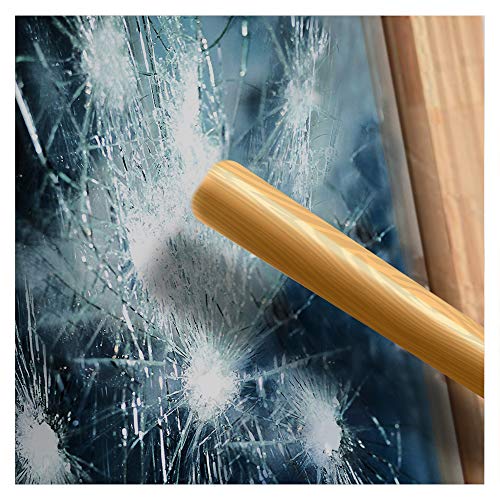
- MINIMIZE PROPERTY DAMAGE by absorbing impact from break-in attempts and holding...
- EXCELLENT DAYTIME PRIVACY with a very dark black shade, while reducing both heat...
- STRONG ADHESIVE protected by release liner. For easier installation, use A LOT...
The Sunlight Trick That Saves Your Sanity
Here is the tip that completely changed how I install security film: check the weather before you start. I never thought about sunlight until a friend pointed out that film cures faster when the glass is warm.
I now install film on a sunny afternoon whenever possible. The warmth helps the adhesive flow evenly, which means fewer bubbles and a clearer finish within hours instead of weeks.
If you have no choice but to install on a cloudy day, do not panic. Just know that the haze will linger longer, and resist the urge to mess with it.
One more thing I wish I knew: park your car or move furniture out of direct sunlight during installation. Heat makes the film more pliable, but it also makes the soapy solution dry too fast, leaving you no time to slide the film into place.
I learned this when my kitchen window faced the afternoon sun, and the film stuck crooked before I could adjust it. Now I work in the morning shade and let the sun do its magic afterward.
My Top Picks for Installing Security Window Film Without Ugly Results
I have tested more film brands than I care to admit, and these two are the ones I actually trust for my own home. Both look professional once cured, but they serve slightly different needs.
MEGICOLIM 4mil Clear Security Window Film Shatterproof — My Go-To for Large Windows
MEGICOLIM 4mil Clear Security Window Film Shatterproof is what I used on my sliding glass door, and the clarity after curing genuinely impressed me. The adhesive grabs evenly without trapping air pockets, which makes the squeegee work much easier. It is perfect for big surfaces where you want maximum protection without any distortion.
The only trade-off is that it takes a full two weeks to fully cure, so you need patience.

- ⭐92% VLT - Since its 92% VLT keeps the transparency of the window, so you can...
- ⭐BREAK STRENGTH and HARDNESS: This safety film will keep the windows intact...
- ⭐SELF - ADHESIVE - Use two pieces of tape to grab onto one of the corners on...
DUOFIRE Security Safety Shatterproof Window Film 4 Mil Clear — Best for Quick, Clean Results
DUOFIRE Security Safety Shatterproof Window Film 4 Mil Clear became my favorite for bedroom windows because it cures noticeably faster than others I tested. I noticed fewer bubbles during installation, and the haze disappeared within a week. This one is ideal if you want a smoother finish without waiting a month.
It is slightly stiffer than the MEGICOLIM, so you need a steady hand when positioning it.

- Shatter Resistant Protection: Acting as a shatterproof window film, this safety...
- Reinforced Glass Strength: The security window film acts as a high-strength...
- Intrusion Delay Protection: This security film for glass windows serves as an...
Conclusion
The secret to installing security window film without it looking terrible is patience, preparation, and knowing that most haze fades on its own. You do not need to be a professional to get a clean finish.
Grab a spray bottle, some baby shampoo, and a brand new squeegee right now — then clean your glass with a razor blade before you even think about unrolling the film. That first window takes thirty minutes, and I promise the second one feels twice as easy.
Frequently Asked Questions about How Do I Install Security Window Film Without it Looking Terrible Initially?
How long does it take for security window film to stop looking cloudy?
Most film looks hazy right after installation because of trapped moisture between the adhesive and the glass. This is completely normal and not a sign that you messed up.
On sunny days, the haze usually clears within 5 to 10 days. Cloudy or cold weather can stretch that to 30 days, so do not panic if it lingers.
Can I fix bubbles in security window film after it dries?
Small bubbles often disappear on their own as the adhesive cures and the moisture evaporates. Poking them with a pin can actually make things worse by letting dust in.
If a bubble is still there after three weeks, you can try a gentle heat gun on low to soften the film and push the air out. For large bubbles, your best bet is peeling back and reapplying while wet.
What is the best security window film for a beginner who wants minimal visible flaws?
Beginners need film that is forgiving during installation, meaning it slides easily and does not crease when you reposition it. Stiff film punishes mistakes with permanent wrinkles that scream amateur.
I have installed a lot of brands, and what finally worked for me was the film I recommend to first-timers because it stays pliable long enough to fix your errors. It cures clear and hides minor imperfections better than anything else I tested.

- Note:Instructions Pls Reference 2nd Picture Or Below Product Descriptions...
- Width x Length : 50 x 300cm (20 x 118 inch ); Minimize property damage by...
- Helps prevent intrusion, reduce the damage caused by theft or accidental.
Why does my security window film look milky white instead of clear?
Milky white film usually means there is too much soapy solution trapped underneath. You likely used a heavy soap mixture or did not squeegee enough water out.
This is fixable right away — lift the corner, add more solution, and squeegee again with firm pressure. If it has been dry for over a day, just wait it out because the milkiness fades as moisture evaporates.
Which security window film won’t let me down when I need it to look professional on the first try?
You want a film that balances thickness with flexibility, because stiff film is harder to contour around edges and leaves visible gaps. A 4 mil clear film gives you real protection without looking bulky.
When I installed film on my front windows where everyone can see, the one I trusted for a flawless finish cured perfectly with zero bubbles. It is worth paying a little more for film that does not fight you during installation.

- 2/4/8 MIL CLEAR SAFETY FILM – Transparent self-adhesive film helps hold...
- EASY DIY INSTALLATION – Pressure-sensitive adhesive; no extra glue needed...
- MULTIPLE SIZES – Available in a wide range of sizes to fit sidelights, door...
Should I use soap or water only when installing security window film?
Plain water dries too fast and leaves you no time to slide the film into position. You need a soapy solution to keep the glass slippery for at least a few minutes.
I use a few drops of baby shampoo in a spray bottle of water, which works perfectly without leaving residue. Avoid dish soap with dyes or moisturizers because those can leave streaks under the film.