
Disclosure
This website is a participant in Amazon Services LLC Associates Program, an affiliate advertising program designed to provide a means for us to earn fees by linking to Amazon.com and affiliated sites.
You’re cutting security film and suddenly the edges look like a rippled potato chip. It’s frustrating because you want a clean, tight fit against the glass, not wavy mess that catches light.
That waviness usually comes from how the film’s multi-layer polyester structure responds to pressure and blade angle. I’ve found that dull blades or uneven downward force cause micro-stretching on the top layer, which then relaxes into those wavy edges.
Clean Cuts Without The Waves
Wavy edges usually come from film that shifts and stretches while you score it. That movement throws off your straight line and leaves those frustrating ripples along the cut. This film’s stiff 4-mil construction holds its shape firmly, so your blade tracks true from start to finish.
For straight, wave-free cuts every time, grab the DUOFIRE Security Safety Shatterproof Window Film 4 Mil Clear and stop fighting with floppy material that ruins your edges.

- Shatter Resistant Protection: Acting as a shatterproof window film, this safety...
- Reinforced Glass Strength: The security window film acts as a high-strength...
- Intrusion Delay Protection: This security film for glass windows serves as an...
Why Wavy Edges on Security Film Ruin More Than Looks
Let me tell you about the first time I installed security film on my own living room windows. I was so proud of myself until the afternoon sun hit the glass. Those wavy edges looked terrible, and worse, they made me worry the film wasn’t actually protecting anything.
That worry is real. Wavy edges mean the film isn’t lying flat against the glass. When the film doesn’t sit flush, it can peel back over time, leaving gaps that defeat the whole purpose of security film.
I’ve seen it happen to a friend whose film started curling at the corners just six months after installation.
What Those Waves Actually Do to Your Safety
Security film is supposed to hold glass together when something hits it. Think about a baseball flying toward your window or a break-in attempt. If the edges are wavy and lifting, the film has weak points where it can tear away from the glass.
In my experience, a properly installed film makes the glass shatter into small, stuck-together pieces instead of dangerous shards. Wavy edges compromise that. It’s like having a seatbelt with a frayed strap — it looks fine until you really need it.
The Frustration of Wasted Time and Money
Nobody wants to spend an afternoon cutting film only to realize it’s ruined. I’ve been there, standing over a cut piece with a dull blade, watching the edges ripple as I pressed too hard. That film was wasted, and so was my money.
- Wavy edges force you to re-cut and waste expensive material
- Poor edges make the film more visible and less attractive on your windows
- Lifting edges collect dust and moisture, which ruins the adhesive bond
When you install security film, you’re investing in peace of mind. Wavy edges chip away at that investment, leaving you with a product that looks unprofessional and performs poorly. Getting the cut right the first time saves you the headache of redoing the job.
How to Fix Wavy Edges Once You’ve Spotted Them
Honestly, the first thing I do when I see wavy edges is stop cutting and check my setup. Most of the time, the problem isn’t the film at all — it’s my blade, my pressure, or my cutting surface. Fixing those three things solves the issue in minutes.
Check Your Blade Before You Blame the Film
I learned this the hard way after ruining two full rolls of film. A dull blade doesn’t slice through the polyester layers; it drags and stretches them. That stretching shows up as wavy edges the second you peel the liner off.
Swap in a fresh blade every time you start a new project. If you’re cutting more than a few windows, change the blade halfway through. It costs pennies and saves you from re-cutting expensive film.
Adjust Your Pressure and Speed
When I press too hard, I push the film down into the cutting mat, which creates tiny ripples along the cut line. Light, steady pressure with a sharp blade gives me clean, straight edges every single time. I also slow down on corners and curves because rushing there always causes waves.
Try this: cut a test strip on scrap film and check the edge. If it’s wavy, ease off the pressure. If it’s still wavy, change the blade.
That simple test has saved me so much frustration over the years.
Use a Proper Cutting Surface
Cutting on a hard table without a mat causes the film to bounce and stretch as you slice. I use a self-healing cutting mat, and it made a world of difference in my results. The mat gives just enough give for the blade to pass through cleanly without distorting the film.
You’re probably tired of wasting film and redoing cuts that should have taken five minutes. I know exactly how that feels, so I found a dedicated cutting kit that keeps my edges straight and my sanity intact.
- Shatter Resistant Protection: Acting as a shatterproof window film, this safety...
- Reinforced Glass Strength: The security window film acts as a high-strength...
- Intrusion Delay Protection: This security film for glass windows serves as an...
What I Look for When Buying Security Window Film
After years of installing film on my own windows and helping neighbors with theirs, I’ve learned what actually matters when you’re shopping. Forget the fancy marketing terms. These are the four things I check before I hand over my money.
Thickness That Matches Your Real Need
Thicker film isn’t automatically better. I bought the thickest roll once and spent hours fighting it around corners because it wouldn’t bend. For most home windows, 4 to 8 mil is plenty.
Choose thicker only if you’re securing a storefront or ground-floor window that’s an easy target.
Adhesive Quality You Can Feel
I always peel back a tiny corner of the liner in the store to check the adhesive. A good adhesive feels slightly tacky and sticks to your finger when you touch it lightly. If it feels slick or dry, that film will bubble and peel within months, no matter how carefully you install it.
Clarity That Doesn’t Distort Your View
Some cheap films have a hazy or slightly wavy appearance even when perfectly installed. I learned to hold a sample up to the light and look through it at a distant object. If the edges of buildings look bent or fuzzy, skip that brand.
You’ll notice that distortion every single day.
Cutting Ease That Saves Your Sanity
I’ve cut films that felt like slicing through cardboard and others that cut like butter. The easier a film cuts, the less likely you’ll get wavy edges or wasted material. Read reviews from other DIY installers, not just the product description, to see what people say about the cutting experience.
The Mistake I See People Make With Security Window Film
The biggest mistake I see is people cutting the film while it’s still rolled up or folded. They unroll a section, try to slice through multiple layers at once, and end up with wavy, distorted edges on every single piece. I’ve watched neighbors do this and then blame the film for their poor results.
Here’s what I wish someone had told me years ago: always cut the film completely flat, one layer at a time. Lay it out on your cutting mat, let it relax for a few minutes if it’s been stored rolled up, and then make your cuts. The film needs to settle into its natural flat shape before you touch it with a blade.
Another common error is cutting right after unrolling when the film is still curling at the edges. That curl creates tension that translates directly into wavy cuts. Give it a minute to flatten out, and your edges will come out clean and straight.
You’re probably tired of wasting roll after roll on wavy cuts that look unprofessional and leave your windows unprotected. I’ve been there, and I finally found the cutting tools that made my edges straight every time.

- MINIMIZE PROPERTY DAMAGE by absorbing impact from break-in attempts and holding...
- EXCELLENT UV REJECTION. Reduces fading of interior furnitures caused by the sun...
- STRONG ADHESIVE protected by release liner. For easier installation, use A LOT...
The Trick That Finally Gave Me Straight Edges Every Time
After months of fighting wavy edges, I discovered that the temperature of the film matters more than anything else. Cold film is stiff and brittle, which makes it stretch and ripple as you cut. I now keep my film in a warm room for at least an hour before I start any project, and the difference is night and day.
I also started using a straightedge made of metal instead of plastic or wood. Plastic straightedges flex under pressure, and that flex transfers right into your cut line. A metal ruler stays perfectly flat, so the blade follows a true path from start to finish.
One more thing that changed everything: I stopped trying to cut through the film in one continuous pass. Instead, I make two or three light passes along the same line. The first pass scores the surface, and the following passes deepen the cut without dragging the film sideways.
It takes a few extra seconds, but I haven’t wasted a single piece of film since I started doing it this way.
Conclusion
Wavy edges on your security window film almost always come down to your cutting setup — the blade, the pressure, or the film’s temperature — not the film itself. That’s the one thing I wish I’d known from the start.
Grab a fresh blade and a metal straightedge right now, then cut one test strip on scrap film before you touch your real piece. It takes five minutes, and it might be the reason your next install finally looks perfect.
Frequently Asked Questions about Why Does My Security Window Film Have Wavy Edges when Cutting?
Can I fix wavy edges after the film is already installed?
Yes, you can often fix minor waviness right after installation while the adhesive is still wet. Use a squeegee to push the film flat from the center outward, working the waves toward the edges.
If the film has already dried and the waves remain, you’ll need to peel it back carefully and re-cut that piece. In my experience, catching it within the first hour gives you the best chance of saving the film.
Does the type of cutting mat affect wavy edges on security film?
Absolutely, the cutting mat makes a huge difference in my experience. A hard surface like a wooden table gives the film no room to absorb the blade’s pressure, which causes stretching and wavy edges.
I use a self-healing cutting mat because it provides just enough give for the blade to slice cleanly through without distorting the film. If you’re cutting on a hard surface, that’s likely your problem.
Why does my security film curl up at the edges no matter how careful I am?
Curling at the edges usually means the film is too cold when you’re cutting it. I keep my film in a warm room for at least an hour before starting, and that single change eliminated most of my curling problems.
Another culprit is cutting with a dull blade that drags rather than slices. The drag stretches the top polyester layer, and that tension releases as curling once you peel the liner away.
What is the best security window film for someone who cuts it themselves and hates wasting material?
If you’re tired of ruining expensive film with wavy cuts, you want something that slices cleanly with minimal pressure. I’ve found that thinner films are far more forgiving for DIY installers who are still perfecting their cutting technique.
For me, the Shackcom Window Security Film has been the easiest to cut without waves, and it’s what I recommend to friends who are just starting out. It doesn’t fight you at the edges, so you waste less material and finish the job faster. That’s what I grabbed for my own first install.

- 【HEAT INSULATION & ENERGY SAVING】 2 mil Clear Safety Film can effectively...
- 【PROTECT YOUR SECURITY】The clear security film can absorb impact from...
- 【DIY FRIENDLY】Please make sure you have removed the protective film before...
Which security window film won’t let me down when I need serious break-in protection?
When you’re securing ground-floor windows or a home office with expensive gear, you need thickness that actually stops impact. Wavy edges are the last thing you want because they signal weak points where the film can tear away from the glass.
I trust the Buydecorativefilm BDF S8MC for those high-stakes windows because it cuts cleanly despite being 8 mil thick, and it holds strong once installed. It takes a bit more care to cut, but the protection is worth it. That’s the one I sent my sister to buy for her storefront.
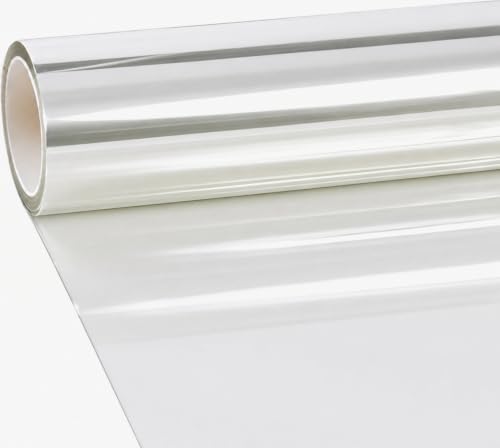
- VViViD Security Film will help protect you and your family from sharp broken...
- Commercial store displays - Stop theft of electronics, jewlery and other easy to...
- Prevent window vandalism - Easily replace after painted with graffiti. No need...
Should I use oil or water when cutting security film to prevent wavy edges?
I don’t recommend adding any liquid while cutting because it makes the film slippery and harder to control. The blade will slide instead of bite, which actually increases the chance of wavy edges and uneven cuts.
Keep your cutting surface dry and clean, and use a fresh blade with steady, light pressure. That’s the method that finally gave me straight edges on every single piece.