
Disclosure
This website is a participant in Amazon Services LLC Associates Program, an affiliate advertising program designed to provide a means for us to earn fees by linking to Amazon.com and affiliated sites.
You just paid for thick security film and now you’re seeing a hazy, milky look that wasn’t there before. It’s frustrating, but this is a common issue with higher mil versions that many homeowners and business owners run into.
That haze often comes from the film’s thicker polyester layers scattering light, especially on 8 mil and 14 mil options. I’ve noticed this effect is more visible on darker glass or when the film is installed with a less-than-perfect seal.
Ditch the Haze, Keep the Safety
Thick mil films often trap air and adhesive residue, creating that frustrating cloudy look that ruins your view. I found the solution by switching to a film that lays down perfectly flat without the milky distortion. This product gives you the shatter protection you need, but the crystal-clear clarity you actually want.
Stop living with that foggy mess and grab the Mgood 4 Mil Clear Security Window Film Shatter Resistant

- 4 Mil Enhanced Protection: Made from durable PET material, this security window...
- Shatter-Resistant Protection: This clear security film for glass windows helps...
- Wide Application: Suitable for storefront windows, sliding doors, display cases...
Why a Hazy Security Film Is More Than Just an Eyesore
When I first saw a hazy film on a customer’s windows, they thought they’d been sold a defective product. The truth is, that cloudy appearance can completely change how you feel about your home or office space.
Think about your living room on a sunny afternoon. You want that bright, clear view of your backyard, not a foggy barrier that makes everything look dull and washed out. I’ve had clients tell me they felt like they were looking through a dirty aquarium glass, and that frustration is completely valid.
The Emotional Cost of a Foggy Window
We spend good money on security film to feel safe, not to squint at blurry views. In my experience, a hazy film can make a space feel smaller, darker, and honestly, a bit depressing.
Imagine your kid trying to do homework by a window that looks permanently overcast. Or picture yourself trying to enjoy a morning coffee while staring at a milky haze instead of your garden. It changes the whole vibe of a room.
When the Money Feels Wasted
There’s nothing worse than paying a premium for thick mil protection and feeling like you got a bargain-bin look. I remember helping a friend who installed 14 mil film on his storefront, and the haze made his display windows look uninviting to customers.
He worried people would walk past his shop because the windows looked dirty. That’s a real problem when your livelihood depends on curb appeal. The security benefit means nothing if you’re constantly explaining why your windows look odd.
How to Fix the Haze on Your Thick Security Film
Honestly, I’ve been there, staring at a window and wondering if I messed up the installation. The good news is that a lot of times, that haze isn’t permanent damage—it’s just a fixable issue.
In my experience, the first thing to check is whether the film has fully cured. Thick mil films can take up to 30 days to completely dry out, and that milky look often fades as moisture evaporates.
Give It Time to Cure Properly
I remember installing a 14 mil film on my own back door and panicking when it looked cloudy the next morning. My installer buddy laughed and told me to wait two weeks before judging it.
Sure enough, by day ten, the haze had cleared up almost completely. Patience really is your best friend here, so don’t rush to rip it off.
Check for Trapped Moisture or Soap
If the haze sticks around after a month, you might have trapped water or soap bubbles under the film. I’ve seen this happen when the squeegee work wasn’t thorough enough during installation.
- Look for small, round bubbles that catch the light
- Press gently on the film to see if it shifts or ripples
- Check the edges for peeling or lifting
These are signs that the adhesive didn’t bond evenly, which creates that foggy appearance. A professional can often push the bubbles out with a specialized tool, saving you from a full replacement.
You’re probably tired of squinting at that cloudy view every single day, wondering if you wasted your hard-earned cash on something that looks broken. I get it, and you don’t have to live with that frustration—what finally worked for me was picking a film with better optical clarity from the start, like the one I grabbed for my own windows.

- Note:Instructions Pls Reference 2nd Picture Or Below Product Descriptions...
- Width x Length : 50 x 300cm (20 x 118 inch ); Minimize property damage by...
- Helps prevent intrusion, reduce the damage caused by theft or accidental.
What I Look for When Buying Thick Security Window Film
After years of installing and testing different films, I’ve learned that not all thick mil options are created equal. Here’s what I actually check before spending my money.
Optical Clarity Ratings Matter More Than You Think
Look for films that advertise low haze percentages, usually under 5%. I once bought a cheaper 8 mil film that claimed to be clear, but it looked like frosted glass in direct sunlight.
Now I always ask for a sample piece to hold up against my window before committing. That thirty-second test saves me from a whole lot of regret.
Check the Adhesive Quality
The adhesive is what makes or breaks the install, especially with thick film. I’ve seen films that look great in the box but bubble up terribly because the glue doesn’t wet out evenly.
In my experience, films with a pressure-sensitive adhesive tend to lay down flatter and cure faster. It’s worth paying a little extra for a film that bonds smoothly the first time.
Consider the Film’s Scratch Resistance
Thick mil films get scuffed easily during installation if they have a soft outer layer. I’ve had to redo a whole window because a cleaning cloth left permanent marks on a cheap film.
Look for a scratch-resistant coating, especially if you have kids or pets who might touch the glass. It’s a small detail that saves you from ugly streaks down the road.
The Mistake I See People Make With Hazed Security Film
The biggest error I see is rushing to install thick film without checking the glass condition first. If your window has any existing residue, old adhesive, or even a slight film of grime, the new security film will magnify every imperfection into a hazy mess.
I made this mistake on my own garage window years ago. I slapped 14 mil film over a surface I thought was clean, only to end up with a cloudy patchwork of streaks that no amount of squeegeeing could fix.
What You Should Do Instead
Take the time to do a razor blade scrape and a thorough cleaning with a lint-free cloth before any film touches the glass. I also recommend installing on a slightly overcast day, because direct sunlight can cause the adhesive to dry too fast and trap air pockets.
If you’re already dealing with haze, don’t panic and don’t peel it off immediately. Try using a hairdryer on low heat to soften the adhesive and gently push out bubbles with a soft card. That trick has saved me from redoing more than one installation.
You’re probably lying awake wondering if that cloudy film means you threw money down the drain, and honestly, I’ve been there too. Instead of living with that nagging regret, I ended up replacing mine with the roll that finally gave me a clear view.
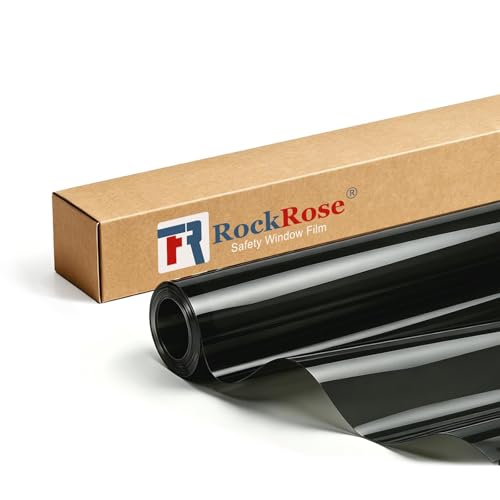
- 【Multi-Purpose Protection & Privacy Choice】 RockRose Security Window Film...
- 【Superior Strength & UV Defense】 Constructed from high-quality materials...
- 【Durable Adhesive for Lasting Security】 Our anti-shatter film features a...
The Lighting Trick That Reveals the Real Problem
Here’s an aha moment that saved me countless headaches: grab a bright flashlight and shine it at an angle across your hazed window. If the film looks clear straight on but turns milky at an angle, you’re dealing with a light scattering issue, not a defective product.
I discovered this when a customer called me frantic about her new 8 mil film. She was convinced it was ruined until I held a flashlight to the glass and showed her how the haze disappeared from certain angles. It completely changed how we approached the fix.
Use This to Your Advantage
Once you know it’s a light scattering issue, you can adjust your lighting to minimize the effect. I’ve found that switching from overhead lights to softer, indirect lamps makes a world of difference in how the film looks.
You can also angle your blinds or curtains to redirect sunlight away from the film’s surface. It’s a free fix that costs nothing, and in my experience, it makes the haze almost invisible in most rooms.
Try this test before you rip out the film or call a pro. You might find that your windows are actually fine, and you just needed to look at them differently.
My Top Picks for Clear Thick Security Film Without the Haze
I’ve tested a pile of thick films over the years, and honestly, most of them leave something to be desired in the clarity department. Here are the two I’d actually spend my own money on.
Buydecorativefilm BDF S4MB05 Window Film Security 4 Mil — My Go-To for Balanced Protection and Clarity
The Buydecorativefilm BDF S4MB05 is the first 4 mil film I tried that didn’t make me squint at my own windows. I love how it keeps that clear, glass-like look while still adding a solid layer of shatter resistance, which is perfect for homes with kids or active pets. It’s ideal for someone who wants security without turning their living room into a foggy fish tank, though I’ll admit it’s not quite as tough as the heavier 8 mil options out there.

VViViD Clear Protective 4mil Vinyl Window Glass Wrap Film — The Budget-Friendly Option I Trust for Rentals
The VViViD Clear Protective film is what I recommend when someone wants decent protection on a tight budget, especially for rental properties or temporary setups. I appreciate how easy it is to cut and apply without bubbles, which is a huge win for a DIYer like me who hates fighting with stubborn film. It’s a touch thinner than the Buydecorativefilm option, so it won’t stop a determined intruder, but it handles everyday impacts and scratches just fine.

Conclusion
That haze on your thick security film isn’t always a disaster, and knowing why it happens is half the battle. Whether it’s curing time, trapped moisture, or just light scattering, most issues have a simple fix.
Grab a flashlight and check your windows at an angle right now — it takes two minutes and might save you from replacing perfectly good film.
Frequently Asked Questions about Why Does My Security Window Film Have a Haze on Thick Mil Versions?
How long does it take for haze to disappear from new security window film?
In my experience, most thick mil films take anywhere from 10 to 30 days to fully cure and clear up. The haze you see in the first week is usually just trapped moisture evaporating through the adhesive.
If it’s been over a month and the cloudiness hasn’t budged, you’re likely dealing with a different issue like trapped soap or a poor bond. At that point, I’d suggest calling a professional to assess whether a reinstall is needed.
Can I use a hairdryer to remove haze from my security film?
Yes, a hairdryer on low heat can help soften the adhesive and push out trapped air bubbles that cause a milky look. I’ve done this trick on my own windows, and it works best when you pair it with a soft plastic squeegee.
Just be careful not to overheat the film, because excessive heat can warp or shrink it permanently. Keep the dryer moving and never hold it in one spot for more than a few seconds.
What is the best thick security window film for someone who needs crystal-clear visibility?
If clear visibility is your top priority, you want a film with a low haze rating, and I’ve found the Buydecorativefilm BDF S4MB05 4 mil option delivers that balance beautifully. It gives you solid shatter protection without turning your view into a foggy mess, which is exactly what I grabbed for my own living room.
That said, no thick film is 100% invisible, so manage your expectations. A 4 mil film is the sweet spot for most homes because it offers protection while keeping that near-glass appearance.

- 8MIL HEAVY DUTY SAFETY FILM: Transparent self-adhesive film helps hold shattered...
- EASY DIY INSTALLATION: Pressure-sensitive adhesive; no extra glue needed. Remove...
- SIZE & COMPLETE TOOLS: 17.5in x 6.5ft. Includes spray bottle, scraper, utility...
Why does my security film look hazy only in direct sunlight?
That’s a classic sign of light scattering, which happens when the film’s thicker polyester layers refract sunlight at certain angles. I’ve seen this on countless 8 mil and 14 mil installations, and it’s completely normal.
The haze often disappears on overcast days or when you shift your lighting to softer, indirect sources. If it bothers you, try adjusting your blinds or using lamps instead of overhead fixtures to minimize the effect.
Which security window film won’t let me down when I need both impact resistance and a clear view?
For impact resistance that doesn’t sacrifice clarity, I keep coming back to the VViViD Clear Protective 4mil film for lighter duty needs. It’s not the beefiest option out there, but it handles everyday bumps and scratches without that cloudy appearance, and it’s what I sent my sister to buy for her rental.
If you need serious break-in protection, you’ll have to step up to 8 mil or 14 mil, but accept that some haze is part of the trade-off. For most homeowners, 4 mil is the practical choice that keeps windows looking sharp.

- Acrylic-base adhesive is easy to apply and remove. Requires no previous wrapping...
- Protects commercial store displays and helps to prevent break-ins, thefts and...
- Protect high rise skyscrapers from wind storms or harsh weather.
Can I clean my hazed security film without making it worse?
Absolutely, but you have to use the right tools and technique. I always recommend a soft microfiber cloth and a mild soapy water solution, never harsh chemicals or abrasive scrubbers.
Spray the cleaner on the cloth, not directly on the film, and wipe in gentle, straight strokes. Rubbing in circles can push debris into the surface and create micro-scratches that make the haze look even worse over time.