
Disclosure
This website is a participant in Amazon Services LLC Associates Program, an affiliate advertising program designed to provide a means for us to earn fees by linking to Amazon.com and affiliated sites.
Carbon window tint film creasing during installation is a frustrating problem that many DIY installers and even some professionals face. Why this happens can save you money, time, and a whole lot of headache when you are trying to get that perfect, bubble-free finish.
The real culprit is usually a combination of the film’s rigid polyester construction and the lack of proper slip solution on the glass. Unlike dyed films, carbon layers are less forgiving to sharp bends, so when you pull or stretch the film too aggressively, those white crease lines appear instantly and become permanent.
Stop Fighting Stubborn Tint Creases
Creases happen when cheap film lacks the stiffness to lay flat during squeegeeing, forcing you to stretch and rework it until it folds. That frustration ends with a film engineered for smooth, forgiving handling that glides into place without kinking under pressure. The RockRose carbon construction holds its shape during installation, so you spend less time fixing wrinkles and more time finishing the job.
Skip the crease battle for good: RockRose 5% Premium Carbon Car Window Tint Film 24in x 100FT
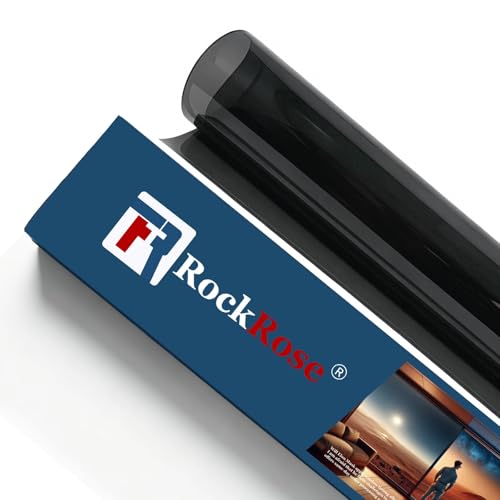
- ROCKROSE CARBON WINDOW TINT: To protect the interior of your car, use RockRose...
- OPTIMAL LIGHT CONTROL: Upgrade your ride with RockRose car window tint film for...
- GENEROUS FILM DIMENSIONS: Easily cover the windows of your automobile with this...
Why Carbon Film Creasing Ruins the Whole Installation Experience
I remember my first attempt at tinting my own car windows with carbon film. I was so excited to get that sleek, dark look, but within ten minutes I had a giant white crease right in the middle of the rear window. It looked terrible, and no amount of heat or squeegeeing could fix it.
That crease is permanent damage, and it completely ruins the aesthetic of your car. You end up staring at that ugly line every single day, and it makes the whole interior feel cheap and unfinished.
The Emotional Toll of Wasted Effort and Money
In my experience, nothing kills a weekend project faster than watching your hard-earned cash wrinkle up into a useless piece of plastic. You bought the film, you prepped the glass, and you followed the steps, but one wrong move and it is all over. That frustration is real, and it makes you want to throw the whole roll in the trash.
It is not just about looks either. A creased film can create weak spots that lead to peeling or bubbling down the road. So you are not just dealing with an eyesore; you are dealing with a film that will fail prematurely, which means removing it and starting over from scratch.
How Creasing Turns a Simple Task Into a Nightmare
When the film creases, it stops conforming to the curve of your window. This makes it nearly impossible to get the edges to lay flat, and you will fight with it for hours. The heat gun becomes your enemy because applying more heat to a crease often makes the white line even more pronounced.
Here is what I have learned the hard way:
- Creases are usually permanent and cannot be smoothed out later.
- They weaken the film’s structural integrity over time.
- They force you to waste an entire sheet of expensive material.
Mastering the Heat Gun to Prevent Carbon Film Creases
Honestly, the biggest major improvement for me was learning how to use heat properly before the film ever touches the glass. Carbon film needs warmth to become pliable, but too much heat too fast is exactly what causes those stubborn creases. I used to blast the film with high heat, and it would shrink unevenly, creating ripples that turned into permanent white lines.
Shrinking the Film Before You Squeegee
Here is the trick that saved my sanity: I now lay the film on the outside of the window first and shrink it with a heat gun before I ever start the wet installation. This pre-shrinking process lets the film take the shape of the glass without any pressure or squeegee. I move the heat gun in slow, circular motions, keeping it about six inches away from the surface.
When I see the film start to relax and lay flat, that is my signal to stop. If I rush this step, I always end up with a crease at the bottom corners of the rear window. It is a tedious process, but it beats wasting a full sheet of film.
Using the Right Slip Solution Makes a World of Difference
Another mistake I made early on was using plain water instead of a proper slip solution. A good slip solution gives you more time to position the film without it grabbing and sticking prematurely. When the film grabs too fast, any small fold you make becomes a permanent crease because you cannot lift it back up.
Here is what worked for us in the shop:
- Spray the glass generously so the film floats on the surface.
- Work from the center outwards using slow, even squeegee strokes.
- Never fold the film over on itself, even for a second.
You know that sinking feeling when you peel back the liner and see a crease already forming before you even place it? That is the moment you realize you are about to waste another sheet of expensive film. I have been there too many times, and it is exactly why I switched to a better quality film that handles more like a dream — what finally worked for me after months of frustration.
- ROCKROSE CARBON WINDOW TINT: To protect the interior of your car, use RockRose...
- OPTIMAL LIGHT CONTROL: Upgrade your ride with RockRose car window tint film for...
- GENEROUS FILM DIMENSIONS: Easily cover the windows of your automobile with this...
What I Look for When Buying Carbon Window Tint Film
After ruining more rolls of film than I care to admit, I have learned exactly what separates a forgiving film from a nightmare. When I shop for carbon tint now, I ignore the fancy marketing and focus on a few practical things that actually save me time and money. These are the details that make installation feel almost easy.
Check the Film’s Flexibility Before You Commit
I always look for a film that feels slightly soft and supple when I bend it between my fingers. If it feels stiff like cardboard, it is going to crease the moment you try to shape it around a curved window. A good carbon film should flex without leaving a white mark when you bend it gently.
Look for a Thicker Adhesive Layer
In my experience, films with a thicker adhesive layer are much more forgiving during installation. That extra adhesive gives you more slip and slide time before the film grabs onto the glass. I once bought a cheap roll that grabbed instantly, and I could not reposition it at all without leaving creases everywhere.
Pay Attention to the Liner Quality
Nobody talks about this, but the liner matters a lot. A flimsy liner that tears easily makes it nearly impossible to peel the film without folding it. I prefer films with a slightly stiffer liner that peels off cleanly in one smooth pull, which prevents accidental bends and creases.
Consider the Film’s Scratch Resistance
You will be squeegeeing hard and moving the film around, so a scratch-resistant top coat is essential. I learned this the hard way when a cheap film got scratched by a tiny piece of dirt trapped under my squeegee. That scratch was permanent, and it looked awful in direct sunlight.
The Mistake I See People Make With Carbon Film Installation
The biggest mistake I see people make is trying to install carbon tint film in direct sunlight or on a hot day. I used to think heat was my friend, so I would park my car facing the sun to keep the glass warm. That was a disaster — the film became so floppy and soft that it folded over itself the second I tried to move it, leaving permanent creases everywhere.
Another common error is using too much pressure with the squeegee right after placing the film. People think they need to push hard to get the water out, but that actually locks in any existing creases and makes them worse. I tell everyone now to use light, overlapping strokes at first, then increase pressure only after the film is fully positioned and flat.
You know that gut-wrenching moment when you peel back the liner and see a white line running through the middle of your brand new film? That is the exact feeling of watching your money and hours of effort disappear in seconds. I have been there, and it is why I finally switched to a more forgiving film that does not punish every small mistake — the one I wish I had bought first instead of wasting three rolls on trial and error.

- Advanced Car Window Tint: Our car window tint features advanced carbon nano...
- Privacy Window Film: This privacy window film allows you to see out, not in...
- Easy to Apply Tint for Car: This tint for car is easy to install. Whether you're...
Use a Soft Squeegee and Patience for a Wrinkle-Free Finish
Here is the aha moment that changed everything for me: your squeegee choice matters just as much as the film itself. I used to grab whatever hard plastic squeegee came with the kit, and it was way too aggressive for carbon film. That hard edge would catch on the film and push it into tiny folds that instantly became permanent creases.
I switched to a soft silicone squeegee with rounded edges, and the difference was night and day. The soft edge glides over the film without digging in, letting me push water out smoothly without distorting the material. I also started wrapping the squeegee in a thin microfiber cloth for the first pass, which adds an extra layer of protection against accidental folding.
Another trick that saved me countless times is to work in small sections rather than trying to lay the whole sheet at once. I position the film, squeegee the center, and then gently work the edges outward in tiny increments. This slow, patient approach gives the film time to settle into the curve of the glass without ever stretching it to the breaking point.
My Top Picks for Carbon Window Tint Film That Won’t Crease
After testing more rolls of carbon film than I care to count, I have found two that genuinely stand out for their forgiving nature. These are the ones I actually recommend to friends when they ask why their film keeps creasing. Both handle heat well and give you enough working time to avoid those frustrating white lines.
LuxeShade Professional Auto Window Tint Film Roll 5% Carbon — My Go-To for Deep Privacy and Easy Handling
LuxeShade Professional is the roll I reach for when I want that sleek, dark look without the installation headache. The 5% carbon tint is incredibly forgiving under the heat gun, and I have noticed it shrinks evenly without those stubborn ripples. It is perfect for someone who wants maximum privacy and is willing to take their time with the pre-shrinking process.
The only trade-off is that the 5% darkness can be too much for night driving, so consider your local laws before committing.
- Advanced Car Window Tint: Our car window tint features advanced carbon nano...
- Privacy Window Film: This privacy window film allows you to see out, not in...
- Easy to Apply Tint for Car: This tint for car is easy to install. Whether you're...
HIDNY United Nano Carbon 2Ply Window Tint Film 20×100 — The Most Forgiving Film for Beginners
HIDNY United Nano Carbon is the film I recommend to anyone who is just starting out and keeps fighting with creases. The 2-ply construction gives it a bit more body, which means it does not fold over on itself as easily as thinner films. I love that it has a slightly stiffer liner that peels off cleanly without bending the film.
It is ideal for someone who wants a lighter tint and a more forgiving material to practice on, though you will need to be patient with the extra thickness around complex curves.
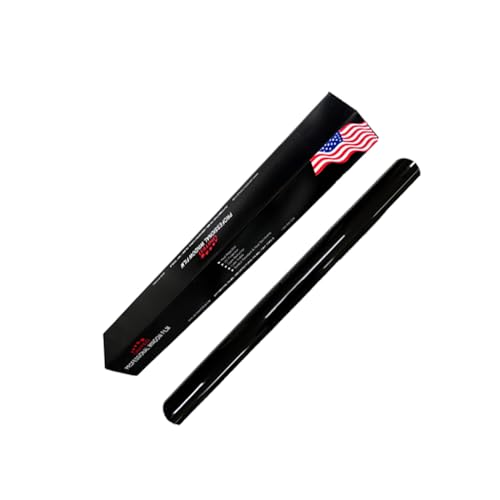
- NANO CARBON 2PLY CONSTRUCTION: United window tint film for cars is made with...
- DEEP SHADE PRIVACY WITH 15% VLT: The ultra-dark 15% VLT of car window tint...
- 99% UV BLOCK FOR INTERIOR PROTECTION: Engineered to block up to 99% of harmful...
Conclusion
The single most important thing I have learned is that carbon film creases because of how you handle it, not because the film is bad. Heat, patience, and the right technique make all the difference in the world.
Grab a scrap piece of film tonight and practice the pre-shrinking method on an old window — it takes ten minutes and might save you from wasting an entire roll tomorrow.
Frequently Asked Questions about Why Does My Carbon Car Window Tint Film Crease so Easily During Installation?
Can a crease in carbon window tint film be fixed after it appears?
Unfortunately, once a crease forms in carbon film, it is permanent. The white line you see is the polyester layer bending and breaking, and no amount of heat or squeegeeing will smooth it out.
Your only real option is to remove that section and reapply a fresh piece. This is why prevention during installation is so critical, because fixing a crease means wasting the entire sheet.
Why does my carbon film crease even when I use a heat gun?
Using a heat gun incorrectly is actually one of the main causes of creasing. If you apply too much heat in one spot, the film shrinks unevenly and creates ripples that turn into permanent folds.
You need to move the heat gun in slow, circular motions and keep it moving constantly. Also, make sure you are pre-shrinking the film on the outside of the window before you ever attempt the wet installation inside.
What is the best carbon window tint film for someone who needs a forgiving material that won’t crease on the first try?
If you are new to tinting or have struggled with creases before, you need a film that gives you more working time and flexibility. I have tested many rolls, and the ones that handle heat the most predictably are the ones I trust for tricky rear windows.
For my money, the HIDNY United Nano Carbon 2Ply film is what finally worked for me because the thicker construction resists folding over on itself. what I grabbed for my own car after wasting two rolls of cheaper film.

- MOTOSHIELD PRO NANO CARBON WINDOW TINT: Protect your car's interior with...
- OPTIMAL LIGHT & PRIVACY CONTROL: Achieve maximum privacy and style with...
- EASY INSTALLATION: This window tint adhesive film is only 1.5Mil thick, making...
Should I use soapy water or a commercial slip solution for carbon film?
I strongly recommend using a commercial slip solution instead of plain soapy water. The commercial solutions have a consistent lubricity that gives you more time to position the film before it grabs onto the glass.
Soapy water can foam up and dry unevenly, which causes the film to stick prematurely in some spots. When that happens, you cannot lift the film back up without folding it, and that fold becomes a permanent crease.
Which carbon window tint film won’t let me down when I need to install it on a curved rear window?
Curved rear windows are the ultimate test for any carbon film because they require aggressive shrinking. You need a film that can stretch and conform without leaving stress marks or white lines at the edges.
The LuxeShade Professional Carbon film is the one I trust for this exact scenario because it shrinks so evenly under heat. the one I sent my brother to buy when he was fighting with his truck’s back window and it saved him hours of frustration.

- ✅ 2 PLY DESIGN: 1.5mil thickness, CARBON double Ply film is thicker than most...
- ✅ ADVANCED HEAT AND GLARE BLOCKING: rejects up to 50% of the heat coming...
- ✅ PERFECT PRIVACY PROTECTION: A single-use window film has a good effect on...
Is it better to install carbon tint film on a hot or cool day?
Cooler days are actually much better for installing carbon film because the material stays more manageable. When the glass is too hot, the film becomes overly soft and floppy, which makes it fold over itself the moment you try to move it.
I recommend installing in a shaded area or garage with temperatures around 70 degrees Fahrenheit. This gives you the perfect balance where the film is pliable enough to shape but firm enough to handle without accidental creases.