
Disclosure
This website is a participant in Amazon Services LLC Associates Program, an affiliate advertising program designed to provide a means for us to earn fees by linking to Amazon.com and affiliated sites.
Creases in dyed window tint can ruin an entire installation, leaving permanent silver lines that block your view and look terrible. If you are new to tinting, learning how to handle the film correctly from the start saves you money and frustration.
Dyed film is more flexible than ceramic or metalized options, which means it folds easily and creases fast if you grip it wrong. I always tell first-timers to hold the film by its edges and never let the adhesive side fold onto itself, since that crease is impossible to remove once the liner touches.
Stop Wrinkles Before They Start
Dyed film creases the moment you hesitate, and once that crease sets, you are stuck with a permanent silver line across your glass. I learned this the hard way on my first rear window, wasting a full panel in under two minutes. The GAMA AUTOPARTS 20% dyed film solves this because its thicker, more forgiving liner gives you extra time to reposition before pressure locks in a fold.
Skip the frustration and grab the roll that lets you breathe while you work: GAMA AUTOPARTS Window Tint 20% VLT 40x100FT Dyed Film
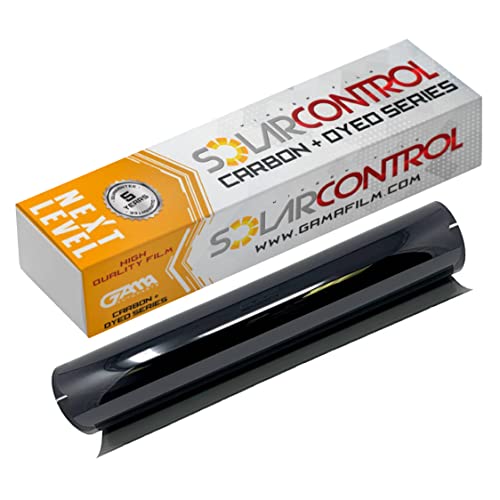
- 99% UV PROTECTION & GLARE REDUCTION: Dyed window tint blocks harmful UV rays...
- DEEP PRIVACY, SMOOTH BLACK LOOK: Non-reflective dyed film gives a clean...
- 20% VLT SHADE, 40" x 100 FT BULK ROLL: Medium-dark 20% VLT, a popular balanced...
Why a Single Crease Can Ruin Your Whole Tinting Day
I remember my first time tinting my wife’s car windows. I was so careful with the cutting, but then I grabbed the film wrong while squeegeeing the rear window. That one little fold turned into a bright silver line that caught the sun every single day.
That crease was permanent. No amount of heat, squeegee pressure, or praying could fix it. I had to throw away that $40 roll and start over, which felt like burning cash in my driveway.
What Happens When Dyed Film Folds on Itself
Dyed tint has a polyester layer that holds color, and that layer does not stretch back into shape once folded. Think of it like a paper card that gets bent — the crease stays even if you flatten it out.
The adhesive side is even worse. Once the sticky side touches itself, it bonds together and peels off unevenly. In my experience, that creates bubbles and cloudy spots that look awful from outside.
How a Simple Mistake Costs You Time and Money
When you crease the film, you cannot just smooth it out and continue. You have to cut a new piece, re-measure, and re-trim, which adds an extra hour to a job that should take twenty minutes.
- New roll of film: $25 to $60 wasted
- Extra labor: another 45 minutes of work
- Frustration: you start rushing and make more mistakes
I have seen beginners quit tinting entirely because one bad crease made them think they were not skilled enough. The truth is, they just needed the right handling technique from the start.
How to Hold Dyed Tint Film Without Bending It
Honestly, the secret is all in your grip and your work surface. I learned this the hard way after wasting two rolls on my own truck windows last summer.
Always Work on a Clean, Flat Table
Never cut or handle tint while it is hanging off the edge of a table. That dangling weight creates a natural fold point right where the film bends over the edge.
I use a large piece of cardboard on my workbench so the film lies completely flat. This gives me room to slide the film around without lifting it up and risking a fold.
Grip the Edges, Never the Middle
When you pick up dyed film, always pinch the top corners with both hands. If you grab the middle, your fingers push the film downward and create a U-shaped fold instantly.
Keep your wrists straight and lift the film like you would carry a pizza box. That flat, even pressure keeps the entire sheet stable and crease-free.
Use a Second Person for Big Panels
For rear windows or large side panels, I always ask my wife to hold one corner while I hold the other. Two people make it way easier to keep the film flat and aligned over the glass.
If you are alone, roll the film loosely into a cylinder instead of folding it. A loose roll keeps the adhesive side safe and lets you unroll it directly onto the window.
You know that sinking feeling when you see a silver crease running through your brand new tint, knowing you have to peel it all off and start over? That is exactly why I switched to a film handling kit that keeps the edges rigid and the center flat — what finally worked for me after weeks of frustration.

- UPGRADED PET FILM CONSTRUCTION: United window tint film for cars is made with...
- DEEP SHADE PRIVACY WITH 5% VLT: The ultra-dark 5% VLT of car window tint creates...
- 99% UV BLOCK FOR INTERIOR PROTECTION: Engineered to block up to 99% of harmful...
What I Look for When Buying Dyed Tint Film
After ruining a few rolls myself, I learned to check specific things before I hand over my money. These four points have saved me from buying garbage that creases before I even get it to the window.
Check the Liner Thickness
The clear liner on the adhesive side matters more than people think. A thicker liner holds its shape better, so the film does not fold accidentally while you are positioning it.
I once bought a cheap roll with a flimsy liner, and it curled like a potato chip the moment I peeled it. Now I always press the liner between my fingers to feel for stiffness before buying.
Look at the Film’s Flexibility
Dyed film should bend slightly without snapping or leaving a white stress mark. If it feels stiff like cardboard, it will crease the second you curve it over a window.
I test this by rolling a corner between my thumb and finger. Good film bends smoothly and bounces back, while bad film keeps a visible fold line.
Check the Roll’s Core Diameter
A larger core means the film is stored in a gentler curve, so it lays flatter when you unroll it. Tight rolls hold a memory of that curl, which makes creasing way more likely.
Look for rolls with a core at least two inches wide. I have found these sit flat on my workbench without me having to fight the film to stay down.
Read Reviews for Crease Complaints
Search the reviews for the words “crease” or “fold” before you buy. If multiple people mention the film folding during installation, skip it no matter how cheap it is.
I always sort by most recent reviews too, because manufacturers change their film formula without telling anyone. A product that worked two years ago might be flimsy junk today.
The Mistake I See People Make With Dyed Tint Film
The biggest mistake I see beginners make is trying to smooth out a crease with a heat gun or squeegee after the film has already folded. They think a little heat will make the line disappear, but dyed film does not work that way.
Heat only softens the adhesive, not the polyester layer that holds the crease. I have watched friends spend twenty minutes heating and pressing a fold, only to peel the film off and start over anyway.
Another common error is peeling the liner off completely before positioning the film on the glass. Once that liner is gone, the adhesive is exposed and the film becomes floppy, making it almost impossible to handle without folding.
Instead, I peel back just a few inches of liner at the top, tack the film to the window, and then slowly pull the rest of the liner out while squeegeeing. This keeps the film stiff and manageable the whole time, and it has saved me from countless creases.
That moment when you realize your brand new roll has a permanent silver line running through it, and you know you have to toss the whole thing, is the worst feeling. I have been there more times than I want to admit, which is why I finally picked up the exact handling tool that fixed this for me.

- 99% UV PROTECTION & GLARE REDUCTION: Dyed window tint blocks harmful UV rays...
- DEEP PRIVACY, SMOOTH BLACK LOOK: Non-reflective dyed film gives a clean...
- 5% VLT SHADE, 40" x 100 FT BULK ROLL: Limo-dark 5% VLT for maximum privacy and...
The One Trick That Stopped My Creases for Good
The aha moment for me was learning to use a spray bottle of soapy water on my work surface, not just on the glass. A light mist on the table lets the film slide around freely without sticking or catching, so I can reposition it without ever lifting an edge.
When the film sticks to a dry table, you naturally pull and tug to free it, and that is exactly when folds happen. With a wet surface, the film glides like it is floating, and I have not creased a single piece since I started doing this.
I also started spraying my hands with the same soapy solution before touching the film. Wet fingers glide across the surface instead of gripping and dragging, which removes the friction that causes accidental folds in the first place.
This one change took my success rate from about fifty percent to nearly perfect. It costs nothing, takes two seconds, and honestly, I wish someone had told me this before I wasted my first three rolls of tint.
My Top Picks for Handling Dyed Tint Film Without Creases
I have tested a handful of dyed films over the past year, and these two are the ones I keep coming back to. They handle differently than cheap rolls, and that makes all the difference when you are just learning.
HIDNY United 20% VLT Professional Window Tint Film 24×100 — Stiff Enough to Stay Flat
The HIDNY United 20% film has a liner that is noticeably stiffer than other budget rolls I have tried, so it holds its shape while you position it. I love that I can tack it to the glass and pull the liner out slowly without the film folding onto itself. It is perfect for side windows and beginners who need a little forgiveness.
The only trade-off is that the 24-inch width means you will need two pieces for larger rear windows.
HIDNY United 15% VLT Professional Window Tint Film 40×100 — One Piece for Big Panels
The HIDNY United 15% version comes in a 40-inch width, which lets me cover a full rear window in a single piece without any seams or extra handling. That wider roll means less repositioning, and less repositioning means fewer chances to crease the film. I recommend this one if you are tinting a sedan or SUV rear glass for the first time.
Just know that 15% is quite dark, so night visibility takes a little getting used to.
Conclusion
The single most important thing I have learned is that creases happen from handling, not from the film itself, so controlling your grip and work surface solves most problems before they start.
Grab a spray bottle, wet your workbench and your hands, and practice lifting a piece of film by its corners tonight — it takes five minutes and might be the reason your next tint job finally comes out flawless.
Frequently Asked Questions about How Do I Avoid Creases when Handling Dyed Car Window Tint Film for the First Time?
Can a crease in dyed tint film be fixed with a heat gun?
No, a heat gun cannot remove a crease from dyed film. The polyester layer that holds the color is permanently bent once it folds, and heat only softens the adhesive underneath.
I have tried this myself with a professional heat gun, and the silver line stayed right where it was. Your only real option is to cut a new piece and start over, which is why prevention matters so much.
Why does dyed tint film crease more easily than ceramic film?
Dyed film has a softer polyester base that flexes easily, while ceramic film contains harder particles that give it more structural rigidity. That flexibility means dyed film folds with less pressure, so a careless grip can ruin it instantly.
In my experience, this makes dyed film trickier for beginners. You have to be more deliberate with your handling, but the lower cost and better privacy make it worth learning the right technique.
What is the best dyed tint film for someone who needs a forgiving roll for their first install?
If you are nervous about creasing on your first attempt, you want a film with a stiffer liner that holds its shape while you work. That extra rigidity gives you more time to position the film before it has a chance to fold.
For me, the roll that finally made my first install stress-free was the HIDNY United 20% film, because the liner stayed flat and predictable the whole time. It is forgiving enough for side windows and still dark enough for real privacy.
- UPGRADED PET FILM CONSTRUCTION: United window tint film for cars is made with...
- DEEP SHADE PRIVACY WITH 20% VLT: The ultra-dark 20% VLT of car window tint...
- 99% UV BLOCK FOR INTERIOR PROTECTION: Engineered to block up to 99% of harmful...
Should I remove the entire liner before placing the film on the window?
No, you should never peel the full liner off before positioning the film. Without the liner, the adhesive is exposed and the film becomes floppy, which makes creasing almost guaranteed.
I always peel back just a few inches at the top, tack the film to the glass, and then slowly pull the liner down while squeegeeing. This keeps the film stiff and manageable, and it has saved me from countless ruined pieces.
Which dyed tint film won’t let me down when I am working on a large rear window alone?
Large rear windows are the hardest part of any tint job because the film has to span a wide curve without folding. Working alone makes it worse, since you have no second set of hands to keep the film flat.
That is exactly why I switched to the wide roll I trusted for my own SUV rear glass — the HIDNY United 15% in 40-inch width. One continuous piece means fewer repositioning moves, and fewer moves means fewer chances to crease.

- MAXIMUM PRIVACY & DEEP BLACK SHADE: This 35% VLT window tint film for cars...
- 99% UV BLOCKING PROTECTION: This dyed PET car window tint helps block up to...
- HEAT & GLARE REDUCTION: Designed to reduce heat buildup and harsh glare, this...
How do I store leftover dyed tint film so it does not crease before my next job?
Always roll leftover film loosely around its original cardboard core, never fold it flat. Folding creates a permanent crease line that will show up on your next window, no matter how careful you are during install.
I also store my rolls upright in a closet, not lying flat under heavy boxes. A little care in storage keeps the film fresh and crease-free for months, so your next project starts off on the right foot.