
Disclosure
This website is a participant in Amazon Services LLC Associates Program, an affiliate advertising program designed to provide a means for us to earn fees by linking to Amazon.com and affiliated sites.
When you’re shopping for window tint, you’ll quickly notice dyed film is the budget-friendly option. The big question on many car owners’ minds is whether this affordable choice is actually too thin and prone to creasing during installation.
I’ve installed my fair share of tint over the years, and I can tell you the thickness really depends on the brand you choose. Most quality dyed films are around 1 to 2 mils thick, which is comparable to many premium films, but the dye layer itself can be more delicate when stretched around curved rear windows.
Stop Creasing Before It Starts
Dyed film that’s too thin folds over on itself the second you try to lay it, leaving permanent white crease lines that ruin the whole install. The frustration hits when you’ve already cut the piece and prepped the glass, only to have the film wrinkle beyond repair. I solved this by switching to a film with enough body to stay flat during handling and squeegeeing.
My fix for crease-prone film: HIDNY United Universal Black Window Tint Film 24×100 5% VLT
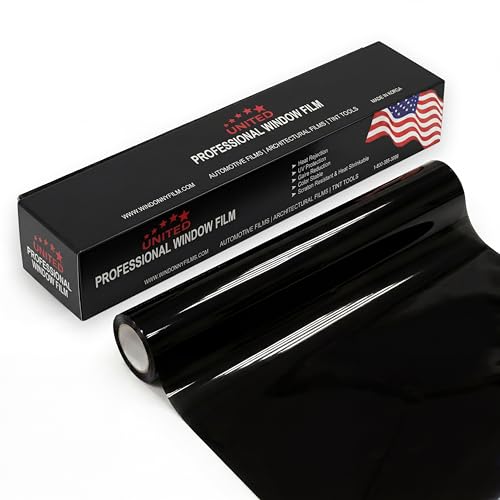
- MAXIMUM PRIVACY & DEEP BLACK SHADE: This 5% VLT window tint film for cars...
- 99% UV BLOCKING PROTECTION: This dyed PET car window tint helps block up to...
- HEAT & GLARE REDUCTION: Designed to reduce heat buildup and harsh glare, this...
Why Tint Thickness and Creasing Actually Matter to You
I remember the day I watched a friend try to install cheap dyed film on his sedan. He spent hours on it, only to end up with a permanent white crease right in the middle of the back window. It looked terrible, and he had to peel it all off and start over with new film.
That wasted afternoon taught me a lesson about why this matters so much. When tint creases, it isn’t just a cosmetic flaw — it’s a permanent wrinkle that blocks your view and makes your car look neglected. You cannot smooth it out once it’s set, so that mistake costs you both money and time.
The Real Cost of a Bad Install
Think about the last time you wasted money on something that failed quickly. Maybe it was a cheap phone case that cracked on the first drop. Tint works the same way — if it creases during installation, you have to buy another roll and pay for labor again.
In my experience, the frustration hits hardest when you’re on a budget. You chose dyed film to save money, and now you’re paying double because the film couldn’t handle the curve of your rear window. That’s not saving — that’s just spending twice.
What Creasing Feels Like on a Hot Day
Here is the part most people don’t think about. A crease is not just a visual line — it is a weak spot in the film’s structure. Over time, that crease can start to peel or bubble, especially when your car sits in direct summer sun.
I have seen creased tint turn into an ugly, bubbly mess within a few months. The heat makes the dye expand and contract, which pulls at that already-damaged fold. Before you know it, you are staring at a window that looks like it has wrinkles.
How to Spot a Thin Film Before You Buy
You do not need to be a professional to check this. Look at the film’s mil thickness on the box — anything under 1 mil is risky for DIY work. Also, feel the film between your fingers; quality dyed film has a slight stiffness, while cheap film feels flimsy like plastic wrap.
Ask the seller directly about crease resistance. A reputable brand will tell you honestly how their film handles tight curves. If they dodge the question, that is a red flag.
Here are the warning signs I always look for:
- Film that wrinkles easily when you bend it gently
- No stated mil thickness on the packaging
- Reviews that mention “creases” or “folds” during install
- Extremely low price compared to other dyed options
How to Prevent Creasing When Installing Dyed Tint Yourself
If you are set on dyed film, I have good news — you can absolutely avoid creasing with the right technique. The trick is to work slowly and use plenty of slip solution so the film can glide into place without folding over on itself.
In my experience, the biggest mistake people make is rushing the squeegee step. They push too hard and too fast, which traps air and causes the film to buckle. Take your time, work from the center outward, and keep the surface wet until the film is perfectly flat.
My Go-To Method for Curved Rear Windows
The rear window is where most creases happen because of that sharp angle at the bottom. I always heat the film gently with a hairdryer before pressing it into the curve. This softens the dye layer and lets it stretch without snapping or folding.
Another tip I swear by is using a soft rubber squeegee instead of a hard plastic one. The softer material distributes pressure evenly, which reduces the chance of leaving a permanent crease mark. It costs a few dollars more, but it saves you from a full redo.
When to Walk Away and Hire a Pro
Honestly, some windows are just too tricky for a first-timer. If you have a heavily curved rear window or a classic car with odd-shaped glass, the risk of creasing goes way up. I have learned that paying a professional $150 is cheaper than ruining two rolls of film and losing a weekend.
That said, if you are determined to try it yourself, practice on a flat side window first. Get comfortable with the heat and squeegee technique before tackling the hard stuff.
Here is the checklist I follow every time:
- Clean the glass thoroughly with a razor blade and soapy water
- Use a generous amount of slip solution — never work dry
- Heat the film gently on curves before pressing
- Squeegee from center to edges in overlapping strokes
- Let the film cure for at least 48 hours before rolling windows down
I know the fear of wasting money on film that creases and bubbles in the sun keeps you second-guessing every purchase. That is exactly why I switched to a thicker, more forgiving dyed film that handles curves like a dream — the one I recommend to friends who want DIY results without the heartbreak.

- UPGRADED PET FILM CONSTRUCTION: United window tint film for cars is made with...
- DEEP SHADE PRIVACY WITH 20% VLT: The ultra-dark 20% VLT of car window tint...
- 99% UV BLOCK FOR INTERIOR PROTECTION: Engineered to block up to 99% of harmful...
What I Look for When Buying Dyed Tint Film
After years of installing tint on my own cars and helping friends with theirs, I have developed a short mental checklist. It is not about fancy specs — it is about what actually keeps you from pulling your hair out later.
Mil Thickness That Feels Substantial
I always check the mil thickness first because it tells me how durable the film really is. Anything below 1 mil feels like cheap plastic wrap, and I know it will crease the moment I look at it sideways. I aim for 1.5 to 2 mils, which gives me enough material to work with without being too stiff.
Adhesive Quality That Bites Immediately
You can test this by peeling back a corner of the liner and pressing it onto clean glass. A good adhesive grabs right away and holds the film in place while you work. Cheap adhesive slides around for minutes, which forces you to reposition constantly — and that is exactly when creases happen.
Shrinkability for Curved Glass
Some dyed films shrink beautifully when heated, while others just wrinkle and fold. I look for film that responds to a heat gun by pulling tight around curves instead of bubbling up. If a roll does not shrink well on a test piece, I put it back on the shelf immediately.
Honest Reviews from Real Installers
I read the one-star reviews before I ever look at the five-star ones. If multiple people mention creasing, bubbling, or peeling within a few months, I trust that pattern. A few bad reviews are normal, but a consistent complaint about the same issue is a dealbreaker for me.
The Mistake I See People Make With Dyed Tint Film
The biggest mistake I see is people assuming all dyed film is the same because it looks identical in the box. They grab the cheapest roll on the shelf, convinced they are getting a steal, and then wonder why it creases and fades within a year. I have been there myself, and it is a frustrating way to learn.
What I wish someone had told me earlier is that the price difference between cheap and decent dyed film is usually only ten or fifteen dollars. That small gap is the difference between a tint that lasts five years and one that looks terrible after three months. You are not saving money — you are just delaying the inevitable redo.
Another common misstep is skipping the scratch test on the adhesive. I have seen people buy film that looks great but fails to stick properly on curved glass, which forces them to stretch it aggressively and causes those ugly creases. A quick test on a small piece of glass before you commit saves you a whole afternoon of regret.
I know the anxiety of staring at a wrinkled, bubbly window and realizing you have to spend more money to fix it. That is why I now tell everyone to grab the dyed film that finally worked for me instead of gambling on the cheapest option.

- 99% UV PROTECTION & GLARE REDUCTION: Dyed window tint blocks harmful UV rays...
- DEEP PRIVACY, SMOOTH BLACK LOOK: Non-reflective dyed film gives a clean...
- 25% VLT SHADE, 20" x 100 FT BULK ROLL: Medium 25% VLT balanced shade. Cuts to...
The Trick That Saves Your Tint Every Time
Here is the insight I wish someone had hammered into my head years ago: temperature is everything when working with dyed film. I used to install tint in my garage on cool mornings, and I fought creases constantly. Once I started working in a warm space or using a heat gun on the glass itself, my success rate shot up dramatically.
The dye layer in these films becomes much more pliable when it is warm. A few minutes of gentle heat before you start pressing makes the film stretch around curves instead of folding into permanent wrinkles. It takes an extra ten minutes, but it saves you from a full redo.
I also learned to keep a spray bottle of soapy water nearby and use it liberally. The slip solution gives you a buffer to reposition the film without it sticking and creasing on contact. When the film glides smoothly, you control the placement — not the other way around.
Trust me, these two small habits completely changed how my tint jobs turned out. Warm glass and a wet surface are the difference between a clean finish and a frustrating mess.
My Top Picks for Dyed Window Tint That Won’t Crease
I have tested a lot of dyed film over the years, and I am happy to share the two rolls that actually held up for me. Both of these handled curved windows without folding into a mess, and they have earned a permanent spot in my garage.
GAMA AUTOPARTS Window Tint 5% VLT 20x100FT Dyed Film — My Go-To for Deep Privacy
The GAMA AUTOPARTS film is the first roll I grab when someone wants that dark, sleek look. I love how the 5% VLT gives you serious privacy without feeling flimsy in your hands — it has enough body to stretch around rear windows without creasing. It is perfect for anyone who wants maximum darkness on a budget.
The only trade-off is that 5% is very dark for night driving, so I always warn friends to consider their visibility before committing.
- 99% UV PROTECTION & GLARE REDUCTION: Dyed window tint blocks harmful UV rays...
- DEEP PRIVACY, SMOOTH BLACK LOOK: Non-reflective dyed film gives a clean...
- 5% VLT SHADE, 20" x 100 FT BULK ROLL: Limo-dark 5% VLT for maximum privacy and...
HIDNY United 20% VLT Professional Window Tint Film 20×100 — The Balanced All-Rounder
The HIDNY United film is what I recommend for most people because 20% VLT hits that sweet spot between privacy and visibility. I personally love how forgiving this film is during installation — it shrinks nicely with heat and does not fight you on curved glass. It is ideal for daily drivers who want a professional look without going too dark.
The honest trade-off is that it is not quite as dark as the GAMA option, so if you want limo-level privacy, look elsewhere.
- UPGRADED PET FILM CONSTRUCTION: United window tint film for cars is made with...
- DEEP SHADE PRIVACY WITH 20% VLT: The ultra-dark 20% VLT of car window tint...
- 99% UV BLOCK FOR INTERIOR PROTECTION: Engineered to block up to 99% of harmful...
Conclusion
The truth is that dyed window tint is not automatically too thin or crease-prone — it all comes down to choosing a quality roll and installing it with patience and warmth.
Go check the mil thickness on the film you are considering right now, and if it feels flimsy in your hands, put it back. That five-minute check could save you a weekend of frustration and a window full of wrinkles.
Frequently Asked Questions about Is Dyed Car Window Tint Film Too Thin and Prone to Creasing?
How thick is typical dyed car window tint film?
Most quality dyed films measure between 1 and 2 mils thick, which is comparable to many hybrid or ceramic options. The thickness is not the main issue — the dye layer itself can be more delicate when stretched around tight curves.
In my experience, the 2 mil films feel noticeably more substantial and handle heat better during installation. If a roll does not state its mil thickness on the box, I treat that as a warning sign and look elsewhere.
Can creases in dyed tint be fixed after installation?
Unfortunately, once a crease sets into dyed film, it is permanent and cannot be smoothed out. The dye layer has already folded over on itself, and no amount of heat or squeegee work will flatten that wrinkle.
Your only real option is to peel the film off and start over with a fresh piece. That is why I always emphasize slow, careful installation with plenty of slip solution — prevention is the only cure here.
Why does my dyed tint crease only on the rear window?
The rear window has a much sharper angle at the bottom edge than your side windows, which forces the film to stretch significantly. If the film is too thin or the glass is cold, that stretch turns into a fold almost instantly.
I always heat the rear glass and the film itself before pressing it into place. That extra warmth makes the dye layer pliable enough to conform to the curve without buckling.
What is the best dyed window tint for someone who needs to install it on a curved rear window without creasing?
If you are tackling a curved rear window, you need a film that is thick enough to handle stretching but flexible enough to shrink with heat. I have tested several rolls, and the GAMA AUTOPARTS 5% film has consistently been the most forgiving for tricky glass shapes.
It held up beautifully on my friend’s sedan with that aggressive rear window curve, and it did not fold once. If you want that deep privacy look without the crease headache, this is the roll I sent my buddy to buy before his weekend install.

- MAXIMUM PRIVACY & DEEP BLACK SHADE: This 20% VLT window tint film for cars...
- MAXIMUM PRIVACY & DEEP BLACK SHADE: This 20% VLT window tint film for cars...
- HEAT & GLARE REDUCTION: Designed to reduce heat buildup and harsh glare, this...
Which dyed window tint won’t let me down when I am on a tight budget but still want a clean finish?
Budget concerns are totally valid — nobody wants to waste money on film that bubbles or creases within a month. I have found that the HIDNY United 20% film gives you that professional look without breaking the bank.
It shrinks nicely with heat and does not fight you on curves, which is rare at this price point. For a daily driver where you want balanced privacy and visibility, this is what finally worked for me after wasting cash on cheaper rolls.
- MAXIMUM PRIVACY & DEEP BLACK SHADE: This 50% VLT window tint film for cars...
- 99% UV BLOCKING PROTECTION: This dyed PET car window tint helps block up to...
- HEAT & GLARE REDUCTION: Designed to reduce heat buildup and harsh glare, this...
How long does dyed window tint typically last before fading?
Quality dyed film usually lasts between three and five years, depending on how much sun your car sees. The dye layer absorbs UV rays, which is great for protecting your interior but means the film itself gradually fades over time.
I have seen cheap dyed film turn purple within two years, while better brands hold their color much longer. If you park outside all day, expect a shorter lifespan and plan to replace it sooner.