Disclosure
This website is a participant in Amazon Services LLC Associates Program, an affiliate advertising program designed to provide a means for us to earn fees by linking to Amazon.com and affiliated sites.
For a variety of reasons, window tint has become a common addition to vehicles, homes, and commercial buildings. It provides privacy, blocks UV rays, lowers glare, and can even enhance a property’s aesthetic appeal.
The tint will ultimately need to be removed, as with everything else. Window tint removal can be a daunting task, particularly if you don’t know where to begin or have never done it before.
The procedure can be time-consuming and necessitates the use of specialized tools and techniques. But don’t worry, with the proper information and tools, you can safely and efficiently remove window tint.
The time it takes to remove window tint is affected by a number of variables. The ease with which a tinted window can be removed depends on whether it is stock tinted or aftermarket tinted.
The quality of the tinting film, as well as the age of the tint, will both play a part. Temperature and humidity, for example, can have an impact on the procedure.
Factors Influencing Window Tint Removal
When it comes to removing window tint, a number of variables can influence how simple or difficult the process is. Understanding these factors can help you better prepare for and plan for the removal procedure.
Let’s take a deeper look at some of the most important factors influencing window tint removal.
Types of Tinted Windows
The type of tinted window you have is one of the most important things to consider. Factory-tinted windows are tinted during the production process, making them more difficult to remove.
This is due to the fact that the tint is frequently a component of the glass and cannot be removed without causing damage to the glass. Aftermarket-tinted windows, on the other hand, are tinted after the glass has been fitted and are easier to remove.
The Film Quality Used in Tinting
The tinting film’s quality can also have an effect on the removal procedure. Lower-quality films may be more difficult to remove because they do not always peel off in one piece and leave more sticky residue.
Higher quality films, on the other hand, may be easier to remove and leave less sticky residue.
Age of the Tinted Window
The tinted window’s age can also influence how simple or difficult it is to remove. The glue used to apply the tint can dry out and become more difficult to remove over time.
This can lengthen the removal process and necessitate more effort to eliminate the tint and adhesive residue.
Weather Conditions
Weather conditions can also have an effect on the removal procedure. For example, attempting to eliminate tint in cold conditions may cause the film to become more brittle and difficult to remove.
Hot weather, on the other hand, may cause the adhesive to soften, making it simpler to remove.
Removal Procedure
The removal procedure can also have an impact on how long it takes to remove window tint. Some methods may be more effective than others, and the tools you employ can also have an influence on the process.
Using a heat gun or a steamer, for example, can help soften the adhesive and make the film simpler to remove. These tools, however, can damage the glass if not used cautiously.
Tools Needed for Window Tint Removal
To remove window tint, you’ll need a few tools to make the procedure as quick and easy as possible. Let’s take a deeper look at the tools you’ll need to remove window tint.
Spray Bottle
For applying the adhesive remover mixture to the glass, a spray container is required. Look for a spray container with an adjustable nozzle that produces a fine mist. This will assist to ensure that the mixture is applied evenly.
Dishwashing Detergent
Dish detergent is an efficient and low-cost method for removing adhesive remnants from windows. Choose a washing detergent that does not contain bleach or other harsh chemicals.
Ammonia
Another effective adhesive remover that can aid in the removal procedure is ammonia. However, because the fumes from ammonia can be toxic, it must be used in a well-ventilated location.
Razor Blade
Razor blades can be used to raise the corner of the window tint film and remove any adhesive residue. To prevent scratching the glass, use new razor blades.
Scouring Pad
To carefully scrub away any remaining adhesive residue, use a scouring pad. To prevent scratching the surface, look for a glass-specific pad.
All-Purpose Cleaner
If you have especially stubborn adhesive residue, a stronger adhesive remover may be required. Purchase a high-quality all-purpose cleaner that is suitable for removing adhesive remnants from glass surfaces.
Towels
Towels are important for protecting the interior surfaces of your vehicle, house, or business. To prevent damage or discoloration, cover any surfaces that may come into contact with the adhesive remover.
The Window Tint Removal Process
The removal of window tint can be a time-consuming job, but with the right tools and techniques, it can be done quickly and effectively.
The procedure for removing windshield tint is outlined below.
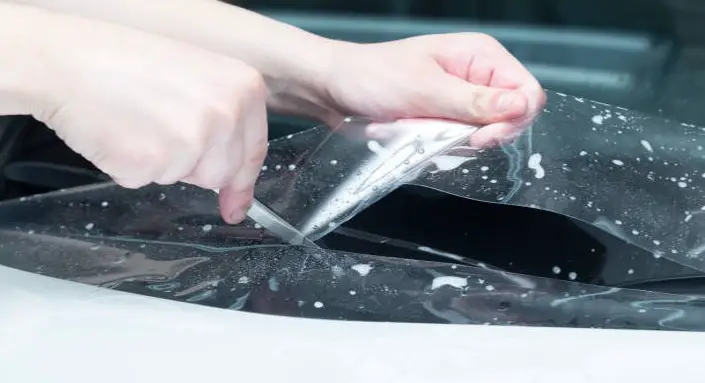
Removing the Film
The film must be removed first in order to clear window tint. Begin by lifting a piece of the tint film with a razor blade or a scraper.
Once you’ve lifted a corner, carefully pull the film away in a slow and steady motion. The tint film should come off in one piece, but if it tears, lift another portion with the scraper and repeat the process.
Removing the Adhesive
After the film has been taken, the adhesive residue must be removed. There are several methods for accomplishing this, but one of the most efficient is to use a mixture of dish detergent and ammonia.
In a spray bottle, combine warm water, dish detergent, and ammonia. Spray the combination on the adhesive residue. Allow the mixture to infiltrate the adhesive for a few minutes.
The debris can then be removed with a razor blade or a plastic scraper.
Removing Tint from Defroster Lines
If the window tint you’re removing is on a vehicle with defroster lines on the inner surface, proceed with caution.
Soften the adhesive with a heat gun or a steamer, then peel the tint off in small parts. Using a scraper or a razor blade on the defroster lines can cause harm.
Tips for a Successful Removal
- Work in a well-ventilated location to avoid inhaling any glue remover fumes.
- To avoid creating a mess, apply the adhesive remover to the window with a spray bottle.
- To prevent damaging the glass or defroster lines, be patient and work slowly.
- If any residue remains after removing the adhesive, carefully remove it with a plastic scouring cloth.
Does Removing Tint Damage Windows?
One of the most common worries people have when removing window tint is that it will damage their windows. While eliminating tint will not harm the glass, you may scratch or damage the surface if you use the wrong tool or use the right tool incorrectly.
If you’re not cautious, using a razor blade or scraper to remove the adhesive residue can scratch the glass surface. To prevent damaging the glass, use these tools with caution and at the proper angle.
Windows with complex curves may be more difficult to tint because the curvature of the glass makes it difficult to remove the tint in one piece. To prevent damaging the glass surface, take your time and work carefully.
It is feasible to remove window tint without damaging the glass if the proper tools and techniques are used.
You can successfully remove tint from your windows without causing any damage by using a mixture of dish detergent and ammonia to soften the adhesive and a plastic scouring pad to carefully remove any residual residue.
How Much Does Window Tint Removal Cost?
The cost of removing window tint varies according to a number of variables. These factors include the style of window, the size of the window, and its location.
In general, the price can vary from a few dollars to several hundred dollars.
For example, the expense of removing window tint from your car may vary depending on the size of the vehicle and the type of tint used.
The cost may also vary based on where you live and whether professional tint removal services are available in your region.
Similarly, the expense of removing window tint from your home or commercial building will vary depending on the size of the window and the type of tint used.
The cost may also vary based on where you live and whether professional tint removal services are available in your region.
You may be able to remove the window tint yourself in some instances if you use the tools and techniques outlined in this piece. This can help you save money on expert moving services.
However, if you are unsure about the procedure or have large or complex windows, it may be best to employ a professional to ensure that the tint is safely and effectively removed.
How to Restore Peeling Window Tint
Peeling window tint can be an irritating problem for anyone who has tinted their windows. While cutting the peeling section with a razor blade may provide a temporary fix, it is not a long-term answer.
Using a razor blade to cut the peeling section can help to prevent further peeling and keep the tint in place for a short period. This is only an interim solution. The tint will eventually peel and necessitate a more permanent answer.
The easiest way to fix peeling window tint is to remove it and re-tint it. While this may appear to be a time-consuming and costly process, it is the most effective method to ensure a long-term solution.
Removing the old tint and replacing it will not only solve the peeling problem but will also enhance the general appearance of your windows.
If you are not confident in removing and reinstalling the window, it is best to hire an expert.
A professional tint installer can remove the old tint and replace it, ensuring that the work is done correctly and quickly.
Conclusion
To summarize, removing window tint can be a time-consuming and difficult process, but it is doable with the proper tools and knowledge.
You can safely and effectively remove the tint from your windows by following the procedures outlined in this piece.
Keep in mind that removing window tint takes time and meticulous attention to detail. The glass surface or defroster lines can be damaged if the procedure is rushed or the wrong tools are used.
Taking the effort to do it correctly will save you from unnecessary stress and potential window damage.
If you are unsure about the procedure or have large or complex windows, it is best to seek professional assistance.
A professional tint installer will make certain that the job is done correctly and quickly, leaving you with a clean and polished window.
Overall, removing window tint may appear to be a difficult job, but with the right tools and techniques, it is simple.
To guarantee a successful removal, remember to take your time, be patient, and work carefully.