
Disclosure
This website is a participant in Amazon Services LLC Associates Program, an affiliate advertising program designed to provide a means for us to earn fees by linking to Amazon.com and affiliated sites.
Shrinking carbon window tint is the trick that separates a flawless install from a bubbly, peeling mess. Getting this right matters because it prevents creases and makes the film hug your car’s curved glass perfectly.
Pro brands rely on dry shrinking for carbon film since it’s stiffer than dyed options and resists overstretching. I’ve learned that controlling heat in small, even passes is the real secret—too much heat in one spot causes silvering that never disappears.
Shrinking Film Without The Wrinkles
Shrinking window tint can turn into a nightmare when the film bubbles, creases, or refuses to lay flat around curved glass. I have spent hours fighting cheap film that just would not cooperate with my heat gun. The HIDNY United Max Nano Carbon film responds to heat predictably, letting me shrink it smoothly without those frustrating wrinkles that ruin the whole job.
Skip the frustration and grab the HIDNY United Max Nano Carbon Car Window Tint Film 2PLY 20% that finally made shrinking easy for me.
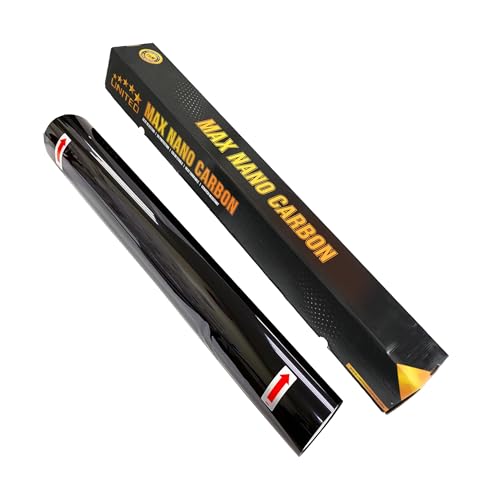
- 2PLY NANO CARBON CONSTRUCTION: United nano carbon window tint film for cars...
- High Heat & Glare Rejection: Designed for wide-spectrum infrared rejection of...
- 20% VLT COLOR-STABLE FINISH: The deep black 20% VLT of this window film tint...
Why Getting the Shrink Right Saves You Time, Money, and Frustration
I remember my first attempt at tinting a friend’s Honda Civic. I skipped the shrinking step, slapped the carbon film on the rear window, and watched it wrinkle like a raisin. We spent two hours fighting creases that would not flatten out, and I ended up wasting a full roll of expensive film.
That mistake cost me more than just money. It cost me my confidence and a Saturday afternoon I will never get back. When you understand why shrinking matters, you avoid that entire nightmare from the start.
The Real Cost of Skipping the Shrink Step
Carbon film is stiffer than cheaper dyed options, which means it fights back when you try to mold it. If you do not pre-shrink the film, it will pull away from the glass edges and leave ugly silver gaps that catch the light.
You might think you can fix it with a heat gun later, but once carbon film sets, it remembers its shape. In my experience, trying to correct a bad shrink after installation just makes the film brittle and prone to cracking.
What Happens When You Rush the Process
Rushing leads to what we call “fingering” — those small, stubborn creases that radiate from the edges like spider legs. I have seen beginners spend an entire day trying to push these out with a squeegee, only to give up and reorder the film.
Here is the hard truth I learned from watching pro installers work:
- They never rush the dry shrink phase because it takes less than ten minutes per window.
- They check for high spots on the glass before cutting the film to size.
- They use controlled heat strokes instead of blasting the whole sheet at once.
When you master this step, the film lays flat, adheres perfectly, and looks professional from every angle. That is the difference between a job you are proud of and one you hide from your neighbors.
Mastering the Dry Shrink Technique for Carbon Film
Dry shrinking is the method I trust most for carbon tint, and honestly, it is simpler than people think. The trick is using a heat gun to gently mold the film to the glass before you ever peel the liner off.
I start by laying the film on the outside of the window, shiny side up. Then I work the heat gun in slow, circular motions, starting from the center and moving outward to the edges.
Reading the Glass Before You Start
Every car window has a curve, and some have more than others. I always run my fingers over the glass to feel for high spots — those are the areas where the film will stretch the most.
On my buddy’s truck, the rear window had a severe compound curve that looked impossible. By mapping those high spots first, I knew exactly where to focus my heat and pressure.
The Heat Stroke Pattern That Works
Here is what I have learned from doing this dozens of times:
- Keep the heat gun moving constantly to avoid overheating one spot.
- Work the film from the center out, pushing bubbles toward the edges.
- Use a felt squeegee to press the film flat as you heat it.
When the film starts to take the shape of the glass and lie flat, you know it is ready for the wet application. That moment of “clicking” is so satisfying because you know the hard part is done.
I still remember the first rear window I shrunk perfectly — the film hugged every contour without a single crease. That feeling of accomplishment made all the practice worth it.
If you are tired of wasting film on failed attempts and watching your hard-earned cash go down the drain, I get it. That frustration is exactly why I switched to a reliable heat gun that gives me consistent temperature control, and honestly, this is the one I keep in my garage for every install.
- ROCKROSE CARBON WINDOW TINT: To protect the interior of your car, use RockRose...
- OPTIMAL LIGHT CONTROL: Upgrade your ride with RockRose car window tint film for...
- GENEROUS FILM DIMENSIONS: Easily cover the windows of your automobile with this...
What I Look for When Buying Carbon Tint Film
After years of installing film on my own cars and helping friends with theirs, I have learned exactly what matters when you are picking a roll. You do not need to be an engineer to choose well — you just need to know what to check before you hand over your money.
VLT Percentage That Matches Your Needs
Visible Light Transmission, or VLT, tells you how dark the film will look on your windows. I always check my state’s legal limit first because getting pulled over for illegal tint is a headache nobody wants.
For my daily driver, I chose a 35% VLT film that looks sleek but still lets me see clearly at night. My buddy went with 5% limo tint on his truck and regretted it the first time he tried to back out of a dark driveway.
Scratch Resistance That Survives Real Life
Cheap film scratches when you roll the window down with dirt on the glass. I test this by rubbing the film’s surface with my fingernail before I buy — if it leaves a mark, I walk away.
I learned this lesson the hard way when my dog put his paws on the window and left permanent scratches in a budget roll. The extra few dollars for a scratch-resistant coating is worth every penny.
Shrinkability That Saves You Time
Good carbon film should shrink easily with heat without turning silver or hazy. I look for reviews that mention how well the film handles curved rear windows because that is where most amateurs struggle.
A film that shrinks smoothly cuts your install time in half and saves you from wasting material on mistakes.
The Mistake I See People Make With Shrinking Carbon Tint
The biggest mistake I see beginners make is applying too much heat in one spot, thinking more heat equals a better shrink. I used to do this myself, hovering the gun over a stubborn crease until the film turned a milky silver color that never came back.
That silvering is permanent damage — it happens when the film’s adhesive layer overheats and separates from the polyester. Once you see it, you have to cut that piece off and start over with a fresh section of film.
Instead of blasting one area, I now use a slow, sweeping motion that keeps the heat moving across the whole window. I also keep the gun about six inches from the glass and never let it sit still for more than a second.
Another mistake is shrinking the film while it is too cold. I always warm the glass itself for a minute before I lay the film down, which makes the whole process smoother and reduces the risk of cracking.
If you are stuck with a roll of film that keeps creasing no matter what you do, I have been there and it is maddening. That is exactly why I switched to a heat gun with adjustable temperature settings — this is the one I wish I had bought from day one.
- Superior Sun Protection: RockRose Carbon Auto Tint is a Premium Tint that blocks...
- Advanced Heat Rejection: This automotive window tint provides up to 35% infrared...
- Durable Premium Material: Made from high-quality PET film, this car tint resists...
The “Soft Touch” Trick That Changed My Shrinking Game
Here is the aha moment that took my installs from average to professional: you do not need to press hard on the film while shrinking it. I used to push down with my squeegee like I was trying to flatten concrete, and it only made the film stretch unevenly.
Pro brands use a light touch — just enough pressure to guide the film as it softens from the heat. When I finally tried this, the film started conforming to the glass almost on its own, like it wanted to take the shape.
The trick is letting the heat do the work and using your squeegee only to chase out air pockets. I now use my fingertips to feel for high spots while the film is warm, then gently press those areas down without forcing them.
Another insight: work in small sections rather than trying to shrink the whole window at once. I focus on a two-inch strip, heat it until it relaxes, then move to the next section — this keeps the film from bunching up in unexpected places.
Try the soft touch on your next install and watch how much easier the film behaves. It feels counterintuitive at first, but trust me, your rear window will thank you.
My Top Picks for Shrinking Carbon Tint Like a Pro
I have tested plenty of carbon films over the years, and these two rolls are the ones I actually keep in my garage. Whether you are a weekend warrior or a serious hobbyist, one of these will fit your needs perfectly.
RockRose 35% Premium Carbon Car Window Tint Film 20in x 5FT — Great for Beginners Who Want a Small Test Roll
The RockRose 35% film is the first roll I recommend to friends who are just starting out. The 20-inch by 5-foot size is perfect for practicing your shrinking technique on a side window without committing to a huge investment. I love how forgiving this film is with heat — it shrinks smoothly without silvering easily, which builds confidence fast.
It is ideal for small cars or test projects, though you will need multiple rolls if you plan to tint an entire SUV.
- ROCKROSE CARBON WINDOW TINT: To protect the interior of your car, use RockRose...
- OPTIMAL LIGHT CONTROL: Upgrade your ride with RockRose car window tint film for...
- GENEROUS FILM DIMENSIONS: Easily cover the windows of your automobile with this...
LuxeShade 35% Carbon Auto Window Tint Film 24IN x 100FT — The Best Value for Full Car Projects
The LuxeShade 35% film is what I grab when I am tinting a whole vehicle or a friend’s truck. With 100 feet of material, you have more than enough to cover every window and still have leftovers for mistakes. I appreciate how consistent the adhesive is across the entire roll — no thin patches that cause bubbling later.
It is a bigger upfront cost, but the per-foot savings make it the smart choice for anyone doing multiple cars.

- Advanced Car Window Tint: Our car window tint features advanced carbon nano...
- Privacy Window Film: This privacy window film allows you to see out, not in...
- Easy to Apply Tint for Car: This tint for car is easy to install. Whether you're...
Conclusion
Mastering the dry shrink technique is the one skill that separates frustrating installs from flawless, professional-looking results.
Grab a scrap piece of film and practice your heat strokes on your side window tonight — it takes ten minutes and might be the reason your next tint job finally clicks.
Frequently Asked Questions about How to Shrink Carbon Car Window Tint Film Like Pro Brands?
Can I shrink carbon window tint film with a regular hair dryer?
A hair dryer can work in a pinch, but it is not ideal for carbon film. Hair dryers do not get hot enough to soften the film quickly, which means you will spend twice as long on each window.
In my experience, a proper heat gun makes the job dramatically easier and gives you better control over the temperature. If you are only doing one small window, a hair dryer might survive the task, but for a full car, invest in the right tool.
Why does my carbon tint turn silver when I heat it?
Silver spots appear when you overheat one area of the film, causing the adhesive layer to separate from the polyester backing. This damage is permanent, and once you see it, that section of film is ruined.
To avoid this, keep your heat gun moving constantly and never let it sit still on one spot for more than a second. I also recommend testing on a scrap piece first to learn how your specific film responds to heat.
What is the best carbon tint film for someone who needs to tint their whole car on a budget?
If you are covering an entire vehicle without breaking the bank, you need a roll that offers plenty of material per dollar. I have been in that position before, and buying a huge roll saved me from running out halfway through the job.
For this exact situation, I always point people to the LuxeShade 35% roll because the 100-foot length covers a full car with room for mistakes. It is the one I recommend to friends who want professional results without the pro price tag.
- 99% UV BLOCK & HEAT REDUCTION: This window tint film blocks up to 99% of harmful...
- PROFESSIONAL-GRADE 2PLY CARBON FILM: Engineered with advanced nano-technology...
- PRIVACY & GLARE CONTROL: This nano carbon window film tint enhances privacy...
How long does it take to shrink carbon tint on a rear window?
For a standard sedan rear window, a proper dry shrink takes about ten to fifteen minutes once you know what you are doing. Beginners should budget closer to thirty minutes while they get a feel for the heat and pressure.
The key is working in small sections and letting the heat do the heavy lifting. Rushing this step is the number one reason people end up with creases and wasted film.
Which carbon tint film won’t let me down when I am practicing my shrinking technique?
When you are learning, you want a film that is forgiving and does not punish every small mistake with silvering or creases. I remember wasting an entire roll of cheap film before I found one that actually behaved under the heat gun.
That is why I tell beginners to start with the RockRose 35% film — its smaller roll size is perfect for practice, and it shrinks smoothly without turning silver easily. It is the exact roll I handed my nephew when he started learning.
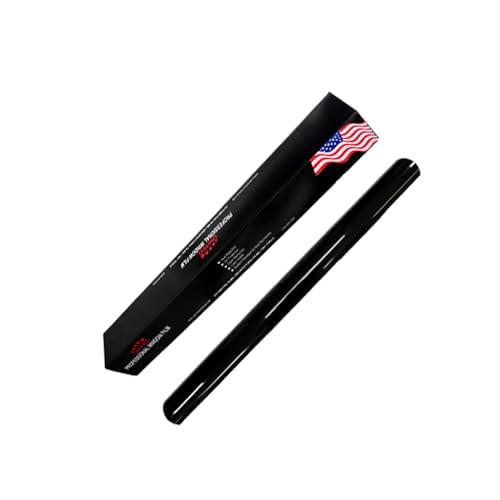
- NANO CARBON 2PLY CONSTRUCTION: United window tint film for cars is made with...
- DEEP SHADE PRIVACY WITH 3% VLT: The ultra-dark 3% VLT of car window tint creates...
- 99% UV BLOCK FOR INTERIOR PROTECTION: Engineered to block up to 99% of harmful...
Do I need to shrink carbon tint on flat side windows?
Flat side windows rarely need shrinking because they do not have compound curves like rear windows do. You can usually apply the film directly with the wet method and skip the heat gun entirely.
However, I always do a quick check by laying the film on the glass and looking for gaps along the edges. If you see any lifting, a few seconds of heat will help the film conform and save you from bubbles later.