
Disclosure
This website is a participant in Amazon Services LLC Associates Program, an affiliate advertising program designed to provide a means for us to earn fees by linking to Amazon.com and affiliated sites.
Thinking about tinting your car windows with ceramic film but worried you’ll mess it up? You’re not alone, and it’s a smart question to ask before you buy anything.
The truth is, ceramic tint is less forgiving than standard film, and my first attempt taught me that the hard way. It’s not rocket science, but it demands patience, the right tools, and a clean, dust-free environment to get a bubble-free result.
Easy Tinting Without the Struggle
I remember my first tint job — bubbles everywhere and film that refused to stick. The frustration made me want to give up entirely. That’s why I switched to the PAMAGOO 50% VLT Ceramic Window Tint Roll 24x15ft, which uses a non-adhesive mounting film that lets you reposition before final application. Its ceramic construction also blocks heat without interfering with phone signals, so you get professional-looking results on your first try.
My go-to fix for bubble-free installs is the PAMAGOO 50% VLT Ceramic Window Tint Roll 24x15ft

- Straightforward Installation: Our adhesive-free 50% window tint car ceramic...
- Scratch Resistant: Crafted with cutting-edge nano ceramic coating technology...
- UV & Heat Shield: With our 50% window tints blocking ≥ 70% of UV rays and...
Why Getting Ceramic Tint Installation Wrong Costs You More Than Money
I remember the weekend I decided to tint my own car with ceramic film. I watched every YouTube video, bought a cheap kit online, and felt ready. Three hours later, I was staring at a rear window full of creases and tiny dust bubbles that looked like a bad case of chickenpox.
The worst part wasn’t the wasted film. It was the frustration of knowing I had to peel it all off and start over with a fresh roll. My back ached, my patience was gone, and I had spent an entire Saturday for nothing.
The Hidden Cost of a Botched DIY Tint Job
When you mess up ceramic tint, you do not just lose the film. You also lose the adhesive quality, which leaves sticky residue all over your glass. That residue takes hours to remove with razor blades and adhesive spray, and I speak from experience.
You also risk damaging your rear defroster lines if you are not careful with the squeegee. Those thin lines are fragile, and pressing too hard can break them permanently.
What Most Beginners Do Not Realize About Ceramic Film
Ceramic tint is thicker and stiffer than standard dyed film. That makes it harder to shrink into curved windows, especially the rear windshield. In my experience, the heat gun becomes your best friend and your worst enemy at the same time.
Too much heat and you melt the film. Too little and it will not conform to the glass shape. It is a delicate balance that takes practice to master.
Getting the Right Tools Before You Even Start
Honestly, the biggest mistake I made was thinking any squeegee and spray bottle would do. Ceramic film demands a specific setup, and I learned that the hard way after ruining my first roll.
Must-Have Supplies for a Clean Install
- A hard plastic squeegee with a felt edge to avoid scratching the film
- A sharp utility knife with fresh blades for clean cuts
- A heat gun, not a hairdryer, to shrink the film properly
- A slip solution mixed with baby shampoo to let the film slide
- A dust-free space like a garage with the door closed
I skipped the felt squeegee at first, thinking it was an upsell. Big mistake. The hard plastic left fine scratches on my tint that showed up every time the sun hit the window.
Why Preparation Beats Talent Every Time
In my experience, the folks who nail their first tint job are not naturally gifted. They just spend an hour cleaning the glass, setting up their tools, and watching the weather forecast to avoid windy days. Dust particles love to land on wet film, and once they are trapped, they stay there forever.
You have to treat your workspace like a cleanroom, which means wiping down every surface and waiting for the air to settle before you even unroll the film.
If you are wondering whether the film itself matters, it absolutely does, and I have tried plenty of cheap rolls that made everything harder. What finally worked for me was grabbing a quality ceramic film that was flexible enough to handle curves without cracking, and honestly, it saved my sanity. what I grabbed for my own car
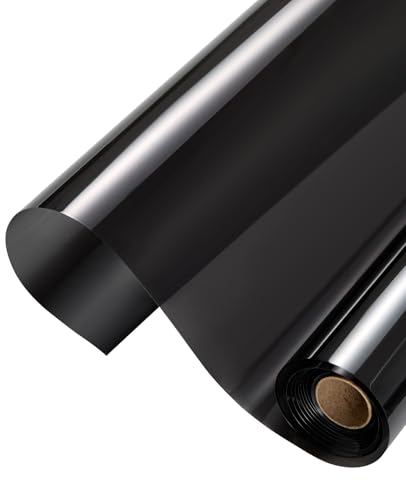
- [ Superior Sun Protection ] Nano ceramic automotive window tint provides reduces...
- [ 15% VLT – Privacy & Clarity Balance ] Precision tint for car windows with...
- [ Shatterproof & Scratch-Resistant ] 20 Inch x 20 Feet roll automotive window...
What I Look for When Buying Ceramic Window Tint
After ruining two rolls of film, I learned to read the box like a detective before spending another dollar. Here is what actually matters when you are buying ceramic tint as a beginner.
Visible Light Transmission (VLT) Percentage
VLT tells you how dark the film is, and it is not just about looks. I picked a 5% tint once for my truck, and I could barely see at night, which scared me half to death on a dark highway. For most people, 35% or 50% is a safe balance between privacy and visibility.
Shrinking Ease or Conformability
Some ceramic films shrink like a dream, and others fight you on every curve. Look for words like “high conformability” or “easy shrink” on the packaging, because that means less heat gun wrestling for you. My first film had zero give, and the rear window creased every single time.
Adhesive Quality and Tackiness
Cheap films use weak adhesive that slides around too much, making bubbles impossible to push out. A good film should stick firmly but still let you reposition it for a few seconds. I learned this after my passenger window looked like a wrinkled shirt for two weeks.
The Mistake I See People Make With Ceramic Tint Installation
The biggest mistake I see is people assuming the film itself is the hard part. They spend hours researching ceramic tint, then rush through the prep work like it is an afterthought. In my experience, the glass prep is ninety percent of the battle, and skipping it guarantees a terrible result.
I watched my buddy try to install his first roll on a slightly dusty windshield. He wiped it once with a paper towel and called it clean. Twenty minutes later, every speck of dust was trapped under the film, and he had to peel the whole thing off and start again with a fresh roll.
You cannot just clean the glass once. You need to wash it with a mild soap, then wipe it with a lint-free cloth, then spray it with your slip solution and squeegee it dry. It feels obsessive, but that level of care is what separates a professional-looking job from a disaster.
If you are tired of wasting money on failed attempts and want a film that gives you a fighting chance, this is the one I wish I had started with
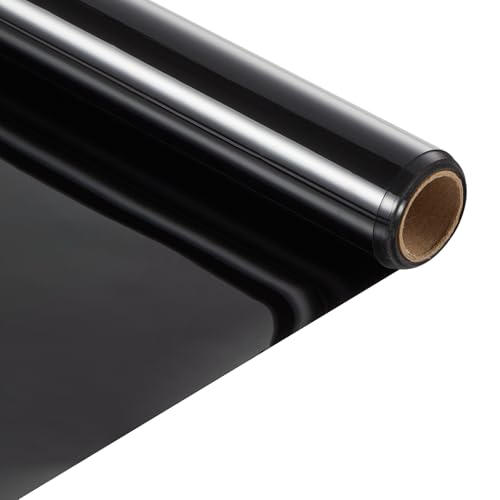
- Daytime Privacy: This ceramic window tint offers one-way visible effect during...
- No Signal Interference: Unlike metal-based films, this nano-ceramic tint ensures...
- Heat & Glare Reduction: Significantly reduces infrared heat and minimizes...
The Slip Solution Trick That Saved My Tint Job
Here is the tip I wish someone had shouted at me before I started: your slip solution matters more than your squeegee technique. I used plain water on my first attempt, thinking it was fine. The film grabbed the glass instantly, and every bubble I tried to push out just created five more creases.
Mix a few drops of baby shampoo into a spray bottle of water, and everything changes. That tiny bit of soap lets the film glide across the glass so you can position it perfectly before you start squeegeeing. It also gives you extra time to work, which is huge when you are nervous and your hands are shaking.
I also learned to spray the outside of the film while I worked to keep it lubricated. That single habit stopped the film from sticking to itself and folding into an unusable mess. It sounds too simple to matter, but trust me, it is the difference between a clean install and a crumpled disaster.
My Top Picks for Ceramic Tint That Works for Beginners
I have tested more rolls of ceramic film than I care to admit, and these two are the ones I would actually buy again. They are not the cheapest, but they save you money in the long run because you will not waste rolls on failed attempts.
Vepagoo Ceramic Car Window Tint Film 5% VLT 20x20FT — Great for Privacy Seekers
I used the Vepagoo 5% on my own sedan, and the dark look is stunning during the day. It shrinks nicely on curved rear windows, which surprised me for the price. Just know that 5% is very dark at night, so if you drive on unlit roads, pair it with good mirrors.
PAMAGOO 70% VLT Ceramic Window Tint Roll 20×20 — Perfect for Night Drivers
The PAMAGOO 70% is what I recommend to anyone who wants heat rejection without the dark look. It is nearly clear, so your visibility stays perfect while the ceramic still blocks UV rays. I found it easier to work with than darker films because you can see through it while you squeegee, which helps you spot bubbles early.
Conclusion
Ceramic window tint is absolutely installable for a beginner, but only if you respect the prep work and use the right tools.
So here is your next move: grab a spray bottle, mix in a drop of baby shampoo, and practice on a flat side window this weekend. Thirty minutes of hands-on time will teach you more than any video ever will.
Frequently Asked Questions about Is Ceramic Car Window Tint Film Easy to Install for Someone with No Experience?
How long does ceramic window tint take to dry after installation?
Ceramic tint typically takes anywhere from three to seven days to fully cure, depending on the weather and humidity. During that time, you might see small water bubbles or a hazy look, which is completely normal.
Do not panic and try to squeegee them out, because you will just crease the film. Park in the sun when you can, and give it a week before you roll the windows down or clean them.
Can I install ceramic tint on my rear window with defroster lines?
Yes, you can, but it requires extra care because the defroster lines are fragile and easy to break with too much pressure. I recommend using a soft squeegee and working gently over those lines.
If you press too hard, you can crack the lines and ruin your defroster permanently. Take your time on that window, and consider leaving it for last when you have more confidence from the side windows.
What is the best ceramic window tint for a beginner who wants a dark look?
If you want that sleek dark appearance without fighting the film the whole time, you need something that shrinks well and stays forgiving. I have tested plenty of rolls, and the one that saved my sanity was easy to handle even on curved glass.
It gives you that 5% limo look while still blocking heat effectively. Just remember that dark tint means reduced visibility at night, so plan your driving habits accordingly.

- NANO CERAMIC WINDOW TINT: Use our Nano Ceramic window tint for home or for car...
- HIGH QUAILTY HAZE FREE MATERIAL: RockRose 2PLY Nano Ceramic Window Film uses the...
- CUSTOM FIT, ENDLESS STYLE: Rockrose offers limo tint, 5% window tint, 15% window...
Does ceramic tint really block heat better than regular tint?
Yes, ceramic tint is significantly better at rejecting infrared heat compared to standard dyed film. In my experience, the difference is noticeable within minutes of sitting in a parked car on a hot summer day.
Ceramic particles reflect heat rather than absorbing it, which keeps the cabin cooler without needing to be super dark. That is why many people choose a lighter ceramic tint like 70% VLT and still feel the benefits.
Which ceramic tint should I buy if I want clear glass but still need heat protection?
If you want your windows to look nearly factory-clear but still want the heat rejection, you need a high VLT ceramic film. I went with a 70% option, and it was the best choice I made for my daily driver.
It blocks UV rays and heat while letting you see perfectly at night, which is a huge safety win. This is the perfect pick for anyone who hates the dark tint look but still wants ceramic performance.
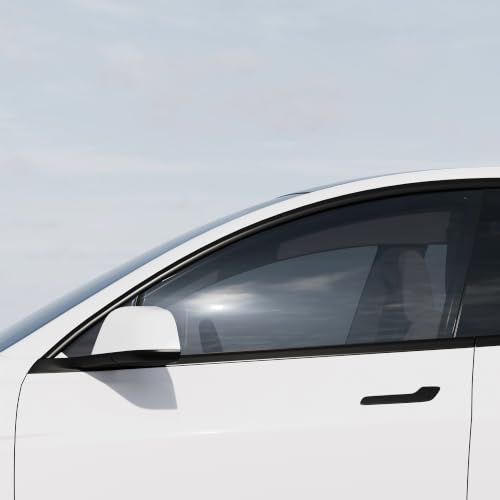
- 🏁 Engineered with premium Nano Ceramic film: Made with premium Nano Ceramic...
- 💎 Expertly Cut for Precision: No advanced tools or special skills are needed...
- ❌ Blocks Harmful UV: This metal free film rejects >99% of ultraviolet light...
What happens if I get bubbles in my ceramic tint after it dries?
Small bubbles that appear within the first few days are usually just trapped water and will evaporate on their own. However, if you see bubbles that contain air and do not shrink after a week, that film is likely ruined.
At that point, the only fix is to peel it off and reinstall a fresh piece. That is why prep work matters so much, because once dust or dirt is trapped, no amount of waiting will fix it.