
Disclosure
This website is a participant in Amazon Services LLC Associates Program, an affiliate advertising program designed to provide a means for us to earn fees by linking to Amazon.com and affiliated sites.
Installing ceramic window tint on your car is a rewarding DIY project, but it requires the right equipment to get a bubble-free, professional finish. Knowing exactly which tools and soap spray to use is your first step toward success.
Many beginners grab dish soap, but that’s a mistake. Ceramic films are stiffer than standard tints, so a high-quality baby shampoo or a dedicated slip solution is crucial for proper glass placement and preventing creases during installation.
Stop Fighting Fussy Film
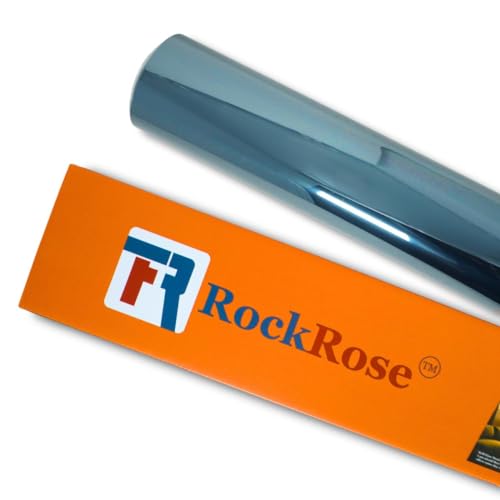
Wrinkles, bubbles, and creases ruin a fresh tint job before it even starts. Cheap film refuses to lay flat around curves, and it leaves you frustrated with wasted material. RockRose’s nano ceramic film slides into place with forgiving flexibility, so you can focus on technique instead of wrestling the sheet. The 75% VLT keeps the cabin bright while still blocking heat.
Ditch the frustration and grab the roll I trust for every install: RockRose 75% Nano Ceramic Car Window Tint 60 in x 100FT

- NANO CERAMIC WINDOW TINT: Use our VLT Car adhesive window film to fully...
- HIGH QUAILTY MATERIAL: With these expertly created window tints for car, which...
- CUSTOM FIT, ENDLESS STYLE: Discover the endless possibilities of flexible window...
Why the Right Ceramic Tint Tools and Slip Solution Save You Time and Money
I learned this lesson the hard way on my own truck. I thought I could save a few bucks by using regular dish soap and a kitchen spray bottle, and the result was a mess of bubbles and creases that took me hours to fix.
Ceramic window tint is not like standard film. It is denser and less forgiving, which means the soap solution you use directly controls how easily the film slides into place. When I switched to the right slip solution, the process felt completely different — smoother, faster, and honestly, a lot less stressful.
What Happens When You Use the Wrong Soap Spray
In my experience, using dish soap leaves a residue that can break down the adhesive over time. That leads to peeling edges and a hazy look that ruins the whole point of ceramic tint.
I had a buddy who used window cleaner with ammonia, and it actually ate away at the film’s coating. He wasted sixty bucks on tint that looked terrible within a month. Don’t let that be you.
How the Right Tools Make Installation Feel Easy
When I finally invested in a proper felt squeegee and a quality slip solution, the film glided like it was on rails. The ceramic layer stayed intact, and the final result looked like a professional shop did it.
Here is what I keep in my own kit:
- A hard card squeegee wrapped in felt for pushing out water without scratching
- A spray bottle with a fine mist setting for even coverage
- A dedicated slip solution or baby shampoo mixed at the right ratio
- A razor blade for trimming edges cleanly
The biggest mistake I see beginners make is grabbing any old spray bottle. A coarse spray leaves dry spots, and dry spots mean the film sticks before you can position it.
Building My Ceramic Tint Tool Kit: What I Actually Use
After a few frustrating attempts, I finally settled on a kit that just works. I do not carry a bunch of fancy gadgets — just the basics that handle every window on my car.
The Must-Have Squeegees and Cards
I keep two types of squeegees in my garage. A hard plastic card pushes out the bulk of the water, and a felt-wrapped one does the final pass without leaving marks.
For curved rear windows, I use a flexible card that bends easily. It saves me from creasing the film on tight corners, which used to ruin my day every single time.
My Go-To Soap Spray Mix
Honestly, I stopped overthinking the solution. I mix one teaspoon of baby shampoo per quart of water, and it gives the perfect slide without leaving any residue.
Dedicated slip solutions work great too, but they cost more. In my experience, the baby shampoo mix is just as effective for ceramic film and a whole lot cheaper.
Small Tools That Make a Big Difference
You cannot skip the little stuff. A sharp razor blade for trimming edges and a heat gun for shrinking film around curves are non-negotiable in my book.
Here is the quick list I give to friends who ask what to buy:
- Felt squeegee and hard card for water removal
- Spray bottle with a fine mist nozzle
- Baby shampoo or slip solution
- Razor blades and a heat gun
I remember staring at a wrinkled rear window for an hour, wishing I had just bought the right gear the first time instead of guessing. If you are tired of wasting money on film that ends up ruined, the kit I finally grabbed for my own car made every step easier.
- NANO CERAMIC TINT: Use our ceramic window tint film for cars or for home to...
- UNPARALLELED 99% IR BLOCKING: This premium heat blocking window film tint...
- ULTRA-CLEAR HIGH-DEFINITION VISION: Drive Safely with Unobstructed...
What I Look for When Buying Ceramic Tint Tools
When I shop for tinting gear, I ignore the flashy marketing and focus on a few things that actually matter. Here is what I check before I hand over my money.
Blade Quality and Sharpness
A dull razor blade will tear your film instead of cutting it clean. I always buy a pack of fresh stainless steel blades, because they stay sharp for the whole job.
I learned this when I tried to reuse an old blade and ended up with a jagged edge on my side window. A two-dollar pack of new blades would have saved me that headache.
Squeegee Handle Comfort
Your hand will cramp up if the handle is too skinny or too slick. I look for a squeegee with a rubber grip that feels solid in my palm, especially for long sessions.
One time I used a cheap plastic card for an entire windshield and my fingers ached for hours. The right handle makes a huge difference in how the job feels.
Spray Bottle Nozzle Adjustability
I need a nozzle that switches from a fine mist to a steady stream. That flexibility lets me wet the glass evenly but also blast water out from under the film when needed.
My first bottle only had one setting, and it left dry patches that caused bubbles. Now I test the nozzle in the store before I buy anything.
Solution Purity
I check the ingredients on any slip solution to make sure it has no ammonia or harsh chemicals. Those additives can ruin the ceramic coating and void your tint’s warranty.
Reading labels takes two minutes but saves you from a costly mistake. I always keep it simple with baby shampoo, which I know is safe for every film I have tried.
The Mistake I See People Make With Ceramic Tint Installation
The biggest error I see is using way too much soap in the slip solution. People think more soap means more slip, but it actually leaves a slippery residue that prevents the adhesive from bonding to the glass properly.
I watched a neighbor do this on his sedan, and within two weeks the edges started peeling up. He had used a heavy squirt of dish soap in every spray bottle, and the film never stood a chance.
Stick to the ratio I mentioned earlier — one teaspoon of baby shampoo per quart of water. That is all you need for a smooth slide and a strong bond that lasts for years.
Another mistake is skipping the final squeegee pass. I know you are tired after an hour of wrestling with film, but leaving excess water trapped under the ceramic layer creates permanent bubbles that look awful in sunlight.
I always do one slow, firm pass with my felt squeegee from center to edge. It takes two extra minutes per window and makes the difference between a pro finish and a DIY disaster.
If you are lying awake worrying about ruining another roll of expensive ceramic film, the squeegee set that finally worked for me gives you the control you need to get it right the first time:
- Daytime Privacy: This ceramic window tint offers one-way visible effect during...
- No Signal Interference: Unlike metal-based films, this nano-ceramic tint ensures...
- Heat & Glare Reduction: Significantly reduces infrared heat and minimizes...
My Best Tip for a Bubble-Free Ceramic Tint Job
Here is the trick that completely changed my results: wet the outside of the glass before you start. I know it sounds backwards, but a damp surface lets you see the film’s edges clearly and spot air pockets as you work.
I also spray the film’s adhesive side generously before peeling off the liner. That extra lubrication prevents the ceramic layer from creasing when you lay it down, which is the number one cause of wasted film in my experience.
Another thing I wish I knew sooner is to work in a shaded area. Direct sunlight dries your slip solution too fast, leaving you with a film that sticks before you can position it perfectly.
I always set up in my garage with the door half closed. It keeps the glass cool, gives me more working time, and honestly makes the whole process feel way less stressful.
Take your time on that first window. Once you feel how the film glides with the right prep, every other window becomes faster and easier.
My Top Picks for Ceramic Window Tint Tools and Film
I have tested a fair share of ceramic films over the years, and these two are the ones I keep coming back to. They each serve a different purpose, so here is exactly why I reach for them.
MEGICOLIM 80% VLT Nano Ceramic Window Film Light Blue — Perfect for a Clear Look with Heat Rejection
I use the MEGICOLIM 80% VLT when I want nearly invisible tint that still blocks heat. It gives my windshield that subtle light blue hue without making the cabin feel dark or closed in.
This film is ideal if you want maximum visibility at night but still want protection from the sun. The only trade-off I noticed is that it does not offer the deep privacy you get with darker films, but that is not what I use it for.
Check the MEGICOLIM 80% VLT price on Amazon
- ⭐99% ANTI-UV - Car window tint film effectively blocks out 99% of UV rays...
- ⭐NANO-CERAMIC PRINCIPLE - Adopting nano-ceramic film technology that absorbs...
- ⭐2 PLY DESIGN - 2 ply design with a scratch resistant coating, which results...
Vepagoo 20% VLT Ceramic Car Window Tint Film 20x20FT — My Go-To for Privacy and Heat Control
The Vepagoo 20% is what I grab for side windows when I want real privacy. It gives that sleek, dark look while still letting me see clearly from inside during the day.
I love that the 20×20 foot roll covers my whole car with plenty of extra for mistakes. If you are a beginner, the extra material is a lifesaver when you mess up a cut or crease a corner.
Check the Vepagoo 20% price on Amazon
- Daytime Privacy: This ceramic window tint offers one-way visible effect during...
- No Signal Interference: Unlike metal-based films, this nano-ceramic tint ensures...
- Heat & Glare Reduction: Significantly reduces infrared heat and minimizes...
Conclusion
The right tools and a proper slip solution make all the difference between a frustrating afternoon and a clean, professional-looking tint job. You do not need a garage full of gear — just a few reliable pieces that work together.
Take five minutes tonight to check your spray bottle and mix up a fresh batch of baby shampoo solution. That small step will set you up for success the next time you tackle a window.
Frequently Asked Questions about What Tools and Soap Spray Do I Need for Ceramic Car Window Tint Film Installation?
Can I use regular dish soap for ceramic window tint installation?
No, I strongly advise against using regular dish soap. Dish soaps contain degreasers and dyes that leave a residue, which can break down the adhesive over time and cause peeling edges.
Stick with baby shampoo or a dedicated slip solution mixed at the right ratio. In my experience, one teaspoon of baby shampoo per quart of water gives the perfect slide without compromising the bond.
What is the most important tool for a beginner tint installer?
For beginners, I always say the felt-wrapped squeegee is non-negotiable. It removes water without scratching the film or leaving marks, which is the difference between a clean finish and a ruined window.
I also recommend a hard card for the initial water push. Together, these two tools give you the control you need to avoid bubbles and creases, even on your very first attempt.
What is the best ceramic window tint film for someone who needs maximum heat rejection without darkening their windshield?
If you want heat rejection without sacrificing visibility, this is a common concern for daily drivers. You need a film with high VLT that still blocks infrared rays, and not every product delivers on that promise.
For my own windshield, the film I trusted for clear heat control gave me exactly that balance. It kept the cabin cool without making night driving feel unsafe.
- 🏁 Engineered with premium Nano Ceramic film: Made with premium Nano Ceramic...
- 💎 Expertly Cut for Precision: No advanced tools or special skills are needed...
- ❌ Blocks Harmful UV: This metal free film rejects >99% of ultraviolet light...
How long does ceramic window tint take to cure after installation?
Ceramic film typically takes about 30 days to fully cure, but the first 48 hours are the most critical. During that time, avoid rolling down the windows or cleaning the glass with anything harsh.
I always tell friends to park in the sun for the first few days if possible. The heat helps the adhesive set faster, which reduces the risk of peeling and keeps the film looking flawless.
Which ceramic window tint film won’t let me down when I need privacy and durability on my side windows?
Privacy and durability are exactly what I look for in side window film, and I know how frustrating it is when a dark tint starts fading or bubbling. You need a film with a strong adhesive and a proven track record.
After testing several brands, the roll I sent my brother to buy held up perfectly through harsh summers. It gave him the sleek dark look he wanted without any peeling after months of use.
- UP TO 99% HEAT REJECTION: This car window tint film blocks up to 99% of infrared...
- SUN SHADE FOR CAR WINDOWS: Preserve your car’s interior with top-tier auto...
- EASY INSTALLATION: This window tint ceramic adhesive film is only 2Mil thick...
Do I need a heat gun for ceramic window tint installation?
Yes, a heat gun is essential if you are tinting rear windows with curves. Ceramic film is stiffer than standard tint, so heat helps it shrink and conform to the glass without creasing.
I use mine on a low setting and keep it moving constantly. A few seconds of concentrated heat can ruin the film, so patience and a steady hand are your best tools here.