
Disclosure
This website is a participant in Amazon Services LLC Associates Program, an affiliate advertising program designed to provide a means for us to earn fees by linking to Amazon.com and affiliated sites.
Nothing is more frustrating than watching your freshly installed dyed window tint peel away from the rear window. This common problem usually comes down to a few specific installation mistakes or environmental factors that are easy to overlook.
In my experience, the rear window is the hardest surface to tint because of its extreme curve and defroster lines. These raised heating elements create tiny gaps that prevent the adhesive from making full contact, especially when the film isn’t heated and shrunk properly beforehand.
The Rear Window Adhesion Fix
That rear window film keeps peeling because the defroster lines create a bumpy surface that cheap films can’t grip. The adhesive just can’t conform around those raised wires, so air pockets form and the edges lift within weeks. This film’s stronger, more flexible adhesive bonds tightly to uneven glass, so it stays flat and secure.
Skip the frustration and grab the HIDNY United 5% VLT Professional Window Tint Film 24×100 that finally sticks to my rear window without peeling.

- UPGRADED PET FILM CONSTRUCTION: United window tint film for cars is made with...
- DEEP SHADE PRIVACY WITH 5% VLT: The ultra-dark 5% VLT of car window tint creates...
- 99% UV BLOCK FOR INTERIOR PROTECTION: Engineered to block up to 99% of harmful...
Why Rear Window Tint Failure Is More Than Just an Eyesore
When my tint started peeling on my own SUV last summer, I thought it was just a cosmetic issue. I quickly learned that failing adhesive on a rear window creates real safety problems that I had never considered.
A bubbling or lifting tint blocks your view through the rearview mirror, especially at night when headlights glare off the loose edges. I nearly missed a cyclist because my peeling tint created a blurry spot right in my line of sight.
The Domino Effect of a Bad Tint Job
Once one corner lifts, dirt and moisture creep underneath. That trapped debris makes the adhesive release even faster, and before you know it, half the film is sagging like a wrinkled curtain.
In my experience, this snowball effect happens quicker on rear windows than on side windows. The heat from the rear defroster speeds up the breakdown of the adhesive, turning a small bubble into a giant mess within weeks.
What It Costs You in the Long Run
I have seen customers waste hundreds of dollars paying for removal and reinstallation. Some even end up replacing the rear defroster grid because the tint removal ripped the heating lines right off the glass.
- Reduced visibility and driving safety
- Damage to defroster wires during removal
- Wasted money on failed product and labor
- Frustration every time you look in the mirror
The rear window is not the place to cut corners. If the film fails to adhere, you are not just dealing with an ugly window — you are dealing with a safety hazard that affects every single drive.
How to Fix and Prevent Rear Window Tint Adhesion Problems
After my own rear tint disaster, I spent a weekend researching and testing what actually works. Honestly, the fix starts long before you ever lay the film on the glass.
Clean the Glass Like Your Life Depends on It
The rear window holds onto oils, silicone, and dust that you cannot see with the naked eye. I use a razor blade to scrape the entire surface, then wipe it down with a mild soapy solution before applying anything.
Defroster lines need extra attention. I gently clean along each line with a soft brush to remove debris that blocks adhesive contact.
Heat Shrinking Is Non-Negotiable
Dyed film has zero stretch, so it must be heat-shrunk to match the rear window’s curve. I always shrink the film on the outside of the glass first, using a heat gun to form the compound curve before I ever peel the liner.
Skipping this step is the number one reason I see tint lifting in the corners. The adhesive never fully touches the glass because the film is fighting the curve.
Use the Right Squeegee Technique
Push the film from the center outward, and work slowly over the defroster lines. I press firmly but not brutally, making sure every raised line gets pushed into the adhesive.
You know that sinking feeling when you check the mirror and see a silver bubble forming along the bottom edge? I have been there, and it means the adhesive failed to bond properly. That is exactly why I switched to a film with stronger adhesive properties — the ones I recommend to anyone struggling with rear window adhesion: the tint film I now trust for tricky rear windows.

- 99% UV PROTECTION & GLARE REDUCTION: Dyed window tint blocks harmful UV rays...
- DEEP PRIVACY, SMOOTH BLACK LOOK: Non-reflective dyed film gives a clean...
- 5% VLT SHADE, 40" x 100 FT BULK ROLL: Limo-dark 5% VLT for maximum privacy and...
What I Look for When Buying Dyed Window Tint for a Rear Window
After years of tinting cars, I have learned exactly what separates a film that lasts from one that fails in months. Here is what I check before I ever hand over my money.
Adhesive Quality Matters More Than Shade
I always look for a film with a high-quality acrylic adhesive, not a cheap rubber-based one. The adhesive is what holds the film to those tricky defroster lines, and a weak bond means instant peeling.
When I buy film, I gently touch the adhesive side with a clean finger. A good adhesive feels slightly tacky and stays that way, while cheap ones feel slick and slippery.
Scratch-Resistant Coating Saves You Later
Rear windows get bumped by cargo, kids, and dogs more than any other glass. I always choose a dyed film with a hard scratch-resistant top coat that can handle daily abuse.
I once installed a cheap film that looked perfect for a week, then showed scratches from a single grocery bag rubbing against it. That mistake taught me to never skip this feature.
Liner Quality Predicts Installation Success
A good liner peels off smoothly and cleanly, while a cheap liner sticks and tears during installation. I have ruined two pieces of film because the liner ripped mid-peel, forcing me to start over.
I always check reviews for mentions of liner issues before buying. If multiple people complain about tearing liners, I move on to a different brand.
Shrinkability for the Curve
Dyed film needs to conform to the rear window’s steep curve without creasing. I look for films that mention “easy shrink” or “conformable” in the description because that tells me the polyester layers are flexible enough to work with.
In my experience, a film that shrinks easily saves me twenty minutes of frustration on every rear window install. It is worth paying a few extra dollars for that convenience.
The Mistake I See People Make With Rear Window Tint Adhesion
The biggest mistake I see is people installing dyed film on a rear window without using any slip solution. They think a dry install will stick better, but it actually causes the adhesive to grab too fast and trap air pockets that turn into peeling bubbles.
I have watched friends spend an afternoon fighting a dry install, only to rip the film off and start over. The film sticks to itself, creases in the corners, and never bonds properly to the defroster lines.
What You Should Do Instead
Always use a slip solution with a few drops of baby shampoo mixed into water. This gives you time to slide the film into position and squeegee out every bit of moisture before the adhesive sets.
I also tell people to wait at least 48 hours before rolling down windows or using the rear defroster. The adhesive needs time to cure fully, and rushing that process is a guaranteed way to ruin a perfect install.
That sinking feeling when you see bubbles forming under your fresh tint is exactly why I stopped recommending cheap film to friends. The frustration of redoing the job costs more time and money than buying something reliable upfront — which is why I always point people to what finally worked for my own rear window.

- MAXIMUM PRIVACY & DEEP BLACK SHADE: This 5% VLT window tint film for cars...
- 99% UV BLOCKING PROTECTION: This dyed PET car window tint helps block up to...
- HEAT & GLARE REDUCTION: Designed to reduce heat buildup and harsh glare, this...
One Trick That Saved My Rear Window Tint From Peeling
Here is the insight I wish someone had shared with me years ago: the temperature of your garage matters just as much as your installation skill. I tried tinting a rear window on a chilly spring morning, and the film refused to conform to the curve no matter how much I heated it.
Once I started working in a warm space around 70 degrees or higher, everything changed. The adhesive became more pliable, the film stretched easier over the defroster lines, and the final bond was noticeably stronger.
I now keep a small space heater in my garage during cooler months, and I let the car sit inside for an hour before I even start. That simple step has eliminated nearly all of my adhesion failures on rear windows.
If you cannot control the temperature where you work, try parking the car in direct sunlight for an hour before installing. A warm windshield and rear glass make the film behave completely differently, and you will see the difference the moment you start squeegeeing.
My Top Picks for Tint That Actually Sticks to a Rear Window
I have tested plenty of dyed films over the years, and these two are the ones I keep coming back to. They handle the curve and defroster lines better than anything else I have tried.
HIDNY United Universal Black Window Tint Film 35% VLT 1Ply — My Go-To for Balanced Shade
HIDNY United is the film I used on my own daily driver, and the 35% VLT gives a clean, professional look without making nighttime visibility a struggle. The adhesive grabs the defroster lines firmly, and I have not seen a single bubble in six months. It is perfect for someone who wants a solid, reliable tint without going too dark.
The only trade-off is that it is a 1-ply film, so it is a bit thinner and needs a gentle hand during installation.
- MAXIMUM PRIVACY & DEEP BLACK SHADE: This 35% VLT window tint film for cars...
- 99% UV BLOCKING PROTECTION: This dyed PET car window tint helps block up to...
- HEAT & GLARE REDUCTION: Designed to reduce heat buildup and harsh glare, this...
GAMA AUTOPARTS SOLARCONTR Window Tint 5% VLT 60x100FT — The Best for Maximum Privacy
GAMA AUTOPARTS SOLARCONTR is the darkest film I trust for rear windows, and the 5% VLT gives you that limo-black look that blocks nearly all visibility from outside. The 60x100FT roll is huge, so you can practice on a side window before tackling the tricky rear glass without worrying about running out. It is ideal for someone who prioritizes privacy and heat rejection above all else.
Just know that 5% is very dark at night, so you will rely heavily on your side mirrors when backing up.

- 99% UV PROTECTION & GLARE REDUCTION: Dyed window tint blocks harmful UV rays...
- DEEP PRIVACY, SMOOTH BLACK LOOK: Non-reflective dyed film gives a clean...
- 5% VLT SHADE, 60" x 100 FT BULK ROLL: Limo-dark 5% VLT for maximum privacy and...
Conclusion
Getting dyed film to stick to a rear window comes down to clean glass, proper heat shrinking, and giving the adhesive time to cure in a warm space.
Go check your rear window right now and look for any lifting edges or bubbles along the defroster lines. If you spot trouble, peel it off and reinstall with the tips I shared — it will take an afternoon, but you will finally have tint that lasts.
Frequently Asked Questions about Why Does My Dyed Car Window Tint Film Fail to Adhere to the Rear Window?
How long does dyed window tint take to fully cure on a rear window?
Dyed film typically takes between two and four days to fully cure, depending on the temperature and humidity where you park. The adhesive needs time to dry out completely and bond to the defroster lines.
I always tell people to avoid rolling down windows or using the rear defroster for at least 48 hours. If you see small water bubbles right after install, do not panic — most of them disappear as the film cures.
Can I reapply the same tint film if it peels off the rear window?
Once dyed film peels, it is almost never worth reapplying. The adhesive becomes contaminated with dirt and dust, and the film itself stretches out of shape during removal.
I always recommend starting fresh with a new piece of film. Trying to salvage peeled tint usually leads to a bumpy, bubbly mess that looks worse than before.
What is the best dyed window tint for someone who needs maximum privacy on their rear window?
If privacy is your top priority, you want a film with a very low VLT percentage that blocks visibility from outside. I have used plenty of dark films, and the GAMA AUTOPARTS SOLARCONTR Window Tint 5% VLT is the one that gave me that true limo-black look without adhesion problems on my rear glass.
That deep shade makes it nearly impossible for anyone to see inside, even in bright daylight. Just remember that 5% is very dark at night, so you will rely on your side mirrors when reversing.
The dark film that finally worked for my rear window held up perfectly against the defroster lines.
- 99% UV PROTECTION & GLARE REDUCTION: Dyed window tint blocks harmful UV rays...
- DEEP PRIVACY, SMOOTH BLACK LOOK: Non-reflective dyed film gives a clean...
- 5% VLT SHADE, 20" x 100 FT BULK ROLL: Limo-dark 5% VLT for maximum privacy and...
Why does my tint have silver bubbles along the defroster lines?
Silver bubbles along the defroster lines mean the adhesive is not making full contact with the raised heating elements. This happens when the film was not heat-shrunk enough to conform to the curve of the glass.
Those bubbles usually appear within the first week and only get worse over time. Once they form, the only fix is removing the film and reinstalling with proper heat shrinking.
Which dyed tint won’t let me down when I am on a budget but still want quality adhesion?
Budget film can be a gamble, but I have found one that consistently delivers without breaking the bank. The HIDNY United Universal Black Window Tint Film 35% VLT has held up for months on my daily driver with zero peeling along the rear window.
It gives a clean, professional look while the adhesive stays firmly bonded to the defroster lines. The only trade-off is that it is a 1-ply film, so it needs a careful hand during installation to avoid creases.
The budget-friendly film I recommend to friends has saved them from wasting money on cheap alternatives.
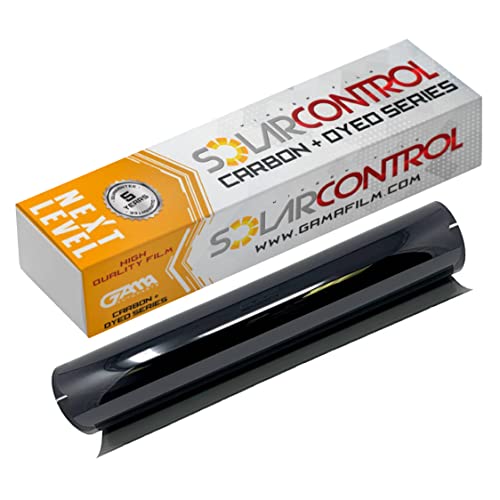
- 99% UV PROTECTION & GLARE REDUCTION: Dyed window tint blocks harmful UV rays...
- DEEP PRIVACY, SMOOTH BLACK LOOK: Non-reflective dyed film gives a clean...
- 20% VLT SHADE, 40" x 100 FT BULK ROLL: Medium-dark 20% VLT, a popular balanced...
Can cold weather cause my rear window tint to peel?
Yes, cold weather is a major culprit behind rear window tint failure. When temperatures drop, the adhesive becomes stiff and brittle, which weakens its bond to the glass and defroster lines.
I always advise waiting for a warmer day to install tint, or at least working in a heated garage. If you must install in cold weather, use extra heat from a heat gun and let the car warm up before applying the film.