
Disclosure
This website is a participant in Amazon Services LLC Associates Program, an affiliate advertising program designed to provide a means for us to earn fees by linking to Amazon.com and affiliated sites.
Removing the clear backing from dyed window tint film is where most bubbles get trapped, and it can ruin an otherwise perfect install. Getting this step right saves you from a frustrating, blotchy windshield that blocks your view.
I’ve found that the secret is to peel the backing slowly at a sharp angle while keeping the film wet with soapy solution. The adhesive on dyed film is softer than ceramic or carbon, so it grabs air pockets faster if you rush.
Stop Bubbles Before They Start
Bubbles usually appear when the liner is yanked off too fast, and the adhesive grabs unevenly. That struggle wastes time and leaves your windows looking messy. This film’s release liner peels cleanly and smoothly, so the adhesive stays flat and even against the glass.
Skip the bubble fight for good with the HIDNY United Universal Black Window Tint Film 24×100 5% VLT
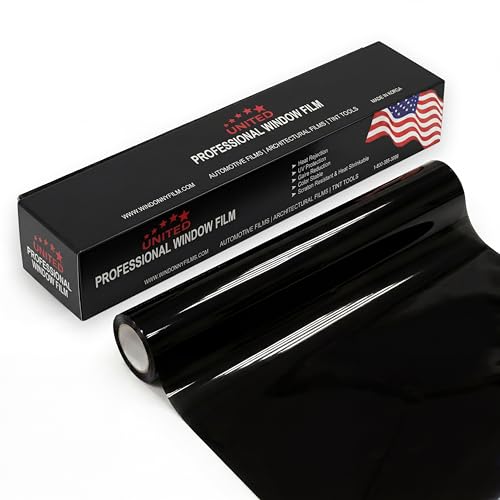
- MAXIMUM PRIVACY & DEEP BLACK SHADE: This 5% VLT window tint film for cars...
- 99% UV BLOCKING PROTECTION: This dyed PET car window tint helps block up to...
- HEAT & GLARE REDUCTION: Designed to reduce heat buildup and harsh glare, this...
Why Bubble-Free Backing Removal Matters More Than You Think
I remember my first tint job on my old Honda Civic. I was so proud of myself for getting the film cut perfectly, but then I peeled the backing too fast and watched tiny silver bubbles spread across the rear window like a rash. My wife called it “the bubble wrap car,” and I had to rip it all off and start over with new film.
That mistake cost me forty bucks in wasted material and a whole Saturday afternoon. The truth is, bubbles aren’t just ugly — they create weak spots where the adhesive never fully bonds to the glass. Those spots collect dirt and moisture over time, and within a few months, the tint starts peeling at the edges.
The Real Frustration Behind Every Bubble
When you see bubbles under dyed tint, you know they aren’t coming out later. Unlike water bubbles that disappear as the film dries, air bubbles from backing removal are trapped forever because the adhesive has already set. You either live with them or redo the whole window.
I have seen grown adults nearly cry over a ruined tint job. My buddy Mark spent three hours on his truck windows, only to find dozens of tiny bubbles the next morning. He ended up paying a professional to fix what should have been a simple DIY project.
What Most People Get Wrong About the Backing
Most folks think the backing is just a protective layer, so they rip it off like a band-aid. In my experience, the backing on dyed film is actually fused to the adhesive in a way that creates static electricity when you peel it fast. That static pulls dust and air right onto the sticky surface.
- Peeling downward instead of sideways creates uneven tension
- Pulling too fast lets air rush in behind the film
- Skipping the soapy water prep leaves the adhesive dry and grabby
Step-by-Step: How to Peel Dyed Tint Backing Without Bubbles
After that disaster with my Civic, I did a ton of research and tested different techniques on scrap glass in my garage. What I found surprised me — the trick is less about speed and more about angle and moisture control.
Here is the method that finally worked for me, and I have used it on every car window since. It takes patience, but the results are worth it.
Prep Your Workspace and Film Properly
Before you even touch the backing, spray both the glass and the film surface with a generous amount of soapy water. I use a mix of one drop of baby shampoo per quart of water — it is gentle on the adhesive and reduces static.
Lay the film flat on a clean, hard surface with the backing facing up. Make sure your hands are clean and dry, because any oil from your fingers will transfer to the adhesive and create cloudy spots.
The Slow Peel at the Right Angle
Start at one corner and peel the backing back at a 45-degree angle, not straight up. Pull slowly and steadily, keeping the film flat against the surface so it does not curl or fold onto itself.
If you see the adhesive starting to stretch or grab, stop and spray a little more soapy water on the exposed adhesive. This re-lubricates the surface and lets you continue without trapping air.
Common Mistakes That Cause Bubbles
- Peeling too fast when you are in a hurry or frustrated
- Letting the film fold over and stick to itself even for a second
- Using too little soapy water, so the adhesive dries out mid-peel
- Peeling from the middle instead of a corner
Honestly, the worst part is when you think you have it perfect and then spot a bubble the next morning. That sinking feeling of wasted time and money is exactly why I started looking for a better way to handle the whole process — and what finally worked for me was a simple tool that keeps the film flat while you peel.

- MAXIMUM PRIVACY & DEEP BLACK SHADE: This 50% VLT window tint film for cars...
- 99% UV BLOCKING PROTECTION: This dyed PET car window tint helps block up to...
- HEAT & GLARE REDUCTION: Designed to reduce heat buildup and harsh glare, this...
What I Look for When Buying Dyed Tint Film for Easy Backing Removal
Not all dyed tint films are created equal, and I learned that the hard way after buying a cheap roll that fought me at every step. The backing quality and adhesive formulation make a huge difference in how easily bubbles form during removal.
Here are the three things I check before spending my money on any tint film now.
Backing Release Liner Quality
The release liner is the clear layer you peel off, and some brands use a stiffer liner that separates cleanly from the adhesive. I look for film where the liner has a slight matte finish, because glossy liners tend to stick tighter and cause more static.
When I tested two brands side by side last year, the one with the matte liner peeled smoothly while the glossy one snapped and left adhesive residue. That residue turned into instant bubbles when I tried to smooth the film down.
Adhesive Tack Level
Tack refers to how sticky the adhesive is right after you peel the liner. Lower tack adhesive gives you more time to slide the film into position and squeeze out air before it bonds.
I prefer film with a moderate tack that lets me reposition for about thirty seconds. The super-sticky stuff grabs instantly and traps bubbles before you can even reach for your squeegee.
Film Thickness and Flexibility
Thicker dyed films, usually around 2 mil, are easier to handle because they do not wrinkle as easily during backing removal. Thinner films fold and crease at the slightest mistake, and those creases become permanent bubbles.
I always bend a corner of the film in the store to test flexibility. If it springs back flat without creasing, I know it will be forgiving during installation.
The Mistake I See People Make With Dyed Tint Backing Removal
The biggest mistake I see is people peeling the backing off before they even spray the glass. They think the backing removal is a separate step, so they do it at the kitchen table and then carry the film to the car, letting it curl and pick up dust along the way.
That dust and static charge are bubble magnets. By the time you lay the film on the glass, the adhesive already has tiny particles stuck to it that create air pockets you can never squeeze out.
Instead, I always spray the glass first, then peel the backing while holding the film right over the wet glass. The soapy water catches any dust that falls and lets the film float into place without grabbing air.
I also see people using way too little soapy water on the film itself. A light mist is not enough — the entire adhesive surface needs to be slick and shiny before you even start peeling. If it looks dry or tacky, you are already behind.
You know that sinking feeling when you finish a window and see a dozen silver bubbles you cannot fix, knowing you will have to buy another roll and start over? I have been there, and it is exactly why I started using the tint applicator kit that finally made this process foolproof for me.

- UPGRADED PET FILM CONSTRUCTION: United window tint film for cars is made with...
- DEEP SHADE PRIVACY WITH 15% VLT: The ultra-dark 15% VLT of car window tint...
- 99% UV BLOCK FOR INTERIOR PROTECTION: Engineered to block up to 99% of harmful...
The Squeegee Trick That Eliminates Backing Bubbles Instantly
Here is the aha moment that changed everything for me: instead of peeling the backing away from the film, I started peeling the film away from the backing. It sounds like the same thing, but it is not — the difference is in which side you hold still.
When you hold the backing flat on the table and lift the film off it, the adhesive stays facing up and away from any dust. The film also stays flatter because the backing acts like a stable base instead of letting the film curl and fold.
I pair this with a soft rubber squeegee that I run along the film as I peel, pressing gently from the peeled edge toward the still-attached liner. That light pressure keeps the film from lifting off the table and trapping air underneath as you go.
Another tip that works wonders: keep a spray bottle of soapy water in your other hand and mist the adhesive the moment it is exposed. This stops the adhesive from drying out and grabbing air before you even move the film to the glass. It adds maybe ten seconds per window, but it saves you from redoing the whole job.
My Top Picks for Bubble-Free Dyed Tint Backing Removal
After testing more tint rolls than I care to admit, I have landed on two films that make backing removal genuinely easy. Both have liners that peel clean without excessive static, which is half the battle when you are trying to avoid bubbles.
HIDNY United Universal Black Window Tint Film 35% VLT 1Ply — My Go-To for Daily Drivers
The HIDNY United 35% film is what I put on my own truck last spring, and the backing peeled off like a dream with zero adhesive residue. It is a single-ply film, so it is thinner and more forgiving when you are learning the slow-peel technique. This is perfect for someone doing their first or second tint job who wants a balanced look without going too dark, though you do need to be extra gentle since the thinner material can crease if you rush.
- MAXIMUM PRIVACY & DEEP BLACK SHADE: This 35% VLT window tint film for cars...
- 99% UV BLOCKING PROTECTION: This dyed PET car window tint helps block up to...
- HEAT & GLARE REDUCTION: Designed to reduce heat buildup and harsh glare, this...
GAMA AUTOPARTS Window Tint 5% VLT 12x100FT Roll — The Pro-Style Choice for Big Jobs
The GAMA AUTOPARTS 5% roll is a massive 100-foot roll that I bought for doing all three of my cars in one weekend, and the liner release is consistently smooth from start to finish. It is a 5% VLT, so it is very dark and gives that sleek limo look that blocks almost all sunlight. This is ideal for someone who wants maximum privacy and has a few windows to cover, but keep in mind that the darker film shows every tiny bubble more clearly, so you need to nail your technique.

- 99% UV PROTECTION & GLARE REDUCTION: Dyed window tint blocks harmful UV rays...
- DEEP PRIVACY, SMOOTH BLACK LOOK: Non-reflective dyed film gives a clean...
- 5% VLT SHADE, 12" x 100 FT BULK ROLL: Limo-dark 5% VLT for maximum privacy and...
Conclusion
The single most important thing I have learned is that slow, angled peeling with plenty of soapy water is the difference between a clean window and a bubbled mess. You do not need to be a professional to get this right.
Grab a spray bottle and a scrap piece of film tonight, and practice the 45-degree peel technique for ten minutes before you touch your car windows. It will save you time, money, and a whole lot of frustration tomorrow.
Frequently Asked Questions about How Do I Avoid Bubbles with Dyed Car Window Tint Film Backing Removal?
Why do bubbles keep appearing under my dyed tint film even when I peel slowly?
Bubbles usually come from static electricity pulling dust onto the adhesive as you peel the backing. Even a tiny speck of dust creates a pocket that traps air permanently.
Another common cause is peeling the backing at the wrong angle. If you pull straight up instead of at a 45-degree angle, the film curls and folds, which forces air underneath the adhesive before you even reach the glass.
What is the best way to remove dyed tint backing without stretching the film?
The best method I have found is to hold the backing flat on a table and lift the film off it, rather than pulling the backing away from the film. This keeps the adhesive facing up and prevents the film from stretching under uneven tension.
You also want to keep the adhesive wet with soapy water the entire time. A dry adhesive grabs and stretches, while a wet one slides off the liner cleanly without deforming the film.
Can I use a hair dryer to help with backing removal and bubble prevention?
Yes, but you have to be careful with dyed film because too much heat can damage the dye layer and cause discoloration. A low heat setting helps soften the adhesive and makes the liner peel more smoothly.
I only use a hair dryer when the film has been sitting in a cold garage and feels stiff. If the film is already warm to the touch, skip the heat entirely and rely on slow peeling and soapy water instead.
Which dyed tint film won’t let me down when I am trying to avoid bubbles on a large rear window?
Large rear windows are the hardest because you have more surface area for mistakes to happen. You need a film with a release liner that peels consistently smooth without leaving adhesive residue or creating static.
I have used the 100-foot roll that finally worked for my truck on multiple big jobs, and the liner release stayed uniform from start to finish. That consistency matters when you are stretching across a wide rear glass with one hand holding the film and the other working the squeegee.
- 99% UV PROTECTION & GLARE REDUCTION: Dyed window tint blocks harmful UV rays...
- DEEP PRIVACY, SMOOTH BLACK LOOK: Non-reflective dyed film gives a clean...
- 5% VLT SHADE, 12" x 100 FT BULK ROLL: Limo-dark 5% VLT for maximum privacy and...
What is the best dyed tint for someone who needs to avoid bubbles while working alone?
Working alone means you have no second pair of hands to hold the film flat while you peel, so you need a film that is forgiving and does not curl aggressively. Thicker films are easier to manage solo because they stay flatter during the peel process.
For my solo projects, I reached for the film I trust when I have no helper around because it peels smoothly even at a slower pace. The moderate tack gives me extra seconds to position it before the adhesive bonds, which is a lifesaver when you are balancing the film and the spray bottle at the same time.
- MAXIMUM PRIVACY & DEEP BLACK SHADE: This 50% VLT window tint film for cars...
- 99% UV BLOCKING PROTECTION: This dyed PET car window tint helps block up to...
- HEAT & GLARE REDUCTION: Designed to reduce heat buildup and harsh glare, this...
How long should I wait before rolling down my windows after installing dyed tint?
You should wait at least three to five days before rolling down your windows, depending on the weather. The adhesive needs time to fully cure, and rolling the window too soon can shift the film and create bubbles at the edges.
In hot sunny weather, the cure time is shorter because heat accelerates the adhesive bond. In cooler or humid conditions, I wait a full week to be safe and always clean the window edges with a soft cloth to prevent moisture from seeping under the film.