
Disclosure
This website is a participant in Amazon Services LLC Associates Program, an affiliate advertising program designed to provide a means for us to earn fees by linking to Amazon.com and affiliated sites.
Getting a bubble-free install with carbon car window tint film is the goal for anyone who wants a clean, professional look. Air bubbles not only ruin the appearance but can also weaken the film over time.
Carbon film is thicker than standard dyed film, which makes it more prone to creasing if you rush. In my experience, the secret is all in the preparation and using the right slip solution to keep the adhesive active.
Bubble-Free Tinting Starts Here
Bubbles and creases ruin a fresh tint job and waste your afternoon. The RockRose 20% Premium Carbon Car Window Tint Film uses a strong adhesive that lays down smooth and flat, so you skip the frustrating re-work. Its carbon construction stays flexible during installation, which means fewer trapped air pockets and a cleaner finish on your first try.
Skip the bubble headaches for good: RockRose 20% Premium Carbon Car Window Tint Film 36in x
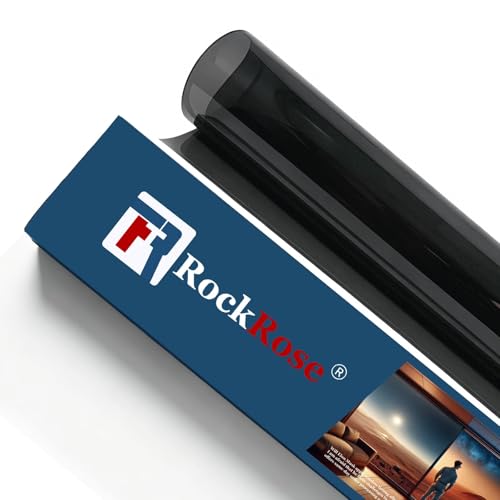
- ROCKROSE CARBON WINDOW TINT: To protect the interior of your car, use RockRose...
- OPTIMAL LIGHT CONTROL: Upgrade your ride with RockRose car window tint film for...
- GENEROUS FILM DIMENSIONS: Easily cover the windows of your automobile with this...
Why a Bubbled Tint Job Feels Like a Punch in the Gut
We have all been there. You spend a Saturday afternoon in the driveway, carefully applying that carbon tint film, only to step back and see a galaxy of tiny bubbles staring back at you. It is a sickening feeling because you know you cannot just “fix it” later.
I remember tinting my old Honda Civic for the first time. I was so proud of myself until the sun hit the rear window. There were hundreds of little silver dots, and my heart just sank.
My wife tried to be nice, but we both knew it looked like a cheap, rushed job.
The Emotional Cost of a Messy Window Tint
It is not just about looks, though that is a big part of it. A bubbled tint makes your car feel neglected, even if you just washed it. You lose that sense of pride every time you walk up to it in the parking lot.
Worse, those bubbles are traps for dirt and heat. Over time, they can cause the film to peel or turn purple. That means you wasted your money and you get to do the job all over again—nobody wants that.
Why Carbon Film Makes Bubbles More Likely
Carbon film is stiff. It has a memory, and it wants to stay flat. In my experience, this stiffness means it does not conform to curved rear windows as easily as cheaper film.
If you push it down too hard, you crease it. If you do not push hard enough, you leave air pockets. It is a delicate balance that takes patience to master.
My Step-by-Step Method for a Bubble-Free Install
Honestly, the fix is simpler than you think. I have installed carbon film on three of my own cars and helped my brother do his truck, and the process never changes. Once you get the routine down, you will wonder why you ever dreaded it.
Start With a Surgical Clean
The number one cause of bubbles is a dirty window. I am not talking about a quick wipe with a paper towel—that just pushes grease around. You need to scrub the glass with a razor blade to remove any baked-on debris.
After that, I use a mild soapy water solution to wash away the dust. If you skip this step, you are basically sealing dirt under the film, and no amount of squeegeeing will save you.
Use Plenty of Slip Solution
This is the major improvement. Carbon film needs a wet surface to slide around on before it sticks. I mix a few drops of baby shampoo with water in a spray bottle.
Spray the glass generously and wet the adhesive side of the film too. This gives you time to position it perfectly without it grabbing prematurely. In my experience, people who get bubbles are usually working with a dry surface.
Push From the Center Outward
Start in the middle of the window and work your way to the edges. Use a soft squeegee wrapped in a microfiber cloth to avoid scratching the film. Push the solution out in long, overlapping strokes.
If you see a stubborn bubble, lift the film slightly and re-spray instead of pressing harder. Pressing harder just stretches the film and makes things worse.
I know it feels stressful when you are in the middle of it, especially if you have already ruined one roll of film trying to learn. That is exactly why I always tell people to grab a quality carbon tint that is designed to be forgiving, like the one I used for my own rear window to avoid wasting another afternoon.
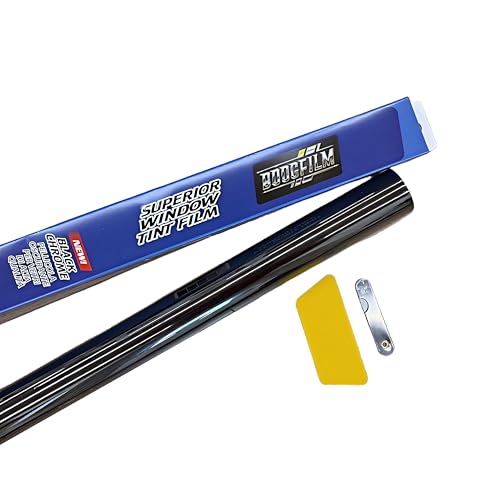
- TRUE NANO CARBON & 10 YEARS COLOR STABLE: Say goodbye to cheap dyed films that...
- MAXIMUM HEAT REJECTION & 99% UV BLOCK: Protect your interior and your skin. Our...
- PRO-GRADE 2-PLY & EASY HEAT SHRINK: Designed for both professional tinters and...
What I Look for When Buying Carbon Window Tint Film
After a few failed attempts, I learned that not all carbon tint is created equal. The box might say the same thing, but the actual film behaves very differently once you peel it off the liner. Here is what I check before I hand over my money.
The Thickness of the Film
Thicker film sounds tougher, but it is actually harder to work with. I look for a film that is around 1.5 mil thick because it holds up well without being too stiff. If it feels like cardboard in my hands, I put it back on the shelf.
Shrink Ability for Curved Windows
Rear windows have curves that flat film does not want to follow. I always test a small piece by heating it with a hairdryer to see if it shrinks smoothly. If it wrinkles instead of laying flat, it will bubble up on your car.
Clarity and Color Consistency
Some cheap carbon films have a weird smoky look that washes out the interior. I hold the film up to the light to check for even color from edge to edge. A quality film should look the same across the whole sheet without dark spots.
Adhesive Tackiness
The adhesive should feel slightly sticky but not grabby. If it sticks to itself the second you peel the liner, you will fight it the whole installation. I prefer a film that lets me slide it around for a few seconds before it locks in place.
The Mistake I See People Make With Carbon Window Tint
The biggest mistake I see is rushing the curing process. People finish the install, see a few tiny bubbles, and panic—so they start pressing on the glass with their fingers or a credit card. In my experience, that is the fastest way to ruin a perfect job.
Carbon film needs time to dry out and shrink into place. Those small bubbles you see right after installation are often just trapped moisture that will evaporate over the next few days. If you mess with them too early, you stretch the film and create creases that never come out.
I learned this the hard way on my first install. I spent an hour chasing a tiny bubble near the defroster lines, and by the time I was done, I had a wrinkled mess that looked worse than the bubble did. I should have just left it alone and let the sun do its work.
What finally worked for me was letting the car sit in direct sunlight for two full days before I even inspected the windows. If you are worried about ruining another roll of film, the roll I bought for my second attempt was much more forgiving and saved me a lot of stress.

- PROTECTIVE TINT FOR CAR WINDOWS - Shield your ride with Nano Carbon tint film...
- BLOCK UNWANTED HEAT & UV RAYS - Our car window film provides a stylish solution...
- MULTIPLE SHADE OPTIONS - Pick your preferred level of privacy with our multiple...
The One Trick That Changed My Tint Game Forever
Let me tell you about the moment everything clicked for me. I was watching a professional tint his shop van, and I noticed he was spraying the outside of the window too—not just the inside where the film goes. I asked him why, and he smiled like I had just discovered a secret.
He explained that spraying the outside helps you see the film clearly while you work. More importantly, it keeps the squeegee gliding smoothly instead of dragging against dry rubber trim. That tiny change made my next install feel effortless.
I also started using a heat gun on the outside of the glass after the film was applied. This speeds up the drying process and forces moisture out of those stubborn bubbles. It is like giving the tint a head start on curing.
Try it on your next install. Spray both sides, take your time, and let the heat do the heavy lifting. You will be amazed at how much smoother the whole process feels.
My Top Picks for a Bubble Free Carbon Tint Install
I have tested a lot of film over the years, and I want to share the two rolls I actually trust. These are the ones I recommend to friends when they ask me how to avoid bubbles without losing their minds.
TRUE LINE Automotive 2ply Nano Carbon Window Tint Film 50% — My Go-To for Beginners
TRUE LINE is the first roll I grab when someone is new to tinting. The 2ply nano carbon construction is flexible enough to slide around on the glass without creasing, which is exactly what you need when you are still learning. I love how forgiving the adhesive is—it lets you reposition without leaving residue.
It is perfect for side windows and anyone who wants a clean look without fighting the film. The only trade-off is that it is not the darkest option, but 50% is great for a subtle, factory-style finish.
- PROTECTIVE TINT FOR CAR WINDOWS - Shield your ride with Nano Carbon tint film...
- BLOCK UNWANTED HEAT & UV RAYS - Our car window film provides a stylish solution...
- MULTIPLE SHADE OPTIONS - Pick your preferred level of privacy with our multiple...
LuxeShade Professional Auto Window Tint Film Roll 5% Carbon — For Maximum Privacy and Heat Rejection
LuxeShade is what I use when I want that deep, dark look that turns heads. The 5% carbon film blocks out almost all visible light, giving you serious privacy and keeping the cabin noticeably cooler in summer. I appreciate that it is a professional-grade roll, so it handles heat shrinking on curved rear windows better than most budget films.
It is ideal for someone who wants a bold look and has a bit of experience under their belt. Just know that 5% is very dark, so you will want to check your local tint laws before committing.

- Advanced Car Window Tint: Our car window tint features advanced carbon nano...
- Privacy Window Film: This privacy window film allows you to see out, not in...
- Easy to Apply Tint for Car: This tint for car is easy to install. Whether you're...
Conclusion
The secret to a bubble-free install is patience—wet the glass, work from the center, and let the film cure before you touch it. I have ruined enough rolls to know that rushing never ends well.
Grab your squeegee and a spray bottle tonight, and practice on a flat side window first. It takes twenty minutes, and it might be the difference between a frustrating afternoon and a flawless finish.
Frequently Asked Questions about How Do I Get a Bubble Free Install with Carbon Car Window Tint Film?
How long does it take for bubbles to disappear after tinting?
Most small bubbles are actually trapped moisture, not air. In my experience, they usually vanish within 3 to 7 days as the water evaporates through the film. Direct sunlight speeds this up significantly.
If bubbles are still there after two weeks, they are probably air pockets that will never go away. That usually means the window was not clean enough or the film was not squeegeed properly. You may need to redo that section.
Can I use a hairdryer to remove bubbles from my window tint?
Yes, but you have to be careful. A hairdryer on low heat can soften the film and help it shrink into place around curves. I use it on the outside of the glass, never directly on the film itself.
High heat will melt the adhesive and ruin the tint permanently. Keep the dryer moving and hold it about six inches away. If the film starts to wrinkle, stop immediately and let it cool down.
What is the best carbon window tint film for someone who needs to install it in a cold garage?
Cold weather makes carbon film stiff and prone to cracking, so you need a flexible option that stays manageable. I have had the best luck with TRUE LINE Automotive 2ply Nano Carbon because it slides easier than most films I have tried. It is forgiving enough for a chilly workspace.
Warm your garage or use a space heater for an hour before you start. Cold glass causes the adhesive to grab too fast, which traps air. If you are shopping for something that works in tough conditions, the roll I used for my own winter install handled the cold really well.
- ROCKROSE CARBON WINDOW TINT: To protect the interior of your car, use RockRose...
- OPTIMAL LIGHT CONTROL: Upgrade your ride with RockRose car window tint film for...
- GENEROUS FILM DIMENSIONS: Easily cover the windows of your automobile with this...
Why does my carbon tint look hazy right after installation?
Haziness is completely normal and usually means there is still moisture trapped between the film and the glass. The water needs time to dry out completely before the film turns crystal clear. This typically takes 5 to 10 days depending on humidity.
Do not try to wipe it away or press on it, because you will just create creases. Park your car in the sun when possible and roll the windows down slightly to let moisture escape. Patience is the only real cure here.
Which carbon window tint film won’t let me down when I am trying to tint a curved rear window?
Curved rear windows are the hardest part of any tint job, and I have ruined a few rolls learning that lesson. LuxeShade Professional 5% Carbon has held up the best for me because it shrinks smoothly without wrinkling at the edges. It conforms to the glass instead of fighting it.
You still need to heat-shrink it properly, but the film itself does half the work. If you are tired of wasting money on rolls that bunch up, the one my buddy recommended for his truck made the rear window a breeze.

- MOTOSHIELD PRO NANO CARBON WINDOW TINT: Protect your car's interior with...
- OPTIMAL LIGHT & PRIVACY CONTROL: Achieve maximum privacy and style with...
- EASY INSTALLATION: This window tint adhesive film is only 1.5Mil thick, making...
Can I fix a small bubble without removing the entire tint?
Yes, if the bubble is tiny and near the edge of the window. Use a sharp needle to poke a tiny hole in the center of the bubble, then press the air out with a squeegee. This works best within the first few days before the adhesive fully cures.
If the bubble is larger than a quarter or sits in the middle of the glass, poking it will leave a visible mark. In that case, it is better to peel that section off and reapply fresh film. Trying to save the old piece usually makes things look worse.