
Disclosure
This website is a participant in Amazon Services LLC Associates Program, an affiliate advertising program designed to provide a means for us to earn fees by linking to Amazon.com and affiliated sites.
Nothing ruins a fresh tint job faster than ugly air bubbles trapped under the film. I have been there, and I know how frustrating it is to see those pesky pockets ruining your hard work and your car’s appearance.
Bubbles happen when dust, dirt, or moisture gets trapped between the adhesive and your glass. In my experience, the secret is a super clean workspace and using the right slip solution, not just pressing harder with your squeegee.
Stop Bubbles Before They Start
Bubbles and creases ruin a clean tint job and make the glass look sloppy. Even with careful squeegeeing, cheap film traps air and lifts at the edges. This film’s high-quality adhesive lays down flat and bonds evenly, so trapped air gets pushed out easily instead of forming permanent bubbles.
Skip the bubble battle for good: HIDNY United Universal Black Window Tint Film 24×100 5% VLT
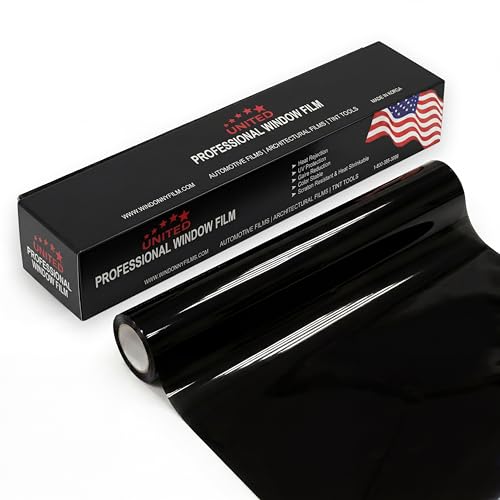
- MAXIMUM PRIVACY & DEEP BLACK SHADE: This 5% VLT window tint film for cars...
- 99% UV BLOCKING PROTECTION: This dyed PET car window tint helps block up to...
- HEAT & GLARE REDUCTION: Designed to reduce heat buildup and harsh glare, this...
Why Air Bubbles Ruin More Than Just the Look
We have all been there. You spend a sunny Saturday installing your window tint, feeling pretty proud of yourself. Then you step back and see a dozen tiny silver bubbles staring back at you, and your heart just sinks.
Those bubbles are not just an eyesore. They weaken the adhesive bond, which means your tint will peel and flake within a few months. I have seen people waste a whole roll of film and hours of effort, only to have to rip it all off and start over.
The Frustration of a Failed First Attempt
I remember my first time tinting my old sedan. I was so excited, but I rushed the cleaning step. By the time I finished, the rear window looked like it had a case of chickenpox.
My kids laughed at me, and I had wasted forty bucks on film that was ruined.
That mistake taught me a valuable lesson. Fixing bubbles after the film is set is nearly impossible. You can try to pop them with a pin, but that just leaves a tiny dark dot that catches the light.
The only real fix is prevention.
What Bubbles Actually Cost You
Think about the money first. A roll of quality dyed film is not cheap, and you will likely need a second roll if you mess up. Then factor in your time, which is even more valuable.
A rushed job that fails means you are doing the same work twice.
Beyond the wallet, there is the frustration factor. Nothing drains your motivation like seeing a shoddy result after all that effort. In my experience, taking the extra ten minutes to prep properly saves you a full afternoon of rework later.
Mastering the Squeegee Technique to Prevent Tint Bubbles
Once your glass is spotless, the real battle begins with the squeegee. I used to think pressing as hard as I could was the answer, but that actually traps air. The trick is a smooth, overlapping stroke pattern that pushes air out to the edges.
Start From the Center and Work Outward
Always start your squeegee strokes from the exact center of the film. Work your way to the outer edges in a fan pattern, just like spreading butter on toast. This forces air and slip solution out the sides instead of trapping it in the middle.
Use the Right Angle and Pressure
Keep your squeegee at a 45-degree angle as you push. That angle creates a wedge that lifts the film slightly and lets air escape ahead of the blade. Apply firm, even pressure, but do not bear down like you are trying to crush a can.
Wrap the Squeegee in a Soft Cloth
Honestly, this was the major improvement for me. Wrap your hard squeegee in a thin, lint-free cloth before the final passes. The fabric absorbs excess moisture and catches tiny particles that would otherwise roll under the film and create bubbles.
You will know you are doing it right when you hear a soft squeaking sound, not a harsh scraping noise. That squeak means the blade is gliding over the film with the perfect amount of slip. If it feels dry, add more solution immediately.
I know the fear of ruining another roll of film after a bad install keeps you up at night. The worry that your car will look unprofessional and the money wasted on failed attempts is real, but the squeegee kit I finally bought for my own garage made every pass smoother and took the guesswork out of my pressure.

- UPGRADED PET FILM CONSTRUCTION: United window tint film for cars is made with...
- DEEP SHADE PRIVACY WITH 15% VLT: The ultra-dark 15% VLT of car window tint...
- 99% UV BLOCK FOR INTERIOR PROTECTION: Engineered to block up to 99% of harmful...
What I Look for When Buying Dyed Window Tint Film
After ruining a few rolls early on, I learned to be picky about which film I bring home. Not all dyed tint is created equal, and the cheap stuff often causes more bubbles than it prevents. Here is what I check before I hand over my money.
Adhesive Quality and Tack
A good film has a tacky adhesive that grabs the glass immediately but still lets you slide it slightly. I test this by peeling back a corner and pressing it down. If it sticks instantly and resists lifting, that is a keeper.
Film Thickness and Flexibility
Thicker film sounds tougher, but it is actually harder to work with on curved windows. I look for a film that bends easily without creasing. My rear window has a tricky curve, and a flexible film conforms to it without trapping air pockets.
Liner Release Ease
Nothing causes bubbles faster than a liner that peels off unevenly. I always peel a small section in the store to see if it comes off in one smooth sheet. If it tears or sticks, I put it back on the shelf.
Shade Consistency Across the Roll
Check that the color is even from edge to edge. I once bought a roll that looked perfect on top but was lighter near the bottom. Inconsistent dye means you will see patchy spots, and you will want to redo the whole window.
The Mistake I See People Make With Dyed Window Tint
I cannot tell you how many times I have watched a friend spray soapy water on the glass and think that is enough prep. They wipe it once with a paper towel and slap the film on. Then they wonder why every window looks like a bubble wrap sample.
The real culprit is almost always leftover dust and tiny fibers hiding in plain sight. Plain soap and water does not remove the invisible grime that builds up on car glass. You need a dedicated slip solution and a razor blade to scrape the glass clean before anything touches it.
I wish someone had told me earlier that the glass prep, not the squeegee work, is where bubbles are born. I spent hours pressing and re-pressing film that never had a chance because I skipped the deep clean. Now I spend ten extra minutes scraping and wiping, and my installs come out flawless every time.
That sinking feeling of peeling up a bubble and watching the film wrinkle beyond repair is something I know too well, and it costs you both time and money every single time. The prep kit I now refuse to install without includes the right scraper and solution to make sure that never happens again.
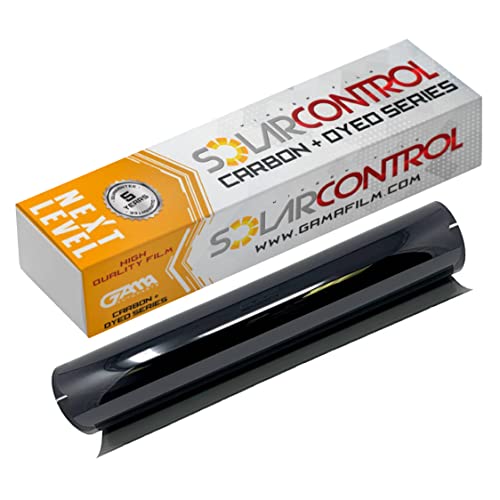
- 99% UV PROTECTION & GLARE REDUCTION: Dyed window tint blocks harmful UV rays...
- DEEP PRIVACY, SMOOTH BLACK LOOK: Non-reflective dyed film gives a clean...
- 20% VLT SHADE, 40" x 100 FT BULK ROLL: Medium-dark 20% VLT, a popular balanced...
The Heat Gun Trick That Saves Your Tint Job
Here is the aha moment that changed everything for me: heat is your best friend during installation. I used to think heat was only for shrinking film on curved windows, but it is also the secret to banishing stubborn bubbles that refuse to move.
When you finish squeegeeing and a few bubbles still linger, grab a heat gun or even a hairdryer on low. Warm the film gently for a few seconds, then press the bubble with your finger or a soft cloth. The heat softens the film and adhesive, letting the air escape that you could not push out cold.
I have saved more than one install this way. A bubble that seemed permanent just melted away with a little warmth and patience. Just keep the heat moving so you do not scorch the film or melt the dyed layer.
One more tip: heat also helps the film settle into deep corners and edges. After your final squeegee pass, warm the perimeter and press the edges down firmly. This prevents the dreaded edge lift that lets air creep back in days later.
My Top Picks for Bubble-Free Dyed Window Tint Installations
I have tested my fair share of film rolls, and a few stand out for how smoothly they go down. These are the ones I trust when I want a clean install without fighting bubbles the whole way.
HIDNY United Universal Black Window Tint Film 35% VLT 1Ply — My Go-To for Easy Handling
HIDNY United is the first roll I reach for when I want a forgiving install. The single-ply construction is thin enough to bend around tricky curves without creasing, which cuts down on trapped air. It is perfect for beginners because the liner peels off smoothly and the adhesive grabs evenly.
The only trade-off is that it is on the lighter side, so it is not ideal if you want maximum privacy.

- MAXIMUM PRIVACY & DEEP BLACK SHADE: This 35% VLT window tint film for cars...
- 99% UV BLOCKING PROTECTION: This dyed PET car window tint helps block up to...
- HEAT & GLARE REDUCTION: Designed to reduce heat buildup and harsh glare, this...
GAMA AUTOPARTS Window Tint 25% VLT 20x100FT Roll — The Best Value for Big Jobs
GAMA AUTOPARTS gives you a massive 100-foot roll, which is a lifesaver if you are doing multiple cars or making mistakes along the way. I love that the 25% shade offers a nice balance of heat rejection and privacy without looking too dark. The film is a bit stiffer than the HIDNY, so you need to be patient with the squeegee, but the results are worth it.
It is my pick when I want professional-looking results on a budget.

- 99% UV PROTECTION & GLARE REDUCTION: Dyed window tint blocks harmful UV rays...
- DEEP PRIVACY, SMOOTH BLACK LOOK: Non-reflective dyed film gives a clean...
- 25% VLT SHADE, 20" x 100 FT BULK ROLL: Medium 25% VLT balanced shade. Cuts to...
Conclusion
Preventing bubbles comes down to clean glass, the right technique, and a little patience with your squeegee. That is the whole secret, and it is easier than you think once you slow down.
Go grab your supplies and clean your rear window right now — it takes five minutes, and it might be the reason your next tint job finally comes out flawless.
Frequently Asked Questions about How Do I Prevent Bubbles in Dyed Car Window Tint Film During Installation?
Why do bubbles keep appearing in my tint even after I squeegee it?
Bubbles usually show up because of leftover dirt or moisture on the glass before the film goes on. Even tiny dust particles invisible to the eye create air pockets that no amount of squeegeeing can remove.
Another common reason is pressing too hard too fast, which traps air instead of pushing it out. Slow down, use a clean slip solution, and work from the center outward to give air a path to escape.
Can I fix a bubble after the tint has already dried?
Once the film has cured, popping a bubble with a pin is possible but risky. You will often see a small dark dot where the needle went through, and the bubble may still not lay flat.
A safer approach is to use a heat gun on low and press the bubble gently with a soft cloth. This softens the adhesive and sometimes lets the air escape without leaving a mark.
What is the best dyed window tint for someone who needs a forgiving install?
If you are new to tinting or working on a car with tricky curved windows, you want a film that bends easily and does not crease. That flexibility is what prevents bubbles from forming in the first place, so it is worth prioritizing over sheer darkness.
I have had great luck with the roll I bought for my own first install because the liner peels cleanly and the film conforms to curves without fighting me. It is forgiving enough that even my mistakes did not ruin the whole job.
- 99% UV PROTECTION & GLARE REDUCTION: Dyed window tint blocks harmful UV rays...
- DEEP PRIVACY, SMOOTH BLACK LOOK: Non-reflective dyed film gives a clean...
- 25% VLT SHADE, 20" x 100 FT BULK ROLL: Medium 25% VLT balanced shade. Cuts to...
Which dyed window tint won’t let me down when I am doing a large vehicle?
Big vehicles mean more glass, more chances for mistakes, and more film wasted if you mess up. You want a roll that gives you plenty of material to work with so one bad cut does not force you to start over completely.
For large jobs, I trust the long roll I stocked up on for my truck because it covers multiple windows without running out. The shade is consistent across the entire roll, which keeps the finished look uniform and professional.
- MAXIMUM PRIVACY & DEEP BLACK SHADE: This 5% VLT window tint film for cars...
- 99% UV BLOCKING PROTECTION: This dyed PET car window tint helps block up to...
- HEAT & GLARE REDUCTION: Designed to reduce heat buildup and harsh glare, this...
How do I clean my windows before applying tint to avoid bubbles?
Start by scraping the glass with a new razor blade to remove any baked-on grime or residue. Then wash it with a dedicated slip solution, not plain dish soap, which can leave a film behind.
Wipe the glass with a lint-free cloth and check it from every angle in bright light. If you see any specks, scrape and wipe again until the surface is completely flawless.
What tools do I need to prevent bubbles during installation?
You need a hard squeegee, a soft squeegee wrapped in fabric, a spray bottle with slip solution, and a heat gun. Each tool plays a specific role in pushing air out and settling the film into place.
Having the right tools makes the process smoother and reduces the urge to rush. I never start an install without all four items ready on my workbench.