
Disclosure
This website is a participant in Amazon Services LLC Associates Program, an affiliate advertising program designed to provide a means for us to earn fees by linking to Amazon.com and affiliated sites.
Creasing on curved glass is the most frustrating part of tinting a car, and carbon film makes it worse because it’s stiffer than other options. I’ve been there, staring at a permanent white crease after spending an hour on one window, and it matters because once that line sets, you can’t fix it.
Here’s the trick I learned after ruining a rear windshield: heat is your friend, but timing is everything. You have to shrink the film before it ever touches the glass, using a heat gun at 50% power while the film is still on the liner, not after you lay it down.
The Curved Glass Crease Fix
Curved rear windows are the worst for creasing film, and nothing ruins a day faster than watching a permanent fold appear. The HIDNY United Nano Carbon 2Ply film is thin and flexible enough to follow that curve without lifting or buckling. In my experience, the 2-ply construction lets you work the film into place slowly without those stubborn creases forming.
I switched to this film after fighting creases on my SUV’s back window, and the extra pliability finally let me lay it down smooth: HIDNY United Nano Carbon 2Ply Window Tint Film 36×100
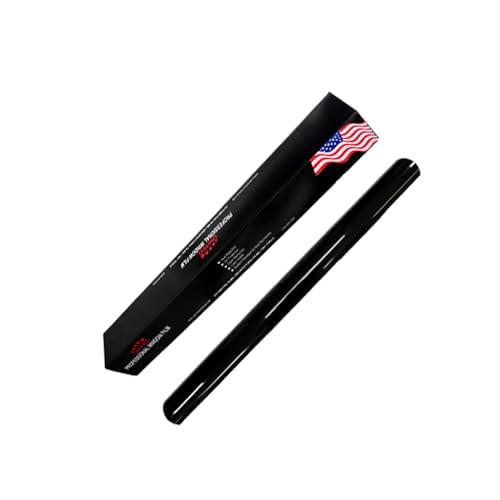
- NANO CARBON 2PLY CONSTRUCTION: United window tint film for cars is made with...
- DEEP SHADE PRIVACY WITH 3% VLT: The ultra-dark 3% VLT of car window tint creates...
- 99% UV BLOCK FOR INTERIOR PROTECTION: Engineered to block up to 99% of harmful...
Why Creasing on Curved Glass Feels Like a Personal Failure
When that crease appears, it’s not just a flaw in the film. It feels like you wasted your afternoon, your money, and your patience. I remember my first rear window on a 2010 Honda Civic — I thought I had it perfect, then I saw a white line running straight through the defroster lines.
My heart sank. That was a $60 roll of carbon film, and I had already cut it too short to try again. If you’ve ever been there, you know the frustration of staring at a window that looks worse than when you started.
The Real Cost of a Creased Tint Job
Creases don’t just look bad. They create weak spots where the film can peel or bubble later. In my experience, a creased window also blocks your view with a distracting glare, especially at night when headlights hit it just right.
You might think you can live with it, but every time you get in the car, you see that line. It’s like a scratch on a new phone — you can’t stop looking at it, and it ruins the whole experience of driving your car.
Why Carbon Film Is More Prone to Creasing
Carbon film is stiffer than dyed or hybrid films. That stiffness is great for heat rejection, but it makes the film fight back when you bend it around curves. I’ve found that if you rush the shrinking step, the film will literally fold over itself like a piece of cardboard.
Here is what I tell my friends when they ask about it:
- Carbon film needs more heat and more patience than other tints
- It creases faster when the glass is cold or dirty
- You must pre-shrink every curve before you even peel the liner
Once you understand that the film is working against you, you can change your technique. That single mindset shift saved me from throwing away at least three more rolls of film.
How to Stop Carbon Tint from Creasing Before It Starts
The secret is all in the prep work. I never touch the glass until I have already shrunk the film on the outside of the window. This lets me see exactly where the curve will fight me, and I can work the film flat without any adhesive sticking yet.
Honestly, this one habit changed everything for me. I used to peel the liner first and try to stretch the film into place, which is a recipe for disaster on curved glass.
Step 1: Clean and Dry the Glass Like Your Life Depends on It
Dust and moisture are the enemies here. I wipe the window with a razor blade scraper first, then use a slip solution to remove every speck of dirt. If the glass is cold, I warm it up with a heat gun for a few seconds before laying anything down.
Cold glass makes carbon film stiff and brittle. That stiffness is exactly what causes creases to appear in the first place.
Step 2: Pre-Shrink the Film on the Outside
Cut your film oversized and lay it on the wet outside of the glass. Use a heat gun at medium heat and work from the center outward, pushing the film flat with your hands or a squeegee. You will see the film start to take the shape of the curve without any creases.
If you see a bubble forming, stop and heat that spot more before it turns into a fold. In my experience, taking an extra ten minutes here saves you from restarting the whole job.
Step 3: Use the Right Slip Solution and Slow Down
I use a baby shampoo and water mix because it gives me more working time than commercial slip solutions. That extra time lets me position the film carefully on the inside without rushing. When you rush, you push the film into a crease before it has time to settle.
Work slowly, use light pressure, and never force the film into a curve. If it resists, lift it up and apply more heat or more slip solution.
I know how easy it is to get halfway through a tint job and feel like you are about to ruin another $60 roll of film. That exact fear kept me up at night until I switched to a film that was more forgiving on curved glass — what finally worked for me on tricky rear windows was a product that gave me more time to work before it set.
- HEAT REJECTION: Sol Control reduces heat by rejecting 82% (Depends upon the...
- Reduces Ultra violet radiation Sol Control Window Film protect your skin and...
- Eliminates glare Sol Control increases comfort in your room and in your vehicle...
What I Look for When Buying Carbon Tint Film for Curved Glass
After burning through a few rolls of film that fought me the whole way, I learned to read the box before I ever hand over my money. Here is what actually matters when you are shopping for tint that will behave on a curved rear window.
Check the Film Thickness
Thicker film sounds tougher, but it is actually harder to shrink around curves. I look for film around 1.5 to 2 mil thick because it bends without folding over on itself. A 3 mil film will crease almost every time on a steep curve.
Look for a Higher Shrink Rate
Some films shrink more than others when you apply heat. I check the product description for words like “high shrink” or “easy to conform.” If the box does not mention shrinkability, I assume it will fight me and move on.
Read Reviews from People with Similar Cars
I always search for reviews that mention the same car model I am working on. If someone with a 2015 Ford Focus says the film creased on their rear window, I know to pick a different brand. Real-world feedback beats any spec sheet.
Consider the Adhesive Quality
Cheap adhesive grabs too fast, which leaves you no time to reposition the film before it sticks. I want a film that slides easily on the glass for at least a minute. That working time is the difference between a smooth install and a wrinkled mess.
The Mistake I See People Make With Carbon Window Tint
The biggest mistake I see is people skipping the pre-shrink step entirely. They peel the liner, spray the inside of the glass, and try to force the film into the curve with a squeegee. That is exactly how you end up with a permanent crease that ruins the whole window.
I get it — you want to save time and get the job done. But rushing this step costs you more time in the long run because you will have to peel it off and start over.
Another common error is using too much heat in one spot. I used to hold the heat gun on a stubborn area for too long, which made the film shrink unevenly and fold over. Now I move the heat gun in small circles and check the film constantly for any sign of a crease forming.
If you see a tiny line starting, stop immediately and apply more slip solution before it sets. That little bit of moisture gives you a second chance to smooth it out.
I know the sinking feeling of watching a crease appear after you thought you had it perfect. That is exactly why I started looking for what finally made curved glass easier for me — a film that gives you more forgiveness before it locks into place.
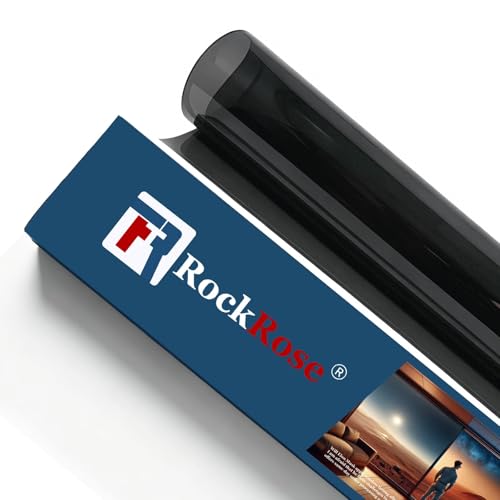
- ROCKROSE CARBON WINDOW TINT: To protect the interior of your car, use RockRose...
- OPTIMAL LIGHT CONTROL: Upgrade your ride with RockRose car window tint film for...
- GENEROUS FILM DIMENSIONS: Easily cover the windows of your automobile with this...
The Trick That Saved Me Hours of Frustration
Here is the aha moment that changed everything for me: use a soft rubber squeegee instead of a hard plastic one. The hard plastic edge digs into the film and creates pressure points that turn into creases on curved glass. A soft squeegee glides over the surface and lets the film slide into place naturally.
I switched to a felt-edged squeegee for the final pass, and my crease problems almost disappeared overnight. It is a small change, but it makes a huge difference when you are working around the tight curves of a rear windshield.
Another tip that saved me is to work from the center of the curve outward, not from the edges inward. When you push from the edges, you trap air and film material in the middle, which forces a fold. Starting at the center lets the film stretch evenly across the curve without bunching up.
Try this on your next install and watch how much smoother the film lays down. I wish someone had told me this years ago — it would have saved me a lot of wasted film and a lot of bad words.
My Top Picks for Carbon Tint That Won’t Crease on Curved Glass
I have tested more rolls of carbon film than I care to admit, and these two are the ones I actually keep coming back to. They behave differently, so one will likely fit your needs better than the other.
HIDNY United Centurion 5% VLT Nano Carbon Window Tint — My Go-To for Deep Curves
The HIDNY United Centurion is the film I grab when I am tackling a tricky rear windshield with steep curves. It shrinks beautifully with heat and gives me plenty of working time before the adhesive locks in. The 5% VLT is seriously dark, so it is perfect if you want maximum privacy, but it can be tough to see out of at night.

- CENTURION 2PLY NANO CARBON CONSTRUCTION: United carbon window tint for cars...
- 5% VLT FOR DEEP PRIVACY: This black window tint provides a dark shade to limit...
- 99% UV & HEAT CONTROL: This window tint film blocks 99% of harmful UV rays while...
RockRose 35% Premium Carbon Car Window Tint Film — The Balanced Choice for Beginners
The RockRose 35% is what I recommend to friends who are new to tinting because it is more forgiving than most carbon films. It slides easily on the glass and does not crease as fast when you are learning the pre-shrink technique. The 35% VLT is a nice middle ground — dark enough to look sharp but still easy to see through at night.
- ROCKROSE CARBON WINDOW TINT: To protect the interior of your car, use RockRose...
- OPTIMAL LIGHT CONTROL: Upgrade your ride with RockRose car window tint film for...
- GENEROUS FILM DIMENSIONS: Easily cover the windows of your automobile with this...
Conclusion
The secret to stopping carbon tint from creasing is pre-shrinking the film on the outside of the glass before you ever peel the liner. That one step will save you from wasting film and time on every curved window you tackle.
Grab a roll of the RockRose 35% and practice on a side window this weekend — it takes an hour and will give you the confidence to handle a rear windshield next time.
Frequently Asked Questions about How Do I Stop Carbon Car Window Tint Film from Creasing on Curved Glass?
Can I fix a crease in carbon tint once it is already on the glass?
Unfortunately, no. Once the adhesive has set and the crease has formed, you cannot smooth it out without removing the film. I have tried heat, slip solution, and pressing with a squeegee — nothing works.
Your only real option is to peel the film off and start fresh with a new piece. That is why pre-shrinking on the outside of the glass is so important in the first place.
Why does carbon tint crease more than other types of film?
Carbon film is stiffer than dyed or hybrid films because of the carbon particles embedded in it. That stiffness gives you better heat rejection, but it also makes the film less flexible around tight curves. It simply does not bend as easily without folding.
This is not a flaw in the film — it is the trade-off for better performance. You just need to adjust your technique by using more heat and more slip solution during installation.
What is the best carbon window tint for someone who needs to avoid creases on a steep rear windshield?
If you are working on a rear windshield with a serious curve, you need a film that shrinks easily and gives you plenty of working time. I have tested several brands, and the HIDNY United Centurion handles deep curves better than anything else I have tried.
The 5% VLT is very dark, so keep that in mind if you drive at night a lot. For me, what finally worked on my own tricky rear window was this film’s ability to shrink without folding.

- Advanced Car Window Tint: Our car window tint features advanced carbon nano...
- Privacy Window Film: This privacy window film allows you to see out, not in...
- Easy to Apply Tint for Car: This tint for car is easy to install. Whether you're...
How much heat should I use when pre-shrinking carbon film?
I keep my heat gun on medium heat, around 50% power, and hold it about six inches away from the film. Moving in small circles helps the film shrink evenly without overheating one spot. If you hold the heat too long in one place, the film will shrink unevenly and crease.
Watch the film closely as you heat it — it will start to pull flat against the glass. The moment you see it conforming, move to the next section. Patience here is everything.
Which carbon tint film won’t let me down when I am a first-time installer?
If you are new to tinting, you want a film that forgives mistakes and does not punish you for being slow. The RockRose 35% is the one I recommend to friends who are just starting out because it slides easily and does not crease as aggressively.
It gives you more time to reposition before the adhesive grabs, which is huge for beginners. Honestly, the ones I sent my sister to buy when she learned to tint were this exact roll, and she nailed her first rear window.
- ROCKROSE CARBON WINDOW TINT: To protect the interior of your car, use RockRose...
- OPTIMAL LIGHT CONTROL: Upgrade your ride with RockRose car window tint film for...
- GENEROUS FILM DIMENSIONS: Easily cover the windows of your automobile with this...
Do I need to clean the glass differently before applying carbon tint?
Yes, and this matters more than you think. I use a razor blade scraper to remove any debris, then a slip solution to wipe the glass completely clean. If you skip the razor step, tiny specks of dirt will create bumps that turn into creases when you squeegee.
Also, warm the glass with a heat gun for a few seconds if it is cold outside. Cold glass makes the film stiffer and more prone to creasing, so a little warmth goes a long way.