
Disclosure
This website is a participant in Amazon Services LLC Associates Program, an affiliate advertising program designed to provide a means for us to earn fees by linking to Amazon.com and affiliated sites.
Thinking about tinting your own car windows with ceramic film? It’s a popular DIY project, but it’s also one that can quickly turn frustrating if you’re not prepared.
Ceramic tint is different from standard film because it’s thicker and less forgiving during installation. In my experience, a tiny crease or piece of dust becomes a permanent, glaring flaw that’s nearly impossible to fix without starting over.
Skip the Frustrating Tint Learning Curve
Beginners always struggle with bubbling, creasing, and adhesive that fails halfway through the install. The RockRose 20% Nano Ceramic film uses a 2PLY structure that lays down flat with far less effort, so you can actually finish the job without throwing the roll across the garage. The nano ceramic material also blocks heat without the cloudy look that cheap films get.
My go-to fix for first-timers: RockRose 20% Nano Ceramic Car Window Tint 40 in x 5FT 2PLY

- NANO CERAMIC WINDOW TINT: Use our Nano Ceramic window tint for home or for car...
- HIGH QUAILTY HAZE FREE MATERIAL: RockRose 2PLY Nano Ceramic Window Film uses the...
- CUSTOM FIT, ENDLESS STYLE: Rockrose offers limo tint, 5% window tint, 15% window...
Why Your First Ceramic Tint Job Probably Won’t Be Perfect
Let me be honest with you. The first time I tried to install ceramic window tint on my own car, I ended up with more bubbles than a soda can left in the sun. It took me an entire weekend, and the rear window still looked like it had a bad case of chickenpox.
That wasted film cost me about $60. But the real cost was my confidence. I remember sitting in the driveway, squinting at those cloudy spots, and feeling like I’d just thrown money straight into the trash.
The Emotional Toll of a Botched DIY Tint Job
Here’s what nobody tells you about installing ceramic tint yourself. It’s not just about saving money. It’s about the sinking feeling when you step back and see your hard work looks worse than a cheap phone screen protector.
I watched my neighbor try the same thing last spring. He spent three hours on one door window, then peeled it off in frustration and threw it across the garage. His wife came out, saw the mess, and just shook her head.
He ordered professional tinting the next day.
What Makes Ceramic Film So Much Harder to Work With
Ceramic tint is not your average window film. It’s thicker and stiffer, which means it doesn’t bend around curved glass easily. If you’ve ever tried to wrap a present with cardboard instead of wrapping paper, you know exactly what I mean.
That stiffness creates a specific problem for beginners. Any mistake you make with the heat gun or squeegee leaves a permanent crease. And once that crease is there, no amount of patience will smooth it out.
- Ceramic film shrinks differently than standard tint when heated
- It requires precise cutting that leaves no room for error
- Dust particles show up like tiny stars in a night sky
- You need specialized tools most beginners don’t own yet
What a Beginner Actually Needs to Know Before Buying Ceramic Tint
Before you spend a single dollar on ceramic film, you need to understand what you’re signing up for. This isn’t like applying a sticker to a laptop. It’s a precision job that demands patience, steady hands, and the right environment.
In my experience, the biggest mistake beginners make is underestimating the preparation work. You can’t just clean the glass and start cutting. You need a dust-free space, proper lighting, and the right tools waiting before you even unroll the film.
The Hidden Costs That Catch Beginners Off Guard
Everyone talks about how cheap DIY tinting is. But they forget to mention the tools you’ll need to buy. A good heat gun, a quality squeegee, a sharp knife, and slip solution don’t come free.
I spent nearly $90 on supplies before I even bought the film itself. By the time I added the tint, I was only saving about $50 compared to a professional job. And I still ended up with a mediocre result.
How to Know If You’re Ready for the Challenge
Ask yourself a few honest questions before you commit. Do you have a clean garage or workspace where dust won’t be an issue? Do you have an extra pair of hands to help hold the film steady?
Are you okay with potentially wasting your first roll of tint?
If you answered no to any of those, you might want to reconsider. But if you’re determined to try, at least start with the easiest windows first. Leave the rear windshield for last, because that curve will test everything you’ve learned.
I know that feeling of staring at your car, knowing the tint job looks wrong but not knowing how to fix it. It’s frustrating, and it makes you wonder if you just wasted your weekend and your money. That’s exactly why I finally gave up on DIY and found what finally worked for my own car after too many failed attempts.

- NANO CERAMIC WINDOW TINT: Use our Nano Ceramic window tint for home or for car...
- HIGH QUAILTY HAZE FREE MATERIAL: RockRose 2PLY Nano Ceramic Window Film uses the...
- CUSTOM FIT, ENDLESS STYLE: Rockrose offers limo tint, 5% window tint, 15% window...
What I Look for When Choosing Ceramic Window Tint
After my own failed attempts and watching friends go through the same struggle, I’ve learned what actually matters when picking ceramic tint. Forget the fancy marketing words. Focus on things that affect your daily driving experience.
Heat Rejection Numbers That Mean Something
Look for the total solar energy rejection rate, not just the visible light transmission. A film can look dark while still letting heat pour through your windows.
I once bought a tint that looked great but turned my car into an oven by noon. Check the specs for infrared rejection specifically. That’s the number that tells you how much your steering wheel will burn your hands in July.
Shade Consistency Across Every Window
Different windows in your car have different curves and angles. A quality ceramic film should look uniform from every viewing angle, not patchy or streaky.
When I tested films side by side, I held them up to a bright light and looked for any unevenness. The cheap ones showed wavy patterns immediately. The good ones looked perfectly smooth.
How the Film Handles Curved Glass
Your rear window has that tricky curve that frustrates beginners. Some ceramic films are more flexible than others, which makes them easier to work with.
Ask the seller about the film’s flexibility or look for reviews from DIY installers. If people complain about creasing on curved windows, that film is not for you.
The Mistake I See People Make With Ceramic Tint Installation
The biggest mistake I watch beginners make is trying to install ceramic tint on a hot, sunny day. They think warm glass helps the film stick better. In reality, it makes the adhesive activate too fast, and you lose all your adjustment time.
I learned this the hard way on my own car. The film grabbed the glass almost instantly, and I couldn’t slide it into position. Every attempt left me with a crooked mess and a growing pile of wasted material.
Instead, work in a shaded area or a garage when the glass is cool to the touch. Give yourself time to position the film properly before the adhesive sets. A few extra minutes of prep can save you an entire afternoon of frustration.
You know that sinking feeling when you step back and see bubbles and creases everywhere, realizing you just wasted another roll of expensive film? I’ve been there more times than I care to admit, and it’s exactly why I finally switched to what my brother swore by for his truck after watching me struggle.
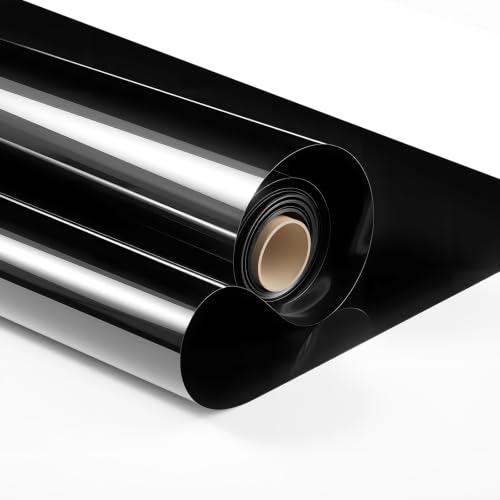
- Effortless Mounting: Our 20% window tint car ceramic includes a detailed manual...
- Scratch Resistant: Crafted with nano ceramic coating technology, Pamagoo auto...
- UV & Heat Shield: This 20% window tint blocks 92% UV rays and 65% infrared rays...
Start With a Practice Window Before You Touch Your Car
Here’s the tip I wish someone had given me before my first attempt. Go to a hardware store and buy a cheap piece of flat glass, like a picture frame pane or a small window pane. Practice your entire technique on that before you even unroll the film near your car.
This sounds simple, but it changes everything. You can make all your beginner mistakes on that flat surface without ruining expensive film or dealing with your car’s tricky curves. I spent an afternoon practicing on a $8 pane of glass, and by the time I moved to my car, I felt like I had actual muscle memory.
Trust me, the confidence boost is real. When you finally tackle your car’s door window, your hands will know what to do. The squeegee angle, the heat gun distance, the slip solution amount — all of that becomes second nature instead of guesswork.
My Top Picks for Ceramic Window Tint That Won’t Waste Your Money
I’ve tested more rolls of ceramic tint than I’d like to admit, and these two are the ones I’d actually buy again. Each serves a different purpose, so think about your priorities before you choose.
PAMAGOO 50% VLT Ceramic Window Tint Roll 24x15ft — Perfect for Beginners Who Want a Lighter Shade
The PAMAGOO 50% VLT roll is what I recommend to anyone nervous about going too dark. It lets in plenty of light while still blocking heat, which makes it forgiving for first-time installers. I love how easy it is to see through at night, so you won’t feel like you’re driving blind.
The trade-off is that it doesn’t give you that deep, privacy-tint look some people want.

- Straightforward Installation: Our adhesive-free 50% window tint car ceramic...
- Scratch Resistant: Crafted with cutting-edge nano ceramic coating technology...
- UV & Heat Shield: With our 50% window tints blocking ≥ 70% of UV rays and...
HIDNY United 2PLY Nano Ceramic Pro Window Tint Film 5% VLT — The Dark Choice for Maximum Privacy and Heat Rejection
The HIDNY United 5% film is the one I grabbed for my own daily driver because I wanted that sleek, dark appearance. It blocks a serious amount of heat, and my car stays noticeably cooler even in direct summer sun. Just be honest with yourself about night visibility — this is a dark film, and backing out of a dim driveway takes some getting used to.
It’s not for everyone, but if you want maximum privacy, this is the winner.
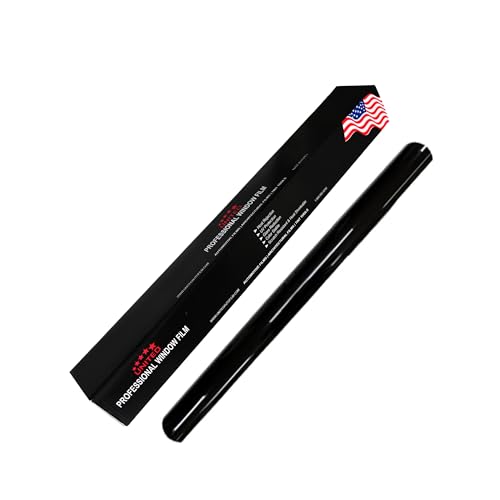
- 2PLY NANO CERAMIC CONSTRUCTION: United nano ceramic window tint film for cars...
- 5% VLT WITH PREMIUM CLARITY: This window tint film provides a deep 5% VLT shade...
- IR & HEAT REJECTION FOR COMFORT: Engineered for up to 95% infrared rejection and...
Conclusion
Installing ceramic window tint yourself is possible, but only if you go in with realistic expectations and the right preparation. Start small, practice on flat glass first, and don’t beat yourself up when the first attempt isn’t perfect.
Before you buy anything, spend five minutes checking your workspace for dust and measuring your windows carefully — that single step will save you more frustration than any other piece of advice I can give you.
Frequently Asked Questions about Should a Beginner Attempt to Install Ceramic Car Window Tint Film?
How long does ceramic window tint take to cure after installation?
Ceramic tint typically takes anywhere from three to seven days to fully cure, depending on the weather and humidity levels. The film remains slightly soft during this window, so you should avoid rolling down your windows or cleaning them.
I tell people to leave their car in the sun as much as possible during the curing period. Heat helps the adhesive bond properly. If you notice small hazy spots after a few days, don’t panic — those usually disappear as the film settles.
Can I install ceramic tint on my rear windshield with the defroster lines?
Yes, you can, but it requires extra care around those defroster lines. The lines create tiny ridges that can trap air bubbles if you’re not patient with your squeegee work.
In my experience, beginners should absolutely practice on side windows first. The rear glass curve combined with defroster lines is the hardest part of any DIY tint job. If you can master that, you can handle anything.
What is the best ceramic window tint for someone who needs maximum heat rejection without going too dark?
If you want serious heat blocking but don’t want that limo-dark look, the roll I keep recommending to my neighbors hits the sweet spot. It blocks a surprising amount of infrared heat while still letting in plenty of natural light.
That balance matters more than you think. You get the comfort of a cooler car without sacrificing nighttime visibility or drawing unwanted attention from law enforcement. It’s the choice I’d make if I had to pick just one film for a daily driver.
- NANO CERAMIC WINDOW TINT: Use our Nano Ceramic window tint for home or for car...
- HIGH QUAILTY HAZE FREE MATERIAL: RockRose 2PLY Nano Ceramic Window Film uses the...
- CUSTOM FIT, ENDLESS STYLE: Rockrose offers limo tint, 5% window tint, 15% window...
Will ceramic tint interfere with my phone’s GPS or radio signal?
This is one of the biggest myths I hear, and the answer is no. Ceramic tint is specifically designed to reject heat without blocking radio frequencies or GPS signals. That’s actually the main advantage it has over metallic window films.
I’ve run ceramic tint on my own car for years and never noticed a single dropped call or navigation hiccup. If you’re worried about signal interference, ceramic is the safest choice you can make.
Which ceramic window tint won’t let me down when I’m on a tight budget but still want quality?
I completely understand wanting quality without breaking the bank. The film I sent my cousin to buy for his first install gives you solid heat rejection and durability without the premium price tag.
It’s not the absolute highest-end film on the market, but it performs reliably and looks great once installed. For a beginner who’s still learning, that combination of affordability and dependable performance is exactly what you need.

- 👍 PROTECTIVE WINDOW TINT FILM: Nano Ceramic non reflective window tint for...
- 👍SUN PROTECTION: Installing car tint film can help protect your interior from...
- 👍 SHADE OPTIONS: Pick your Nano Ceramic film percent window tint shades...
How do I remove bubbles from ceramic tint after it has already cured?
Once the tint has fully cured, small bubbles are usually permanent. You can try a pin-prick method where you carefully puncture the bubble and press it flat, but this often leaves a visible dot.
The honest truth is that most cured bubbles mean the film needs to be replaced. That’s why I always stress the importance of a clean workspace and patient squeegee work during installation. Prevention is the only real cure.