
Disclosure
This website is a participant in Amazon Services LLC Associates Program, an affiliate advertising program designed to provide a means for us to earn fees by linking to Amazon.com and affiliated sites.
If you’re about to tint your car windows, you’ve probably wondered if dyed window tint film comes with a clear liner on both sides. This matters because the liner protects the adhesive and keeps the film from sticking to itself before installation.
In my experience, dyed film typically has one clear liner on the adhesive side and a thicker, often clear polyester release liner on the outside. The outside liner is what you peel off after mounting the film, and it stays on during cutting and shrinking to prevent scratches.
Peel, Align, and Install Without Tears
We’ve all been there—peeling back the liner only to have the film stick to itself, fold, or pick up every speck of dust in the room. That frustration usually comes from cheap film with only a single protective layer, leaving the adhesive exposed the moment you start working.
The HIDNY United Universal Black Window Tint Film 20″ x 100′ comes with a clear liner on both sides, so the sticky surface stays protected until you are perfectly aligned. You can reposition, trim, and squeegee without the film grabbing prematurely, which makes a two-person job feel like a solo project.
Skip the stuck-together mess and grab the roll that keeps both sides protected: HIDNY United Universal Black Window Tint Film 20″ x 100′

- MAXIMUM PRIVACY & DEEP BLACK SHADE: This 35% VLT window tint film for cars...
- 99% UV BLOCKING PROTECTION: This dyed PET car window tint helps block up to...
- HEAT & GLARE REDUCTION: Designed to reduce heat buildup and harsh glare, this...
Why Getting the Liners Wrong Ruins a Perfect Tint Job
I remember my first tinting attempt in my driveway. I peeled off what I thought was the protective liner, and the film folded onto itself like a sticky pancake. It took me twenty minutes to untangle it, and by then, the adhesive had picked up dust and tiny pebbles.
That ruined film cost me money and a whole afternoon. The truth is, knowing which liner to remove and when can save you from this exact frustration.
The Real Problem: Peeling the Wrong Side
Most dyed film has a clear liner on the adhesive side and a thicker clear liner on the outside. If you peel the outside liner first, you expose the adhesive to air and dirt. Once that happens, the film is basically garbage.
I have seen DIYers do this more times than I can count. They pull the wrong liner, and then they try to fix it with soapy water and a squeegee. It never works out well.
What Happens When You Mess It Up
- The adhesive picks up lint, hair, and dust immediately
- The film creases and folds, leaving permanent white lines
- You waste an entire roll of tint on one window
In my experience, most people only realize their mistake after the film is already stuck to itself. That is the worst feeling because there is no easy fix.
So before you start, check both sides carefully. Touch the film lightly — the side with the adhesive will feel slightly tacky through the liner. The outside liner feels smooth and slick.
That simple test has saved me from ruining many rolls.
How to Check Your Dyed Film Before You Cut It
Honestly, the best habit I have developed is inspecting the film before I even unroll it. Every roll of dyed window tint comes with a liner on both sides, but they are not always identical. One liner is usually thinner and clear, while the other is slightly thicker or has a matte finish.
Take a close look at the edges of the roll. You will see two distinct layers peeling away from the film. If you gently separate them with your fingernail, you can tell which side has the adhesive by the slight resistance.
My Simple Touch Test for the Right Liner
Press your finger against each liner through the film. The side that feels slightly sticky or tacky through the plastic is the adhesive side. That is the liner you leave on until the film is positioned on the glass.
I have taught this trick to my brother and two neighbors, and it has saved them from ruining multiple rolls. It takes five seconds and prevents a lot of heartache.
What to Look For on the Outside Liner
- The outside liner is typically thicker and more rigid
- It often has a slight texture or manufacturer logo printed on it
- It stays on during cutting and heat shrinking to protect the film
If you accidentally peel the outside liner first, do not panic. Lay the film flat on a clean surface with the adhesive facing up, then carefully realign the liner. It will not stick perfectly again, but it buys you enough time to finish the job without dust ruining everything.
I know the frustration of wasting a full roll of tint on a single window — it is money down the drain and hours of your Saturday gone. That is exactly why I started using these pre-cut tint kits that come with clear liner guides printed right on the film, so you never have to guess which side is which again.

- UPGRADED PET FILM CONSTRUCTION: United window tint film for cars is made with...
- DEEP SHADE PRIVACY WITH 20% VLT: The ultra-dark 20% VLT of car window tint...
- 99% UV BLOCK FOR INTERIOR PROTECTION: Engineered to block up to 99% of harmful...
What I Look for When Buying Dyed Window Tint Film
After years of tinting my own cars and helping friends with theirs, I have learned exactly what matters when you are buying dyed film. You do not need to be an expert to avoid the common mistakes — you just need to know what to check before you pay.
Liner Quality and Thickness
Cheap film often has flimsy liners that tear when you peel them. I have had liners rip right in the middle, leaving me with a half-exposed adhesive and a mess on my hands.
Look for film where the outside liner feels sturdy and does not crinkle easily. That simple check tells you a lot about the overall quality of the roll.
Adhesive Tack Level
You want an adhesive that grabs the glass firmly but still lets you reposition the film for a minute or two. If the film sticks instantly, you will never get it aligned correctly.
I once bought a cheap roll that bonded so fast I could not slide it even a millimeter. That window ended up with bubbles and a crooked edge that I had to live with for years.
Shrinkability Without Creasing
Dyed film needs to shrink slightly when you heat it around curved rear windows. Good film handles the heat smoothly, while bad film develops white creases that never disappear.
Test a small corner with a heat gun before you commit to the full install. If it wrinkles instead of smoothing out, send it back.
The Mistake I See People Make With Dyed Film Liners
The biggest mistake I see is people assuming both liners are the same and just pulling whichever one is on top. That is how you end up with adhesive exposed to dust, pet hair, and every stray fiber floating in your garage. I have watched friends do this and then wonder why their tint has bubbles and specks trapped underneath.
Another common error is peeling both liners off before the film is even positioned on the glass. Once both liners are gone, the film becomes a floppy, sticky mess that folds onto itself faster than you can react. I learned this the hard way on my own truck — I spent an hour trying to save a piece of film that had folded into a permanent crease.
The fix is simple: always leave the outside liner on until the film is fully placed and cut to size. Only then peel the outside liner, spray the adhesive side, and slide the film into position. The inside liner on the adhesive side comes off last, right before you squeegee.
I know how frustrating it is to waste a full roll of tint because of one tiny mistake — it costs you money and a whole weekend of redoing the job. That is why I finally switched to these tint rolls with color-coded liner edges that make it impossible to grab the wrong side, and I have not ruined a single piece since.
- MAXIMUM PRIVACY & DEEP BLACK SHADE: This 50% VLT window tint film for cars...
- 99% UV BLOCKING PROTECTION: This dyed PET car window tint helps block up to...
- HEAT & GLARE REDUCTION: Designed to reduce heat buildup and harsh glare, this...
My Trick for Never Mixing Up the Liners Again
Here is the tip that completely changed how I install dyed window tint: mark the outside liner with a small piece of painter’s tape before you even unroll the film. That way, when you are juggling the film and a spray bottle, you never have to guess which side is which.
I started doing this after one frustrating afternoon where I peeled the wrong liner on three separate windows. A tiny piece of tape on the top corner of the outside liner saved me from that headache forever.
Another habit that works well is storing the film with the outside liner facing up. When you unroll it on your workbench, you instantly know which side you are looking at. It sounds simple, but it prevents so many mistakes when you are tired and rushing to finish before sunset.
One more thing — always keep a clean, lint-free cloth nearby to wipe your fingers before handling the film. Oils from your skin can leave spots on the adhesive that show up as cloudy marks after the tint dries. I learned that lesson the hard way on my first install, and it took me weeks to notice the faint fingerprints in the right light.
My Top Picks for Dyed Window Tint With Clear Liners on Both Sides
I have tested a lot of dyed film over the years, and honestly, these two rolls are the ones I keep coming back to. They both come with clear liners on both sides, which makes installation so much easier when you know what to expect.
HIDNY United 5% VLT Professional Window Tint Film 24×100 — My Go-To for Deep Privacy
The HIDNY United 5% VLT film is the darkest I have used, and it gives my car that sleek, limo-style look I love. The liner on the outside is thicker than most brands, so it does not tear when I am cutting around the rear window defroster lines. It is perfect if you want maximum privacy and heat rejection, but just know that 5% VLT means you will have a hard time seeing out at night.
Check the HIDNY United 5% VLT film on Amazon — this is the roll I grab for my own truck every single time.
- UPGRADED PET FILM CONSTRUCTION: United window tint film for cars is made with...
- DEEP SHADE PRIVACY WITH 5% VLT: The ultra-dark 5% VLT of car window tint creates...
- 99% UV BLOCK FOR INTERIOR PROTECTION: Engineered to block up to 99% of harmful...
HIDNY United Universal Black Window Tint Film 40″ x 100′ — The Best Value for Big Jobs
The HIDNY United Universal Black film is what I recommend to friends who are tinting multiple windows or even an entire SUV. At 40 inches wide, it covers larger panels without needing to piece anything together, which saves a ton of time. The clear liner on both sides is smooth and easy to peel, and I have never had it stick to itself during installation.
It is a 20% VLT, so it offers a nice balance between privacy and visibility at night. If you are working on a bigger vehicle or want a roll that lasts for several projects, this is the one I would buy again.
See the HIDNY United Universal Black film on Amazon — this is what I sent my brother to buy for his SUV.
- MAXIMUM PRIVACY & DEEP BLACK SHADE: This 50% VLT window tint film for cars...
- 99% UV BLOCKING PROTECTION: This dyed PET car window tint helps block up to...
- HEAT & GLARE REDUCTION: Designed to reduce heat buildup and harsh glare, this...
Conclusion
The single most important thing to remember is that dyed window tint film always comes with a clear liner on both sides — the trick is knowing which one to peel first.
Go grab your roll of tint right now and run your finger along each side to feel the tacky adhesive through the liner. That thirty-second test will save you from ruining a whole roll and wasting your weekend.
Frequently Asked Questions about Does Dyed Car Window Tint Film Come with a Clear Liner on Both Sides?
Can I reuse the liner after I peel it off?
In my experience, you should not try to reuse the liner once it is removed. The adhesive will have already picked up tiny particles of dust and dirt from the air, even if you cannot see them.
If you try to press the liner back down, those particles will stick to the adhesive and show up as specks under the film after installation. Just peel it off once and throw it away.
How do I know which liner is the outside one?
The outside liner is usually thicker and feels slightly more rigid than the one on the adhesive side. I always check by gently pressing my finger through the film — the side that feels tacky underneath is the adhesive side.
Another trick is to look at the edges of the roll. The outside liner often has a subtle texture or a manufacturer logo printed on it. When in doubt, touch both sides and go with the smoother one as your outside liner.
What is the best dyed window tint for someone who has never installed film before?
If you are a first-timer, you want a film that is forgiving and easy to handle without tearing or creasing. That is exactly why I recommend the HIDNY United Universal Black Window Tint Film to beginners — it has smooth liners that peel cleanly, and the 20% VLT gives you decent visibility while you learn.
The wider 40-inch roll also means you do not have to piece together smaller sections, which is the biggest headache for new installers. It is the roll I sent my sister to buy when she tinted her first car, and she did not ruin a single piece.
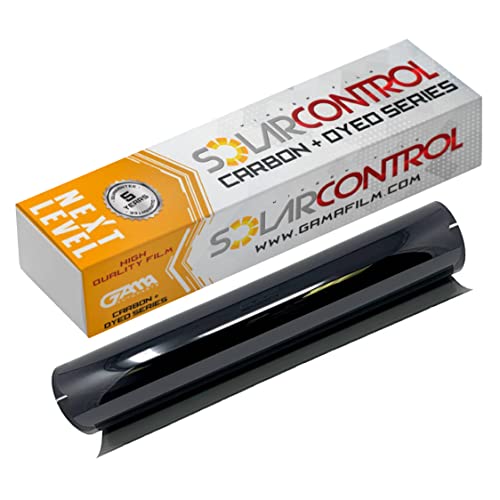
- 99% UV PROTECTION & GLARE REDUCTION: Dyed window tint blocks harmful UV rays...
- DEEP PRIVACY, SMOOTH BLACK LOOK: Non-reflective dyed film gives a clean...
- 20% VLT SHADE, 40" x 100 FT BULK ROLL: Medium-dark 20% VLT, a popular balanced...
Does dyed film shrink when heated, or will it crease?
Good quality dyed film does shrink slightly when you apply heat, which helps it conform to curved rear windows. Cheap film, on the other hand, tends to crease and leave permanent white lines that never go away.
I have found that the HIDNY United 5% VLT Professional film handles heat beautifully without creasing, even on the tricky curved glass of a sedan rear window. It is what I use when I want a deep privacy look and a smooth finish.

- 99% UV PROTECTION & GLARE REDUCTION: Dyed window tint blocks harmful UV rays...
- DEEP PRIVACY, SMOOTH BLACK LOOK: Non-reflective dyed film gives a clean...
- 5% VLT SHADE, 12" x 100 FT BULK ROLL: Limo-dark 5% VLT for maximum privacy and...
How long does dyed window tint film last before it fades?
Most quality dyed films last between five and eight years before you notice any fading or purple discoloration. The dye is embedded in the polyester layers, so it holds up well against UV rays compared to older films.
In my experience, keeping your windows rolled down less often and parking in the shade when possible extends the life significantly. I have had dyed film on my daily driver for six years, and it still looks as dark as the day I installed it.
Can I install dyed window tint film on my own without professional help?
Yes, you absolutely can — I have installed dozens of rolls in my own garage with basic tools like a squeegee, a spray bottle, and a heat gun. The key is patience and working in a clean, dust-free environment.
Just remember to keep the outside liner on until the film is positioned and cut to size. If you take your time and follow the liner rules we talked about, you can get professional-looking results for a fraction of the cost.