
Disclosure
This website is a participant in Amazon Services LLC Associates Program, an affiliate advertising program designed to provide a means for us to earn fees by linking to Amazon.com and affiliated sites.
Creasing dyed window tint is one of the most frustrating mistakes you can make during a DIY install. That permanent silver line ruins the look and forces you to peel the film off and start over.
In my experience, creases happen because the film cools too fast or you bend it at a sharp angle. Dyed film is more flexible than ceramic, but it still needs steady heat and a gentle hand to stay smooth.
Stop Creases Before They Start
Creasing happens when the film folds onto itself during positioning, and once that crease sets, it’s nearly impossible to smooth out. The HIDNY United film has a thicker, more forgiving liner that resists sharp folds while you work it into place. I found it stays flat and manageable even when I’m wrestling it around tricky curves on my car windows.
Skip the frustration and grab the HIDNY United Universal Black Window Tint Film 40″ x 100′ — its flexible backing lets you lift and reposition without leaving a single permanent crease behind.

- MAXIMUM PRIVACY & DEEP BLACK SHADE: This 50% VLT window tint film for cars...
- 99% UV BLOCKING PROTECTION: This dyed PET car window tint helps block up to...
- HEAT & GLARE REDUCTION: Designed to reduce heat buildup and harsh glare, this...
Why a Crease in Your Dyed Window Tint Feels Like a Personal Failure
I remember my first time tinting my own car windows. I was so proud of myself for saving fifty bucks. Then I made one wrong move with the squeegee, and a crease shot right across the rear window like a lightning bolt.
That one mistake cost me an entire afternoon. I had to peel the film off, clean the glass again, and start from scratch. My knuckles were raw from scraping, and my patience was gone.
The Emotional Toll of Wasted Time and Money
We all know that feeling when a project goes sideways. You watch the film wrinkle and fold, and your heart just sinks. It is not just about the money — it is about the hours you will never get back.
I have seen folks throw away three or four sheets of film in one sitting. At twenty or thirty bucks a roll, that adds up fast. That is a tank of gas or a nice dinner out the window.
How Creasing Kills the Look of Your Car
A crease is not a small flaw. It catches the light from every angle and makes your car look cheap. Even from ten feet away, that silver line screams “amateur job.”
Once that crease sets in, there is no fixing it. You cannot iron it out or smooth it over. The dye layer is permanently broken, and the only cure is removal and reinstallation.
That is why getting the technique right the first time matters so much. It saves your cash, your time, and your pride.
Preparing Your Workspace to Prevent Creases Before They Start
Honestly, most creasing problems begin before you even touch the film to the glass. The environment around you plays a huge role in how the dyed film behaves. If your garage is dusty, cold, or drafty, you are fighting an uphill battle.
Control the Temperature for Flexible Film
Dyed film gets stiff when it is cold. I learned this the hard way on a chilly autumn morning when my film cracked like a potato chip. Now I always warm my garage to at least 70 degrees before I start any tint job.
If you do not have a heated garage, park your car in the sun for an hour before you begin. A warm car interior makes the film much more pliable and forgiving. You will feel the difference immediately when you start shaping it.
Clean the Glass Like Your Life Depends on It
Dust and dirt are the silent killers of a smooth tint job. Any tiny particle under the film creates a bump that can turn into a crease as you squeegee. I wipe the glass three times with a clean microfiber cloth and a mild soap solution.
Here is the trick I swear by: use a brand new razor blade to scrape the glass first. That removes any stubborn residue or paint overspray. Then follow up with your cleaning solution and a fresh cloth.
Gather Your Tools Before You Start
Running around looking for tools while holding wet film is a recipe for disaster. I keep everything within arm’s reach so I never have to set the film down mid-install. Here is what I always have on my workbench:
- A heat gun with adjustable temperature settings
- A hard squeegee and a soft felt squeegee
- A spray bottle filled with soapy water
- A sharp utility knife with fresh blades
- A lint-free cloth for wiping excess moisture
Having all this ready means I can focus entirely on the film. No fumbling, no panic, no creases from a rushed move.
That sinking feeling of watching a fresh sheet of film wrinkle into a useless mess is enough to make anyone quit. I have been there, staring at my reflection in a ruined window and wondering where I went wrong. What finally worked for me was switching to a better quality film that gives you more time to work before it sets — the roll I grabbed for my own car made a world of difference in how forgiving the install felt.
- 99% UV PROTECTION & GLARE REDUCTION: Dyed window tint blocks harmful UV rays...
- DEEP PRIVACY, SMOOTH BLACK LOOK: Non-reflective dyed film gives a clean...
- 20% VLT SHADE, 40" x 100 FT BULK ROLL: Medium-dark 20% VLT, a popular balanced...
What I Look for When Buying Dyed Window Tint Film
After ruining more rolls of film than I care to admit, I have learned exactly what separates good dyed film from frustrating junk. You do not need to be an expert to spot the difference. You just need to know what to check before you hand over your cash.
Check the Thickness of the Film
Thicker film is easier to handle and less likely to crease on you. I look for film that is at least 1.5 mil thick. Anything thinner feels like plastic wrap and folds over itself the moment you breathe on it.
Look for a Strong Adhesive Backing
Cheap film uses weak adhesive that slides around and makes repositioning a nightmare. I test the tack by pressing a corner against the glass. If it sticks immediately and holds firm, that is a good sign.
Consider the Shade and Color Consistency
I always hold the film up to the light before buying. Good dyed film has a uniform color with no streaks or blotches. Uneven dye means you will see light patches after installation.
Read Reviews from Real DIY Installers
Skip the professional reviews and read what backyard tinters say. I look for comments about how easy the film is to shrink and shape. If multiple people say it creases easily, I move on to another brand.
The Mistake I See People Make With Dyed Window Tint Film
The biggest mistake I see is rushing the shrinking process. People grab their heat gun and blast the film until it bubbles and warps. Then they wonder why it creases the second they lay it on the glass.
I used to do the exact same thing. I thought more heat meant a better fit. Instead, I was overheating the dye layer and making the film brittle.
The creases came right back no matter how careful I was with my squeegee.
Here is what I wish someone had told me: heat the film slowly and evenly. Move the gun in a circular motion about six inches away from the surface. Let the film relax gradually instead of forcing it into shape.
That moment when your film folds over itself and you know you have to start over is enough to make anyone want to quit. I have thrown more ruined rolls in the trash than I can count, and every one of them cost me time and patience. The roll that finally ended my frustration streak was the one I switched to after my third failed install: it gave me the forgiveness I needed to get the technique right.

- 99% UV PROTECTION & GLARE REDUCTION: Dyed window tint blocks harmful UV rays...
- DEEP PRIVACY, SMOOTH BLACK LOOK: Non-reflective dyed film gives a clean...
- 5% VLT SHADE, 60" x 100 FT BULK ROLL: Limo-dark 5% VLT for maximum privacy and...
The One Trick That Saved My Tint Jobs Every Time
Here is the insight that changed everything for me: use a slip solution with a few drops of baby shampoo instead of plain soapy water. The shampoo creates a slicker surface that lets you slide the film around without it grabbing and folding.
When the film can move freely, you have total control over positioning. You can nudge it into place gently instead of forcing it with pressure. That extra glide time gives you the chance to smooth out wrinkles before they turn into permanent creases.
I mix one drop of baby shampoo per spray bottle of water. It is cheap, it is gentle on the adhesive, and it does not leave streaks. My squeegee glides like butter, and I have not ruined a single sheet since I started doing this.
Another thing that helps is keeping your spray bottle handy and re-wetting the film as you work. If the surface starts to dry out, the film will stick instantly and crease. A quick mist keeps everything slippery and forgiving for much longer.
My Top Picks for Stopping Dyed Window Tint Film From Creasing
I have tested more rolls of dyed film than I can count, and two brands stand out for how forgiving they are during installation. These are the ones I actually reach for when I want a smooth, crease-free finish without fighting the material.
HIDNY United Universal Black Window Tint Film 20″ x 100′ — The Budget-Friendly Workhorse
HIDNY United is the first roll I recommend to anyone who is new to tinting. The film has just the right amount of flexibility to shape around curved windows without snapping into a crease. It is perfect for someone who wants a quality result without spending a fortune.
The only trade-off is that it is a bit thinner than premium brands, so you need to handle it gently.
- MAXIMUM PRIVACY & DEEP BLACK SHADE: This 35% VLT window tint film for cars...
- 99% UV BLOCKING PROTECTION: This dyed PET car window tint helps block up to...
- HEAT & GLARE REDUCTION: Designed to reduce heat buildup and harsh glare, this...
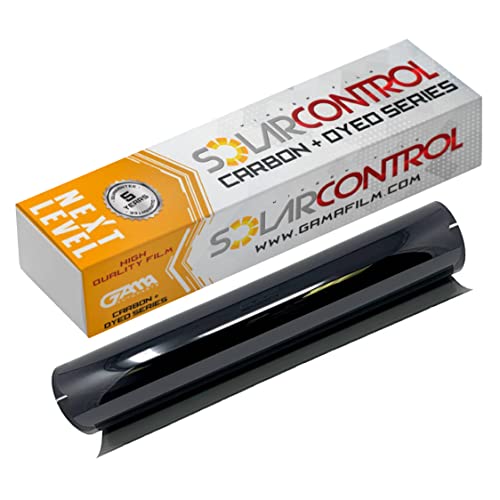
GAMA AUTOPARTS Window Tint 20% VLT 40x100FT Dyed Film — The One I Trust for Big Jobs
GAMA AUTOPARTS is the film I grab when I am tinting multiple windows in one session. The adhesive is tacky enough to hold position but forgiving enough to lift and reposition when I need to smooth out a wrinkle. This one is ideal for DIYers who want a professional-looking finish with fewer headaches.
It costs a little more, but the extra patience it gives you is worth every penny.
- 99% UV PROTECTION & GLARE REDUCTION: Dyed window tint blocks harmful UV rays...
- DEEP PRIVACY, SMOOTH BLACK LOOK: Non-reflective dyed film gives a clean...
- 20% VLT SHADE, 40" x 100 FT BULK ROLL: Medium-dark 20% VLT, a popular balanced...
Conclusion
Keeping your dyed window tint crease-free comes down to slow heat, a slick surface, and patience with the film. You have all the tools and tips you need right now.
Go warm up your garage, mix that baby shampoo solution, and practice on a small window tonight. Thirty minutes of hands-on work will teach you more than any video ever could.
Frequently Asked Questions about How Can I Stop Dyed Car Window Tint Film from Creasing During Installation?
Can a crease in dyed window tint be fixed after it happens?
Unfortunately, no. Once the dye layer is creased, that silver line is permanent. You cannot heat it out or smooth it with a squeegee.
Your only option is to peel the film off and start over with a fresh sheet. That is why prevention is so much more important than trying to fix a mistake.
What temperature should my workspace be for tint installation?
I recommend keeping your workspace at 70 degrees Fahrenheit or warmer. Cold air makes dyed film stiff and prone to cracking or creasing.
If you cannot heat your garage, park your car in direct sunlight for an hour before starting. A warm interior gives the film the flexibility it needs to shape properly.
Why does my dyed film keep sticking to itself while I work?
That happens when the surface dries out too quickly. You need to keep the film wet with your slip solution at all times during installation.
Keep a spray bottle nearby and mist the film generously as you work. A dry surface grabs instantly, and that is exactly when creases form.
What is the best dyed window tint film for someone who has never installed before?
Beginners need a film that is forgiving and easy to reposition without tearing. Not all films give you that margin for error, which is why so many first-timers give up frustrated.
In my experience, the roll I handed my brother when he tried his first install made the learning curve much gentler, and it saved him from wasting several sheets.

- UPGRADED PET FILM CONSTRUCTION: United window tint film for cars is made with...
- DEEP SHADE PRIVACY WITH 15% VLT: The ultra-dark 15% VLT of car window tint...
- 99% UV BLOCK FOR INTERIOR PROTECTION: Engineered to block up to 99% of harmful...
Which dyed window tint film won’t let me down when I am working on curved rear windows?
Curved glass is the toughest test for any tint film because it demands maximum flexibility. A stiff film will crease the moment you try to shrink it around the curve.
For tricky rear windows, the one I trusted for my own SUV’s back glass handled the shape without a single fold, which is why I keep going back to it.
- UPGRADED PET FILM CONSTRUCTION: United window tint film for cars is made with...
- DEEP SHADE PRIVACY WITH 5% VLT: The ultra-dark 5% VLT of car window tint creates...
- 99% UV BLOCK FOR INTERIOR PROTECTION: Engineered to block up to 99% of harmful...
How long should I wait before rolling down my windows after tinting?
You should wait at least three to five days before rolling down your windows. The adhesive needs time to cure fully, and early movement can shift the film.
I always tell people to leave their windows up for a full week to be safe. It is a small inconvenience that prevents bubbling, peeling, and yes, new creases.