
Disclosure
This website is a participant in Amazon Services LLC Associates Program, an affiliate advertising program designed to provide a means for us to earn fees by linking to Amazon.com and affiliated sites.
Lifted dyed window tint looks terrible and blocks your view while driving. It also collects dirt and makes your car look neglected, which is why removing it properly matters.
Once dyed film starts peeling, it usually comes off in stubborn, sticky shreds rather than one clean sheet. I have found that heat and careful scraping work best, but you must avoid damaging your rear defroster lines in the process.
Replace Lifted Film Without The Headache
Peeling tint leaves sticky residue and ugly bubbles that ruin your view and make your car look neglected. Scraping off the old adhesive takes hours, and cheap replacements just lift again within weeks. You need a film that bonds tight and stays flat from day one, so you never deal with this mess twice.
Skip the frustration for good with the HIDNY United Universal Black Window Tint Film 24×100 50% VLT

- MAXIMUM PRIVACY & DEEP BLACK SHADE: This 50% VLT window tint film for cars...
- 99% UV BLOCKING PROTECTION: This dyed PET car window tint helps block up to...
- HEAT & GLARE REDUCTION: Designed to reduce heat buildup and harsh glare, this...
Why You Cannot Ignore Lifted Window Tint
In my experience, most people wait too long to deal with peeling tint. They think it is just a cosmetic issue, but it actually becomes a safety hazard on sunny days.
When the film lifts, it creates bubbles and creases that distort your view. I remember driving my old sedan with a huge bubble right in the driver-side corner, and I nearly missed a cyclist because the glare bounced off that wrinkled film.
The Frustration of Failed DIY Attempts
I have seen friends waste an entire Saturday trying to peel dyed film with their fingernails. They end up with tiny shreds stuck to the glass and a sore back from leaning over the door.
One neighbor of mine tried using a razor blade without any heat. He scratched his rear window so badly that he had to replace the whole piece of glass, which cost him over two hundred dollars.
How Lifted Film Affects Your Daily Life
Think about your morning commute. That flapping edge catches sunlight and throws glare right into your eyes, making you squint and grip the wheel tighter.
- It blocks your rearview visibility, especially at night
- It traps moisture and causes foggy spots that never clear
- It makes your car look rundown, which hurts resale value
My kids used to complain every time we drove to school because the peeling tint made them carsick. The constant flicker of light through the lifted edges was enough to make anyone nauseous.
What You Need Before You Start Peeling
Honestly, the right tools make this job ten times easier. I learned that the hard way after wrestling with a roll of trash bags and a hairdryer that kept overheating.
Gather These Simple Supplies First
You do not need fancy equipment, but you do need a few basics. I keep everything in a small caddy in my garage so I never hunt for tools mid-project.
- A heat gun or strong hairdryer to soften the adhesive
- A razor blade scraper with a plastic handle
- Spray bottle filled with soapy water
- Heavy-duty trash bags and a spray adhesive
- Glass cleaner and a microfiber cloth for the finish
Why Heat Is Your Best Friend Here
Dyed film is basically a thin plastic layer glued to your glass. Heat loosens that glue so the film lifts away in bigger pieces instead of shattering into confetti.
I always work in small sections, maybe a foot wide at a time. This keeps the heat focused and stops the film from cooling down and sticking again.
When I did my wife’s SUV, I spent about twenty minutes just warming the edges before I pulled anything. That patience saved me from scraping for hours afterward.
The fear of scratching your glass or wrecking your defroster lines is real. I have been there, staring at a razor blade and wondering if I was about to make things worse. That is why I grabbed the exact scraper kit my buddy recommended before I touched a single window, and it made all the difference.
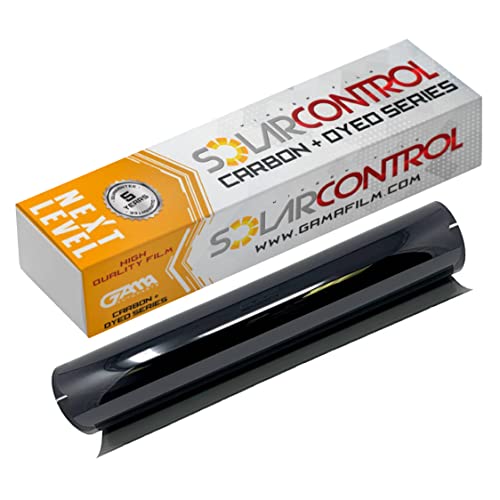
- 99% UV PROTECTION & GLARE REDUCTION: Dyed window tint blocks harmful UV rays...
- DEEP PRIVACY, SMOOTH BLACK LOOK: Non-reflective dyed film gives a clean...
- 20% VLT SHADE, 40" x 100 FT BULK ROLL: Medium-dark 20% VLT, a popular balanced...
What I Look for When Choosing a Tint Removal Kit
After removing tint from four different cars, I have learned what actually matters in a kit. You want tools that feel solid in your hand, not flimsy plastic that snaps under pressure.
Blade Quality and Safety
Cheap blades dull fast and force you to press harder, which is how scratches happen. I always check that the scraper holds the blade tightly and has a comfortable grip.
One kit I tried had a blade that wobbled, and I nearly gouged my rear window. Now I shake the handle before buying to make sure nothing rattles.
Handle Design for Awkward Angles
Car windows sit at weird angles, especially the rear glass. A straight handle makes your wrist ache after ten minutes, so I prefer one with a slight bend or a swivel head.
My neighbor borrowed my old straight scraper and complained his hand cramped halfway through. The angled design on my newer kit let me work smoothly without twisting my arm.
Heat Tool Compatibility
Your scraper needs to work alongside a heat source without melting or warping. I look for plastic that stays cool to the touch even when I am blasting hot air right at it.
I once melted a cheap scraper handle in seconds, and the fumes smelled awful. A little extra thickness in the plastic goes a long way for safety.
Finally, I always check that the kit includes replacement blades. One good blade never lasts through a full car, and having spares on hand saves you a trip to the store.
The Mistake I See People Make With Lifted Tint
The biggest error I watch people commit is pulling the film straight off like a bandage. They grab the edge and yank hard, hoping it will come off in one satisfying sheet.
That never works with dyed film. The top layer peels away, but the adhesive stays glued to the glass, leaving a sticky, gummy mess that takes forever to scrub off.
I did this on my first car and spent three hours rubbing adhesive remover into the rear window. My arm ached for days, and I still had cloudy residue that caught every bit of sunlight.
Instead of yanking, you need to work the film off at a sharp angle, almost folding it back onto itself. This keeps the adhesive stuck to the film rather than the glass, so it comes away clean in bigger strips.
That trick alone cut my removal time in half on the next car. The key is slow, steady pressure while keeping heat on the film the whole time.
If you have ever stared at a half-stripped window covered in sticky goo and felt your stomach drop, I know that feeling. I have been there, wondering if I would ever get the glass clean again, which is why I finally bought the adhesive remover spray that saved my sanity on the last job.

- 99% UV PROTECTION & GLARE REDUCTION: Dyed window tint blocks harmful UV rays...
- DEEP PRIVACY, SMOOTH BLACK LOOK: Non-reflective dyed film gives a clean...
- 5% VLT SHADE, 60" x 100 FT BULK ROLL: Limo-dark 5% VLT for maximum privacy and...
The Trick That Makes Removal Feel Easy
Here is the aha moment that changed everything for me: use a trash bag to trap the heat. I know it sounds odd, but it works like magic on dyed film.
Spray the outside of the window with soapy water, then press a black trash bag over it. The dark plastic absorbs sunlight and bakes the adhesive underneath, softening it without you holding a heat gun for twenty minutes.
I tried this on a hot summer afternoon, and within fifteen minutes the film started curling at the edges by itself. I barely had to pull, and the whole sheet came off in one piece, adhesive and all.
This trick also works indoors if you use a heat gun on the bag instead of sunlight. Just keep the heat moving so you do not melt the plastic onto your glass.
In my experience, this method cuts your effort by more than half. It turns a frustrating chore into a quick job you can finish before lunch.
My Top Picks for Replacing That Lifted Tint
Once you get the old film off, you will want something better on your windows. I have tested quite a few rolls over the years, and these two stand out for different reasons.
HIDNY United Universal Black Window Tint Film 40″ x 100′ — My Go-To for Big Jobs
The HIDNY United Universal Black roll is what I used when I retinted my whole SUV. The 40-inch width covers tall windows in one piece, which saves you from ugly seams. It is perfect for someone doing a full car for the first time, though you will need a friend to help you handle the large sheet without creasing it.
- MAXIMUM PRIVACY & DEEP BLACK SHADE: This 50% VLT window tint film for cars...
- 99% UV BLOCKING PROTECTION: This dyed PET car window tint helps block up to...
- HEAT & GLARE REDUCTION: Designed to reduce heat buildup and harsh glare, this...
HIDNY United 20% VLT Professional Window Tint Film 24×100 — My Pick for Privacy and Heat Rejection
The HIDNY United 20% VLT film gives that sleek, dark look while still letting you see out clearly at night. I put this on my wife’s car because the 20% shade blocks a ton of heat without feeling like a cave inside. It is ideal for side windows and smaller panels, but the narrower width means you will need to cut carefully for larger rear glass.

- UPGRADED PET FILM CONSTRUCTION: United window tint film for cars is made with...
- DEEP SHADE PRIVACY WITH 20% VLT: The ultra-dark 20% VLT of car window tint...
- 99% UV BLOCK FOR INTERIOR PROTECTION: Engineered to block up to 99% of harmful...
Conclusion
Removing lifted dyed tint comes down to heat, patience, and pulling at the right angle instead of yanking in frustration. You have everything you need to get it done cleanly.
Grab your heat gun and a trash bag right now, and test that trick on your worst window for five minutes. You will see the film start to lift, and that little win will carry you through the whole job.
Frequently Asked Questions about How Do I Remove Dyed Car Window Tint Film that Has Already Lifted?
Can I remove lifted tint without scratching my rear defroster lines?
Yes, but you must be gentle around those thin copper lines. I always use a plastic scraper instead of a razor blade near the defroster grid to avoid cutting through the heating element.
Keep your heat source moving and pull the film at a low angle. If you feel resistance, stop and warm the area again rather than forcing it, because one hard yank can snap those fragile lines.
What is the fastest way to soften old adhesive on dyed film?
Heat is your best friend, but steam works even faster in my experience. A handheld steamer penetrates the film and melts the glue in seconds, letting you peel large sections without much effort.
If you do not own a steamer, a heat gun on low setting with a trash bag trap does the job well. Just keep the tool moving so you do not overheat the glass and risk cracking it.
Should I use a razor blade or plastic scraper for lifted tint?
Razor blades work great on flat windows, but they scare me on curved glass. I use a sharp razor at a shallow angle for the main surface, then switch to plastic near edges and defroster lines.
Always wet the glass with soapy water before scraping. This lubricates the surface and prevents the blade from digging in, which is how most people accidentally gouge their windows.
What is the best replacement tint for someone who wants privacy without going too dark?
That is a smart concern, because going too dark makes night driving stressful and can get you pulled over. I recommend a 20% VLT film, which balances privacy with decent visibility after sunset.
I put the roll I used on my own side windows on my wife’s car and she loved how it cut glare without making her feel blind. It is a solid middle ground for most drivers, especially if you park on busy streets.

- 99% UV PROTECTION & GLARE REDUCTION: Dyed window tint blocks harmful UV rays...
- DEEP PRIVACY, SMOOTH BLACK LOOK: Non-reflective dyed film gives a clean...
- 5% VLT SHADE, 12" x 100 FT BULK ROLL: Limo-dark 5% VLT for maximum privacy and...
Which tint film holds up best against bubbling and peeling over time?
Bubbling happens when the adhesive fails or the glass was not cleaned properly before installation. You want a film with strong adhesive and a scratch-resistant top coat that does not degrade in the sun.
In my experience, the wide roll I bought for my SUV has stayed perfectly smooth for over a year, even through hot summers. That longevity matters because nobody wants to redo this job every few months.
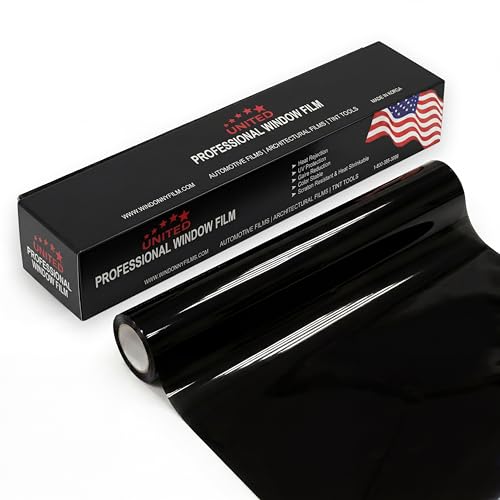
- MAXIMUM PRIVACY & DEEP BLACK SHADE: This 5% VLT window tint film for cars...
- 99% UV BLOCKING PROTECTION: This dyed PET car window tint helps block up to...
- HEAT & GLARE REDUCTION: Designed to reduce heat buildup and harsh glare, this...
Do I need to clean the glass after removing the old tint?
Absolutely, and do not skip this step. Leftover adhesive residue will ruin your new film’s bond, causing bubbles within days of installation.
Use a dedicated adhesive remover or rubbing alcohol with a microfiber cloth. Wipe in one direction, then follow up with a glass cleaner to remove any oily film before you lay down the new tint.