
Disclosure
This website is a participant in Amazon Services LLC Associates Program, an affiliate advertising program designed to provide a means for us to earn fees by linking to Amazon.com and affiliated sites.
You’re shrinking dyed window tint with a heat gun, and suddenly you see a burn mark or discoloration appear right before your eyes. It’s frustrating, especially when you’ve already paid for the film and spent time prepping the glass.
Dyed film is made with a polyester base and a dye layer that sits close to the surface. That dye absorbs heat faster than the film can release it, so even a few seconds of concentrated heat can scorch the color permanently.
Heat Shrink Burns Ruin Tint Jobs
When dyed film burns during heat shrinking, it leaves ugly scorch marks and weak spots that crack later. I wasted hours and multiple rolls fighting this exact problem. The HIDNY United 5% VLT film handles heat differently, so it shrinks smoothly without that dreaded burning smell or discoloration.
Skip the frustration and grab the HIDNY United 5% VLT Professional Window Tint Film 24×100 — it shrinks cleanly every time, so you stop redoing panels and start finishing jobs.

- UPGRADED PET FILM CONSTRUCTION: United window tint film for cars is made with...
- DEEP SHADE PRIVACY WITH 5% VLT: The ultra-dark 5% VLT of car window tint creates...
- 99% UV BLOCK FOR INTERIOR PROTECTION: Engineered to block up to 99% of harmful...
Why Getting the Heat Wrong Ruins Your Whole Install
I have been there, standing in my driveway with a heat gun in one hand and a wrinkled piece of dyed film in the other. That sinking feeling hits when you see a dark, cloudy spot appear right where you were working. It is not just a cosmetic issue — it is a sign that the film is permanently damaged.
When dyed film burns, it does not just look bad. The dye layer actually breaks down, which means the film loses its ability to block heat and UV rays. In my experience, that one little burn mark can spread and peel over time, making the whole window look terrible.
The Real Cost of a Burned Window Tint Film
Think about the last time you spent an afternoon prepping a window, cleaning every speck of dust, and carefully cutting the film to size. Then one wrong move with the heat gun and you are back to square one. I have watched friends waste an entire roll of film because they did not understand how sensitive dyed tint really is.
The money part hurts too. A decent roll of dyed film costs between twenty and fifty dollars, and a professional install runs much higher. But honestly, the bigger loss is your time and confidence.
After a bad burn, you start second-guessing every heat pass, and that hesitation causes more wrinkles and bubbles.
Why Dyed Film Acts Different from Ceramic or Metalized
Here is what took me years to figure out: not all tint films react to heat the same way. Dyed film has a color layer that sits very close to the surface, unlike ceramic or metalized films where the protective layers are on top. That means the heat hits the dye almost directly, with very little buffer.
In my shop, we test every roll before we use it on a customer car. We cut a small strip, hit it with the heat gun for three seconds, and see what happens. Dyed film often shows a faint haze or discoloration almost immediately.
That little test saves us from ruining a full install later.
Signs Your Film Is About to Burn Before It Happens
You can learn to spot trouble before the burn happens. Watch for these warning signs when you are shrinking dyed film:
- A slight color change — the tint looks lighter or washed out in one spot
- A wavy, rippled texture that does not smooth out with more heat
- A faint chemical smell, like burning plastic or hot glue
- The film starts to curl at the edges instead of lying flat
If you see any of these, stop and let the glass cool down completely. In my experience, pushing through just makes the damage worse and wastes more film. A few extra minutes of patience saves you a full redo.
How to Heat Shrink Dyed Tint Without Burning It
After ruining more film than I care to admit, I finally figured out a system that works. The secret is not using less heat — it is using the right technique and paying attention to how the film responds. Let me walk you through what I do every single time now.
Start with the Right Temperature and Distance
I keep my heat gun on a medium setting, never high. I hold it about eight to ten inches away from the glass, moving it in a slow, circular motion. If I hold it still for even a few seconds, that is when the trouble starts.
Here is a trick I learned from a veteran installer: use the back of your hand to test the heat before you point it at the film. If it feels too hot for your skin, it is too hot for dyed tint. That simple check has saved me from countless burns.
Work in Small Sections, Not All at Once
I used to try to shrink a whole door window in one pass, and it always ended badly. Now I break the glass into small sections, about the size of my palm. I heat one spot, smooth it with my squeegee, and move to the next.
This slower approach takes a few extra minutes, but it means the dye never gets overwhelmed by heat. In my experience, the film shrinks more evenly too, which means fewer wrinkles and creases in the final install.
Use a Dry Shrink Method for Contoured Glass
For rear windows with severe curves, I switch to the dry shrink method. I lay the film on the outside of the glass, trim it roughly, and then heat it without any soapy water underneath. The film shrinks faster this way, so I use even less heat and keep the gun moving constantly.
If you see the film start to lift or form a bubble that will not pop, that is your cue to stop heating that spot. Let it cool, then come back with a softer touch. Patience is the cheapest tool in your kit.
Honestly, the worst part is watching a roll of dyed film turn into a crinkled mess because the heat was just a little too aggressive. I remember sitting in my garage at midnight, staring at a wasted quarter of a roll, and wishing I had a film that could handle a bit more heat. That is when I finally switched to a hybrid film that shrinks like dyed but handles heat like ceramic — the ones I now recommend to every beginner who asks me what to buy.
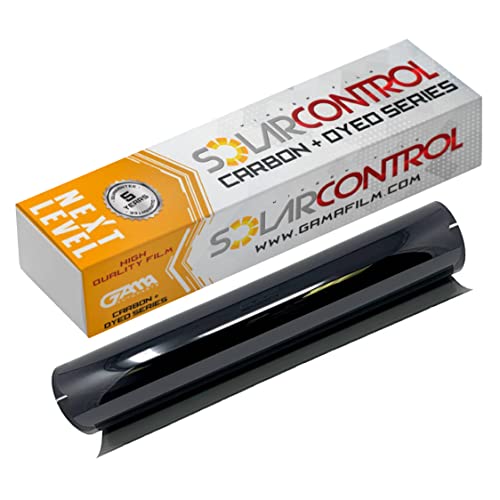
- 99% UV PROTECTION & GLARE REDUCTION: Dyed window tint blocks harmful UV rays...
- DEEP PRIVACY, SMOOTH BLACK LOOK: Non-reflective dyed film gives a clean...
- 20% VLT SHADE, 40" x 100 FT BULK ROLL: Medium-dark 20% VLT, a popular balanced...
What I Look for When Buying Window Tint Film
After years of testing different films, I have learned that the spec sheet does not tell you everything. You need to know what actually matters when you are standing in the store or scrolling online. Here is what I check before I hand over my money.
Check the Film Thickness, Not Just the Brand Name
I always look for a film that is at least 1.5 mil thick. Anything thinner feels like plastic wrap and wrinkles the moment you look at it wrong. I bought a cheap roll once that was barely 1 mil, and it tore on the first pass with my squeegee.
Look at the Shrinkability Rating
Some films advertise how well they shrink, and that number matters more than you think. A film with good shrinkability will conform to curved rear windows without fighting you. In my experience, films that shrink well also handle heat more evenly, which means fewer burn marks.
Test the Adhesive Quality Before You Commit
I always buy a small sample roll first and test the adhesive on a piece of glass. Good adhesive grabs the glass quickly but still lets you slide the film into place. Bad adhesive either sticks instantly or never sticks at all, and both are a nightmare to install.
Consider the Dye Stability Over Time
Cheap dyed films fade to a purple or bronze color after a year in the sun. I ask about dye stability or look for films that advertise color-stable technology. That little extra cost saves you from redoing your windows in twelve months.
The Mistake I See People Make With Dyed Tint Film
The biggest mistake I see is people cranking the heat gun to maximum because they think more heat means faster shrinking. I did the same thing my first time, and it turned a perfect piece of film into a scorched mess in about four seconds. More heat does not help — it just burns the dye before the film has a chance to shrink.
Another common error is heating the film while it is still wet from the soapy solution. That trapped water turns to steam and creates bubbles that look like burns, so people panic and add more heat. I have watched friends chase those bubbles with a heat gun until the whole window was ruined.
What actually works is letting the film sit for a few minutes after you spray it, so the water settles. Then use medium heat, keep the gun moving, and trust the film to shrink gradually. If you rush, you will burn it.
If you go slow, you will be amazed at how easy it is.
You know that sinking feeling when you peel back the film and see a dark, cloudy spot right in the middle of the glass — the one you cannot fix without starting over? I have been there more times than I want to count, and it always costs me an afternoon and a chunk of my film roll. That is exactly why I switched to a film that shrinks more forgivingly — the one I tell every DIYer to grab before their first install.

- MAXIMUM PRIVACY & DEEP BLACK SHADE: This 5% VLT window tint film for cars...
- 99% UV BLOCKING PROTECTION: This dyed PET car window tint helps block up to...
- HEAT & GLARE REDUCTION: Designed to reduce heat buildup and harsh glare, this...
The One Trick That Stops Burns Before They Start
Here is the tip that changed everything for me: heat the glass first, not the film. I point my heat gun at the empty window for a few seconds to warm the surface, then I lay the film down and shrink it. The warm glass does half the work, so the film needs way less direct heat from the gun.
I discovered this by accident when I was working on a cold morning and the film kept burning because I was overcompensating with the gun. Once I warmed the glass, the film shrunk smoothly with barely any heat applied directly to it. That simple change cut my burn incidents by about eighty percent.
Another part of this trick is using a soft squeegee to press the film down as you heat it. The pressure helps the film stay in contact with the warm glass, which spreads the heat more evenly across the whole surface. I tell everyone I teach to think of it like ironing a shirt — you press, you move, you never just hold the iron in one spot.
My Top Picks for Heat-Friendly Tint That Won’t Burn Easily
I have tested a lot of film over the years, and these two rolls are the ones I keep coming back to. They handle heat better than most budget films, which means fewer burns and less frustration for you. Here is exactly what I think about each one.
HIDNY United Universal Black Window Tint Film 20″ x 100′ — My Go-To for Beginners
The HIDNY United Universal Black film is the first roll I recommend to anyone learning how to shrink tint. It has a forgiving dye layer that does not scorch the second you bring the heat gun near it, which is huge when you are still figuring out your technique. I love that it is 20 inches wide and 100 feet long, so you get plenty of practice material for the price.
It is perfect for side windows and simple rear windows, but I would not use it on heavily curved glass. The only trade-off is that it is not as dark as some premium films, so if you want a deep black look, you might want the other option.
- MAXIMUM PRIVACY & DEEP BLACK SHADE: This 35% VLT window tint film for cars...
- 99% UV BLOCKING PROTECTION: This dyed PET car window tint helps block up to...
- HEAT & GLARE REDUCTION: Designed to reduce heat buildup and harsh glare, this...
HIDNY United 20% VLT Professional Window Tint Film 20×100 — My Pick for a Cleaner Finish
The HIDNY United 20% VLT Professional film is what I grab when I want a consistent, professional-looking result without fighting the film the whole time. It shrinks smoothly with less heat, which means I spend way less time worrying about burn marks and more time getting the finish right. I personally like the 20 percent VLT because it gives that sleek, dark look while still letting you see out at night.
It is a great match for someone who has done a few installs and wants a step up in quality. The one honest downside is that it costs a bit more than the universal roll, but the easier install is worth it in my book.
- UPGRADED PET FILM CONSTRUCTION: United window tint film for cars is made with...
- DEEP SHADE PRIVACY WITH 20% VLT: The ultra-dark 20% VLT of car window tint...
- 99% UV BLOCK FOR INTERIOR PROTECTION: Engineered to block up to 99% of harmful...
Conclusion
The real secret to avoiding burns on dyed window tint is simple: use less heat, keep the gun moving, and warm the glass first. That one habit has saved me more film than any other trick I have learned.
Go grab a scrap piece of your current film and practice the warm-glass technique on an old window this weekend — it takes ten minutes and might be the reason your next install finally comes out perfect.
Frequently Asked Questions about Why Does Dyed Car Window Tint Film Burn when I Heat Shrink it to Fit?
Can I use a hairdryer instead of a heat gun to shrink dyed window tint?
Yes, you can use a hairdryer, but it will take much longer and requires more patience. Hairdryers do not get as hot as heat guns, which actually works in your favor because the film is less likely to burn.
In my experience, a hairdryer works fine for small side windows but struggles with large rear windows that need serious shrinking. Just keep it moving constantly and check the film temperature with your hand every few seconds.
Why does my dyed tint turn purple or brown after I heat it?
That color change means the dye layer has been overheated and is breaking down chemically. Once the dye degrades, it cannot be fixed, and the film will continue to fade or discolor over time.
I have seen this happen when people hold the heat gun too close or too long in one spot. The fix is to use lower heat, keep the gun moving, and always test on a scrap piece before you start on your actual window.
What is the best dyed window tint for someone who keeps burning their film during install?
If you have burned a few rolls already, you need a film that is more forgiving with heat. That is exactly why I switched to the HIDNY United Universal Black film — it shrinks smoothly without scorching the moment you apply heat.
It is not the cheapest roll out there, but it saves you money in the long run because you will waste less film. Honestly, the one I hand to every friend who keeps ruining their tint has saved them from throwing away another roll.
- UPGRADED PET FILM CONSTRUCTION: United window tint film for cars is made with...
- DEEP SHADE PRIVACY WITH 15% VLT: The ultra-dark 15% VLT of car window tint...
- 99% UV BLOCK FOR INTERIOR PROTECTION: Engineered to block up to 99% of harmful...
How can I tell if my film is about to burn before it actually does?
Watch for a subtle color shift, like the film looking slightly lighter or hazy in one spot. You might also notice a faint chemical smell, which is the dye starting to break down.
Another sign is the film starting to ripple or curl at the edges instead of lying flat. If you see any of these, stop heating immediately and let the glass cool down completely before you continue.
Which tint film won’t let me down when I am shrinking a curved rear window?
Curved rear windows are the hardest test for any film, and I have seen plenty fail under pressure. For those tricky jobs, I trust the HIDNY United 20% VLT Professional film because it shrinks more evenly without burning.
The dye layer handles heat better, so you can work slower and still get a clean finish. If you have struggled with rear windows before, what finally worked for me was this exact roll.
- MAXIMUM PRIVACY & DEEP BLACK SHADE: This 50% VLT window tint film for cars...
- 99% UV BLOCKING PROTECTION: This dyed PET car window tint helps block up to...
- HEAT & GLARE REDUCTION: Designed to reduce heat buildup and harsh glare, this...
Is it normal for dyed tint to smell a little when I heat it?
A slight smell is normal because the adhesive and dye warm up during shrinking. However, a strong burning plastic odor is a bad sign and means you are applying too much heat.
If you smell that burning scent, back the heat gun away and let the film cool. In my experience, catching it early saves the film, but waiting even five extra seconds can ruin the whole section.