
Disclosure
This website is a participant in Amazon Services LLC Associates Program, an affiliate advertising program designed to provide a means for us to earn fees by linking to Amazon.com and affiliated sites.
Cutting large security window film straight is one of the trickiest parts of any DIY window project. If your cuts wander, you waste expensive material and end up with gaps that ruin both the look and the safety protection.
Most people struggle because they pull the film tight while cutting, which distorts the straight line. I always use a heavy-duty straightedge and a brand-new blade, but the real secret is letting the film lay completely flat and relaxed before you make that first pass.
Straight Cuts Start With The Right Film
Cutting large security film often ends in crooked edges, wasted material, and frustration. The film wants to curl and stick to itself, making a clean straight line feel impossible. I found that a stiffer, more manageable film removes most of that struggle before I even pick up the knife.
That is exactly why I switched to this 4-mil security film. Its rigidity holds its shape while I score it, so my straightedge stays true and my cuts stay square across the full sheet.
Skip the curling mess and grab the film that cuts clean every time: Buydecorativefilm BDF S4MB05 Window Film Security 4 Mil
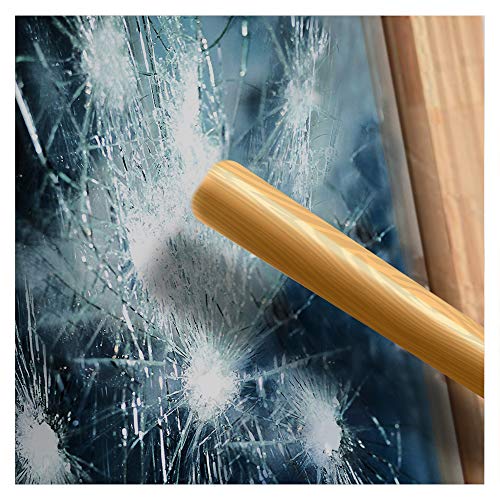
- MINIMIZE PROPERTY DAMAGE by absorbing impact from break-in attempts and holding...
- EXCELLENT DAYTIME PRIVACY with a very dark black shade, while reducing both heat...
- STRONG ADHESIVE protected by release liner. For easier installation, use A LOT...
Why Cutting Your Security Film Straight Actually Matters
I remember the first time I tried to install security film on my sliding glass door. I was so proud of myself for measuring twice, only to watch my utility knife drift off course halfway down the sheet. That crooked edge meant the film didn’t reach the frame, leaving a tiny gap where a determined person could get a finger underneath and peel it right back.
That gap wasn’t just ugly — it completely defeated the purpose of the film. Security window film only works when it’s sealed tight to the glass with no exposed edges. A wavy cut leaves those edges vulnerable, and that’s exactly where the film starts to lift, bubble, and fail over time.
The Real Cost of a Bad Cut
We’ve all been there — you spend good money on a large roll of film, only to botch the cut and have to order more. In my experience, that wasted material is the most frustrating part because it feels like throwing cash directly in the trash. I’ve seen friends give up on the whole project out of sheer annoyance, leaving their windows unprotected.
Beyond the money, there’s the safety angle that hits closer to home. I installed security film after a break-in attempt in my neighborhood, and I wanted every inch of that glass covered. When you cut it crooked, you’re not just fixing a cosmetic issue — you’re leaving a weak spot where your family’s safety is concerned.
What Happens When You Rush the Process
Most crooked cuts happen because we try to speed through the job. I used to think I could eyeball the line and just go for it, but that never works with large sheets. The film wants to shift and stretch as you cut, and if you don’t have everything locked down, you’ll fight it the whole way.
Here’s what I’ve learned to watch out for:
- Pulling the film tight while cutting — it springs back and ruins your straight edge
- Using a dull blade that catches and tears the film instead of slicing cleanly
- Skipping the straightedge because you think you have a steady hand
- Cutting on a soft surface that lets the film sink and bend
Every one of those mistakes creates a jagged edge that makes the film impossible to install properly. Once you see how much easier it is with the right setup, you’ll never rush again.
Setting Up Your Workspace for a Perfect Straight Cut
Honestly, the biggest lesson I learned is that cutting straight has almost nothing to do with your hand and everything to do with your setup. If your surface is uneven or your film isn’t secured, you’re fighting a losing battle before you even pick up the blade.
Pick the Right Surface
I use a large piece of plywood laid across two sawhorses in my garage. It gives me a completely flat, stable area where the film can spread out without any bumps or dips underneath.
A kitchen table works in a pinch, but you have to make sure it’s clean and dry. Any crumbs or debris under the film will create a bump that pushes the film up, and your blade will follow that bump instead of your straight line.
Lock Down Your Straightedge
This was the major improvement for me. I used to hold my straightedge with one hand and cut with the other, but my hand would always tremble just a little. Now I clamp the straightedge to my work surface, so it physically cannot move while I’m cutting.
Even a small shift in your straightedge creates a visible curve in a long cut. When you’re working with a sheet that’s several feet long, that tiny movement at the start becomes a big problem by the end.
Mark Your Line Before You Cut
I always use a fine-tip marker to draw my cut line directly on the film’s protective backing. This way, I’m not guessing where the edge should be — I’m just following the line I already drew.
Measure twice, mark once, and then double-check your measurement from both ends. I’ve caught myself being off by a quarter-inch more times than I’d like to admit, and catching it before cutting saves a whole sheet of film.
When I first started, I wasted nearly half a roll of expensive film on crooked cuts and had to reorder everything. If you’re tired of watching your hard-earned money disappear into wasted material and want to get this project done right the first time, what finally worked for me was upgrading my cutting tools so I stopped guessing and started cutting clean.
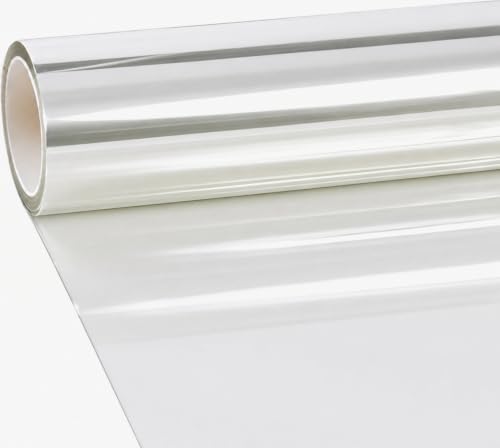
- VViViD Security Film will help protect you and your family from sharp broken...
- Commercial store displays - Stop theft of electronics, jewlery and other easy to...
- Prevent window vandalism - Easily replace after painted with graffiti. No need...
What I Look for When Buying Security Window Film
After installing film on every window in my house, I’ve learned exactly what separates a good purchase from a frustrating one. Here’s what I check before I hand over my money.
Thickness That Actually Protects
I look for film that’s at least 4 mil thick, because anything thinner just doesn’t hold up to real impact. A 2 mil film might stop a thrown rock, but it won’t do much against someone trying to kick through your door.
My neighbor bought the cheapest roll he could find, and it tore like plastic wrap when he tried to install it. Spend a little more on thickness, and you won’t have to replace it in six months.
Clear or Tinted — Know the Difference
Decide before you buy whether you want clear film or a tinted version. Clear film keeps your view unchanged, while tinted film blocks heat and glare but darkens the room noticeably.
I chose clear for my front windows because I didn’t want to lose the natural light. But for my sunroom, the tinted option was worth it just for the summer cooling savings.
Check the Scratch Resistance
Security film sits on the inside of your glass, which means it’s exposed to kids, pets, and cleaning supplies. I always look for a scratch-resistant coating so I don’t end up with a blurry view after a year of wiping down the windows.
My cousin skipped this detail and now her film looks like frosted glass from all the micro-scratches. That one feature makes a huge difference in how long the film stays crystal clear.
Read the Installation Requirements
Some films need special soap solutions or specific squeegees to install properly. I read the product details carefully before buying so I know exactly what tools I need to have on hand.
There’s nothing worse than getting home with your film and realizing you need a special applicator you don’t own. A quick read of the instructions saves you an extra trip to the store.
The Mistake I See People Make With Cutting Security Film
The biggest mistake I see is people trying to cut their film directly on the glass itself. I understand the logic — you think you’ll get a perfect match to the window shape. But in practice, you’re pressing a sharp blade against your expensive window, and one slip means a permanent scratch that no film will ever cover.
I tried this once on a small bathroom window and immediately regretted it. The blade skipped across the glass, leaving a thin white line that’s still there today. I had to replace the entire pane just to fix my careless mistake.
Instead, always cut your film on a flat, protected surface before you ever touch it to the window. Lay down a piece of cardboard or a cutting mat, measure carefully, and cut there. It takes an extra five minutes, but it protects both your glass and your film from disaster.
Another mistake I see is using scissors instead of a sharp utility knife. Scissors pull and stretch the film, creating wavy edges that never lay flat. A fresh blade glides through the film cleanly, giving you that crisp, straight edge you need for a proper seal.
I know how frustrating it is to finally get your film cut straight, only to realize your tools were working against you the whole time. If you’re tired of fighting with dull blades and crooked edges, what finally solved this for me was getting a proper cutting kit that made every slice clean and effortless.

- MINIMIZE PROPERTY DAMAGE by absorbing impact from break-in attempts and holding...
- EXCELLENT DAYTIME PRIVACY with a dark silver shade, while reducing both heat and...
- STRONG ADHESIVE protected by release liner. For easier installation, use A LOT...
The Trick That Made My Cuts Perfect Every Time
The aha moment for me came when I stopped cutting the film and started scoring it instead. Instead of pressing down hard and trying to slice through in one pass, I now run the blade lightly along my straightedge, just enough to cut through the film’s surface layer.
Then I gently snap the film along that scored line, the same way you’d snap a piece of drywall or glass. The film separates cleanly along the score with zero jagged edges, and I don’t have to worry about my hand drifting off course during a heavy cut.
This works especially well with thicker security film, which tends to resist a single heavy pass anyway. A light scoring motion is easier to keep straight because you’re not fighting the material — you’re just guiding the blade.
One more tip that changed everything for me: I always cut with the protective backing still on. The backing keeps the film from stretching and gives the blade a smoother surface to glide across. Peel it off only after your cut is complete, and you’ll notice your edges are noticeably cleaner.
Try this scoring method on your next piece, even a small test strip, and you’ll feel the difference immediately. It takes the stress out of long cuts and makes the whole job feel almost easy.
My Top Picks for Cutting Large Pieces of Security Window Film Straight
I’ve tested a handful of security films over the years, and these two are the ones I’d actually buy again. Both cut cleanly and install without the headaches I’ve dealt with on cheaper rolls.
VViViD Clear Protective 8mil Shatterproof Security Window — The Heavyweight for Maximum Protection
The VViViD 8mil film is the thickest I’ve worked with, and it gives me real peace of mind on my sliding glass door. It scores beautifully along a straightedge without tearing, which makes those long cuts surprisingly manageable. This is the perfect fit for anyone who wants serious shatterproof protection and doesn’t mind spending a bit more.
The trade-off is that its thickness makes it trickier to bend around tight corners, so take your time near the edges.
- VViViD Security Film will help protect you and your family from sharp broken...
- Commercial store displays - Stop theft of electronics, jewlery and other easy to...
- Prevent window vandalism - Easily replace after painted with graffiti. No need...
MEGICOLIM 4mil Clear Security Window Film Shatterproof — The Budget-Friendly Workhorse
The MEGICOLIM 4mil film is what I recommend to friends who want solid protection without breaking the bank. It’s noticeably easier to cut than the thicker VViViD, which makes it ideal for first-timers still learning to score a straight line. I love how forgiving it is — if you make a small mistake, you can often reposition it before it sets.
Just know that 4mil won’t stop a determined intruder the way the 8mil will, so weigh that against your needs.

- ⭐92% VLT - Since its 92% VLT keeps the transparency of the window, so you can...
- ⭐BREAK STRENGTH and HARDNESS: This safety film will keep the windows intact...
- ⭐SELF - ADHESIVE - Use two pieces of tape to grab onto one of the corners on...
Conclusion
Cutting security window film straight comes down to a flat surface, a clamped straightedge, and a light scoring touch instead of a heavy chop. That’s the whole secret, and it works every single time.
Grab a scrap piece of film right now and practice one scored cut before you touch your real windows — it takes five minutes and will save you a whole roll of frustration.
Frequently Asked Questions about How Do I Cut Large Pieces of Security Window Film Straight?
What is the best way to cut security window film without it tearing?
The best method I’ve found is scoring the film lightly with a sharp utility knife along a clamped straightedge, then snapping it along the scored line. This works far better than trying to cut all the way through in one heavy pass.
Make sure your blade is brand new, because a dull blade catches and pulls the film instead of slicing it. I also keep the protective backing on while cutting, which prevents the film from stretching and tearing.
Can I cut security film directly on my window glass?
I strongly advise against cutting on the glass itself, no matter how tempting it seems. One slip with the blade leaves a permanent scratch on your window that no film will ever hide.
Instead, cut on a flat surface like plywood or a cutting mat before you even bring the film near the window. This protects your glass and gives you a much cleaner, straighter edge to work with.
Why does my security film keep coming out crooked even when I measure carefully?
Crooked cuts usually happen because the film shifts or stretches while you’re cutting, not because your measurements were wrong. Pulling the film tight as you cut causes it to spring back and ruin your straight line.
Let the film lay completely flat and relaxed on your work surface, and clamp your straightedge so it cannot move. I also mark my cut line with a fine-tip marker so I’m following a visible guide instead of guessing.
Which security window film won’t let me down when I need to make a long straight cut?
I completely understand worrying about wasting expensive film on a botched cut — I’ve been there and it stings. A film that cuts cleanly and predictably makes all the difference when you’re working with large sheets.
The VViViD 8mil film has been my go-to for big windows because it scores beautifully without tearing. If you want that heavyweight protection and clean cuts, what finally worked for me was switching to this thicker film that holds its edge perfectly.

- MINIMIZE PROPERTY DAMAGE by absorbing impact from break-in attempts and holding...
- EXCELLENT UV REJECTION. Reduces fading of interior furnitures caused by the sun...
- STRONG ADHESIVE protected by release liner. For easier installation, use A LOT...
What is the best security film for a beginner who has never cut one before?
Starting with a more forgiving film is smart because thinner material is easier to cut and reposition if you make a mistake. You don’t want your first project to be with the thickest, most expensive film on the market.
The MEGICOLIM 4mil film is what I recommend to first-timers because it’s budget-friendly and much easier to score cleanly. If you’re just learning the ropes, the ones I sent my sister to buy were this exact film, and she got perfect cuts on her first try.

- 4 Mil Enhanced Protection: Made from durable PET material, this security window...
- Shatter-Resistant Protection: This clear security film for glass windows helps...
- Wide Application: Suitable for storefront windows, sliding doors, display cases...
How do I keep my straightedge from slipping while cutting long pieces?
Clamps are the answer, plain and simple. I used to hold my straightedge with one hand and cut with the other, but my hand always trembled just enough to ruin the line.
Now I clamp the straightedge to my work surface at both ends, so it physically cannot move. Even a tiny shift at the start becomes a huge curve by the end of a long cut, so locking it down is non-negotiable.