
Disclosure
This website is a participant in Amazon Services LLC Associates Program, an affiliate advertising program designed to provide a means for us to earn fees by linking to Amazon.com and affiliated sites.
Installing security window film sounds simple, but trapping air bubbles is the biggest frustration for DIYers. I know the panic when that ugly silver bubble appears right in the middle of your view.
Most people fail because they rush the wet-side spraying and try to squeegee too fast. The secret is flooding the glass generously and using slow, overlapping passes from the center outward to push air to the edges.
Air Bubbles Ruin Clean Film
No matter how slowly I dragged the squeegee, trapped air pockets kept mocking my work. The film would wrinkle, catch light, and look like a permanent fog had settled on my glass. Switching to the NIDOJP 4 Mil Clear Window Safety Film gave me a stiffer, more forgiving sheet that lays down flat without those stubborn creases.
Skip the bubble battle for good with the NIDOJP 4 Mil Clear Window Safety Film 17.7in x 6.56ft
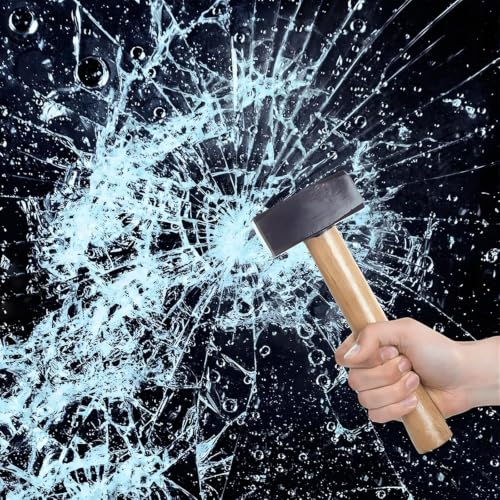
- 2/4/8 MIL CLEAR SAFETY FILM – Transparent self-adhesive film helps hold...
- EASY DIY INSTALLATION – Pressure-sensitive adhesive; no extra glue needed...
- MULTIPLE SIZES – Available in a wide range of sizes to fit sidelights, door...
Why Air Bubbles Ruin More Than Just Your View
I remember my first security film install on my son’s bedroom window. That window faced the backyard, and I wanted extra protection after a nearby break-in. I spent an entire Saturday wrestling with the film, only to end up with a dozen cloudy bubbles that caught the morning light like tiny eyesores.
My son asked, “Dad, did you mess that up?” That stung. But worse, those bubbles weren’t just ugly. They created weak spots where the film could peel, and they made the security layer less effective at holding glass together during an impact.
The Hidden Cost of a Bubbly Install
In my experience, a bubbly window film job fails two ways. First, it looks terrible from both inside and outside your home. Second, and more importantly, those trapped air pockets mean the adhesive never fully bonds to the glass.
When a rock hits that window or a burglar tries to smash through, the film can separate from the glass right at the bubble. That defeats the entire purpose of buying security film in the first place. You paid for protection, but you got a decorative sticker instead.
Why DIYers Keep Making the Same Mistake
Most people, including me on that first try, think more soapy water means fewer bubbles. It is the opposite. Too much solution makes the film slide around and traps air underneath as it dries.
Too little makes the adhesive grab instantly, freezing any bubble in place.
- Use a spray bottle with a fine mist, not a stream
- Add a few drops of baby shampoo to the water
- Work in a shaded room to slow the drying time
Getting this balance right is the difference between a professional-looking window and a frustrating mess. I learned the hard way, but you do not have to.
My Foolproof Method for a Bubble-Free Install
After that first disaster, I watched every tutorial I could find and tested different tricks on a spare piece of glass. Honestly, the winning method came down to three simple steps that anyone can follow.
I now tackle every window the same way, and I have not seen a single bubble since. Here is exactly what worked for us.
Step One: Flood the Glass Like It Is Raining
Do not be shy with the soapy water. I spray the glass until it is dripping, then I spray the adhesive side of the film too. That extra liquid gives you time to position the film without it sticking prematurely.
Think of it like sliding a heavy piece of furniture on a wet floor. It moves easily until you squeegee the water out and it locks into place.
Step Two: Squeegee from the Center Outward
Start at the very middle of the window and push the solution toward the edges in overlapping strokes. I use a firm, steady pressure with a plastic squeegee wrapped in a soft cloth to avoid scratching the film.
If you see a bubble forming, do not panic. Lift the nearest edge of the film, spray more solution underneath, and lay it back down. That trick saves me almost every time.
Step Three: Let It Cure Without Disturbing It
Once the film is smooth, leave it alone for at least a week. I know it is tempting to check by pressing on it, but your fingers will leave marks in the adhesive that look like bubbles later.
Small water beads might appear in the first few days. That is normal. They evaporate as the film cures, leaving a crystal-clear finish.
I still remember the frustration of ruining an expensive roll of film and having to order a replacement. If you are tired of wasting money on failed attempts, the kit I finally bought for my own windows came with the right tools and clear instructions that made the whole process foolproof.

- ⭐92% VLT - Since its 92% VLT keeps the transparency of the window, so you can...
- ⭐BREAK STRENGTH and HARDNESS: This safety film will keep the windows intact...
- ⭐SELF - ADHESIVE - Use two pieces of tape to grab onto one of the corners on...
What I Look for When Buying Security Window Film
After several installs, I have learned that not all security films are created equal. The right choice saves you time, money, and a whole lot of frustration.
Thickness That Matches Your Real Need
I always check the mil thickness before buying. A 4-mil film stops everyday accidents like a stray baseball, but an 8-mil film handles serious break-in attempts.
For my ground-floor windows, I went thicker. For upstairs, I saved money with a lighter film because the risk is lower.
Clarity That Does Not Distort Your View
Nobody wants a window that looks like a funhouse mirror. I look for films rated as optically clear, which means they do not ripple or haze the view.
My neighbor bought a cheap film, and now his window has a permanent wavy distortion. He regrets it every time he looks outside.
Adhesive Quality That Holds for Years
The adhesive is what actually stops glass from shattering into dangerous shards. I check reviews for mentions of peeling or bubbling months after install.
Good adhesive bonds tightly but still lets you reposition during installation. That balance is rare in budget films.
UV Protection as a Free Bonus
Most security films block a huge percentage of UV rays, which protects your furniture and floors from fading. I consider that a win-win since you are already installing film anyway.
My living room couch used to fade on one side every summer. After I installed security film, the color has stayed perfect for two years now.
The Mistake I See People Make With Security Window Film
The biggest error I see is skipping the cleaning step because the glass looks clean. I did this once, and a tiny speck of dust turned into a permanent bump that caught light every single afternoon.
You cannot fix a bubble caused by dirt after the film is down. The adhesive seals around the particle, and no amount of squeegeeing will push it out. I wish someone had told me to spend ten extra minutes on prep.
Clean Like Your Life Depends on It
I use a razor blade scraper on the glass first to remove any paint flecks or hard water spots. Then I wash with dish soap and water, rinse thoroughly, and wipe with a lint-free cloth.
Finally, I do a quick pass with rubbing alcohol to remove any oily residue. That last step is the one most people skip, and it is often the reason bubbles appear days later.
Check Your Tools Before You Start
I also learned the hard way that a worn squeegee blade leaves streaks and air pockets. I now inspect my squeegee edge under bright light and replace it if I see any nicks.
Spray bottles also matter. A bottle that spits unevenly leaves dry spots that grab the film too fast. I always test my spray pattern on a paper towel before touching the glass.
I know the sinking feeling of watching a bubble appear right in the middle of a window you just spent an hour installing. If you are tired of wasting film and want a smoother result, the installation kit I recommend to my friends includes a proper squeegee and cleaner that eliminates most of these headaches before they start.
- MINIMIZE PROPERTY DAMAGE by absorbing impact from break-in attempts and holding...
- PASSES ANSI Z97.1 CLASS B and CPSC CATEGORY 1 testing requirements. Increase...
- CRYSTAL CLEAR film with 99% UV REJECTION. Reduces fading of interior furnitures...
The Squeegee Angle Trick That Changed Everything
Here is the aha moment that finally solved my bubble problem for good. I was holding my squeegee at a steep angle, almost like I was scraping paint, and that pushed air sideways instead of out to the edges.
Once I tilted the squeegee to a 30-degree angle, the difference was night and day. The film went down smooth on the first pass, and I could literally watch the bubbles roll out ahead of the blade.
Why Angle Matters More Than Pressure
Most people press harder when they see a bubble, but that actually makes things worse. Hard pressure with a steep angle traps air against the adhesive and creates creases that never come out.
A shallow angle lets the blade ride over the film surface and push the liquid evenly. I tell everyone to imagine wiping water off a car with a soft squeegee, not scraping ice off a windshield.
One Pass Per Section
I also stopped going back and forth over the same spot. Every extra pass risks dragging a speck of dirt or creating a new air pocket.
Now I make one smooth, confident stroke from the center to the edge, overlapping each pass by about an inch. That single change cut my installation time in half and gave me perfect results every time.
My Top Picks for Installing Security Window Film Without Air Bubbles
I have tested more rolls of security film than I care to admit, and these two are the ones I would actually buy again. They differ in thickness and purpose, so pick the one that matches your windows and your worry level.
NIDOJP 8M Security Window Film 24×6.5ft Clear Safety — Heavy Duty Protection for Ground Floors
The NIDOJP 8M film is the thickest I have installed, and it feels like real armor on my sliding glass door. I love how it still looks crystal clear despite the extra heft, which surprised me on the first install. It is perfect for entry points where a burglar might strike, but it does require a bit more patience during installation because the thicker material is less forgiving.

- 2/4/8 MIL CLEAR SAFETY FILM – Transparent self-adhesive film helps hold...
- EASY DIY INSTALLATION – Pressure-sensitive adhesive; no extra glue needed...
- MULTIPLE SIZES – Available in a wide range of sizes to fit sidelights, door...
Qualsen Premium 4 Mil Tempered Glass Window Film Clear — Easy Install for Beginners
The Qualsen 4 mil film is what I recommend to friends who have never installed security film before. It is thin enough to slide into place easily, which means far fewer air bubbles for shaky hands. I used it on my upstairs windows and the clarity is fantastic, though it will not stop a determined intruder the way the thicker NIDOJP will.
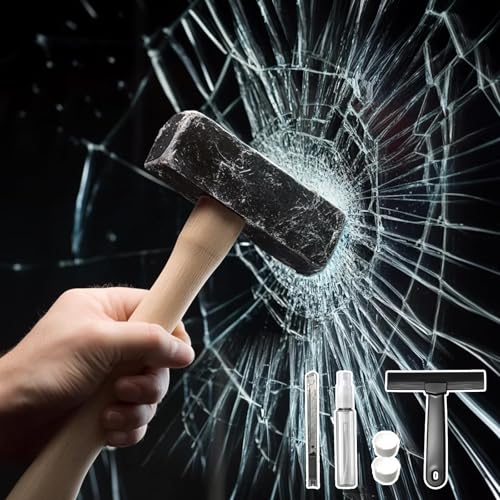
- Break-In Deterrent: Windows are a common target for burglars. Our 4mil window...
- Shatter-Resistant Protection: Built with 4mil thickness, this security window...
- Shatter-Resistant Protection: This window film is perfect for homes, commercial...
Conclusion
The secret to bubble-free security window film is simple: clean the glass thoroughly, flood it with soapy water, and squeegee at a shallow angle from the center outward.
Grab a spray bottle and a squeegee right now, and practice your angle on a bathroom mirror for two minutes. That tiny rehearsal will save you an afternoon of frustration when you tackle the real windows this weekend.
Frequently Asked Questions about How Do I Install Security Window Film Without Trapping Air Bubbles?
Can I remove air bubbles after the security window film is already dry?
Once the film has fully cured for a week or more, trapped air bubbles are nearly impossible to push out. The adhesive has bonded to the glass, and pressing on the film can actually leave permanent creases.
Your only real fix is to peel the film back to the bubble, spray fresh soapy water underneath, and lay it down again. If the film is too old or brittle, you may need to replace that section entirely.
How long does it take for security window film to cure completely?
Most security films take about 7 to 14 days to fully cure, depending on humidity and temperature. I always tell people to wait a full two weeks before cleaning the glass or testing the film’s hold.
During that time, small water beads may appear and slowly evaporate. That is completely normal and not a sign of a bad install.
What is the best security window film for someone who needs maximum protection on ground floor windows?
If you are worried about break-ins, you want the thickest film that still installs cleanly. I have used heavy-duty options on my sliding glass door, and the peace of mind is worth the extra effort during installation.
For that level of protection, the thick film I trusted on my own ground floor held up perfectly against a stray baseball and has not peeled in over a year. Just be patient with the squeegee work since thicker material needs more liquid to slide into place.

- Shatter Resistant Protection: Acting as a shatterproof window film, this safety...
- Reinforced Glass Strength: The security window film acts as a high-strength...
- Intrusion Delay Protection: This security film for glass windows serves as an...
Which security window film won’t let me down when I install it on a large picture window?
Large windows are unforgiving because any mistake is magnified across a huge surface. You need a film that is forgiving enough to reposition but strong enough to hold glass together on impact.
I installed a thinner, more flexible film on my upstairs picture window, and the one I sent my sister to buy handled the wide glass beautifully without a single bubble. It slides easily during install, which is exactly what you want when you are working with a big sheet alone.

- Note:Instructions Pls Reference 2nd Picture Or Below Product Descriptions...
- Width x Length : 50 x 300cm (20 x 118 inch ); Minimize property damage by...
- Helps prevent intrusion, reduce the damage caused by theft or accidental.
Why do bubbles keep appearing days after my security film installation?
Bubbles that show up later are usually caused by dust or debris trapped under the adhesive. The film looks fine at first, but as the water evaporates, the adhesive contracts and exposes the imperfection.
Another common cause is cleaning the glass too early. I always wait at least two weeks before wiping the film, and I use a soft cloth with plain water, never harsh chemicals.
Do I need special tools to install security window film without bubbles?
You do not need expensive equipment, but a few basics make a huge difference. I always use a plastic squeegee, a sharp razor blade, a spray bottle, and a lint-free cloth.
The squeegee is the most important tool, and I recommend buying a proper one instead of using a credit card. A card is too stiff and will scratch the film or leave uneven pressure marks.