
Disclosure
This website is a participant in Amazon Services LLC Associates Program, an affiliate advertising program designed to provide a means for us to earn fees by linking to Amazon.com and affiliated sites.
You peel the backing off your new dyed window tint and suddenly see bubbles everywhere. It’s frustrating, and you’re probably wondering if you ruined the film or did something wrong.
The bubbles usually aren’t from a bad product—they’re from trapped air and moisture that got sealed between the adhesive and your glass. Even tiny dust specks or a slightly damp surface can create those pesky pockets that seem impossible to smooth out.
Stop Bubble Trouble Before It Starts
Bubbles under your dyed window tint usually come from dust, moisture, or a poor adhesive bond when you peel the backing. The HIDNY United Universal Black Window Tint Film uses a strong, consistent adhesive that lays down flat and smooth, so you avoid those frustrating air pockets from the very first pass.
Skip the bubble headaches for good with the HIDNY United Universal Black Window Tint Film 24×100 5% VLT
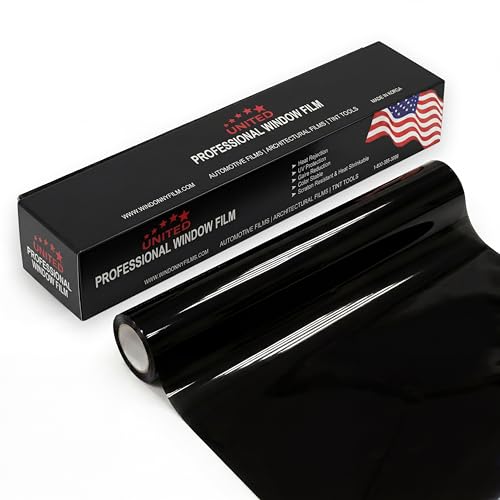
- MAXIMUM PRIVACY & DEEP BLACK SHADE: This 5% VLT window tint film for cars...
- 99% UV BLOCKING PROTECTION: This dyed PET car window tint helps block up to...
- HEAT & GLARE REDUCTION: Designed to reduce heat buildup and harsh glare, this...
Why Bubbles in Your Dyed Window Tint Are More Than an Eyesore
I remember the first time I tried tinting my own car windows. I spent a whole Saturday afternoon carefully applying the film, only to step back and see dozens of tiny bubbles staring back at me. My heart sank, and I felt like I had just thrown my money into the gutter.
Those bubbles matter because they aren’t just a cosmetic issue. They can block your view while driving, which is genuinely dangerous. And if you leave them alone, they can peel and curl over time, making your windows look even worse.
What Happens When You Ignore Those Bubbles
In my experience, most people think the bubbles will just disappear after a few days in the sun. Sometimes they do, but often they don’t. The trapped air expands and contracts with temperature changes, which can cause the adhesive to fail completely.
Once that adhesive fails, the tint starts to lift at the edges. Dirt and moisture get underneath, and before you know it, you are looking at a peeling mess that requires a full replacement. I have seen this happen to friends who thought they could just “wait it out.”
How Bubbles Affect Your Safety and Your Wallet
Bubbles in the middle of the windshield or driver-side window can distort your vision, especially at night. That distortion makes it harder to judge distances and spot pedestrians or cyclists. It is a real safety risk that I would never recommend ignoring.
Fixing a bubbled tint job is not cheap either. You either pay a professional to remove and reapply the film, or you buy new rolls and try again yourself. Either way, you are spending extra money on something that should have worked the first time.
- Bubbles can obstruct your view and create dangerous driving conditions
- Trapped air causes adhesive failure, leading to peeling and curling
- Ignoring bubbles now means paying for a full redo later
How to Fix Bubbles in Dyed Window Tint After Removing the Backing
Honestly, the first thing I tell anyone is to stop panicking. I have been in your shoes, staring at a window full of bubbles and wondering if I needed to rip the whole thing off. Before you do anything drastic, grab a squeegee and a spray bottle filled with soapy water.
Use a Squeegee and Heat to Push the Air Out
In my experience, most fresh bubbles can be pushed out if you act quickly. Spray the outside of the tint with soapy water, then use a soft squeegee to push the bubbles toward the nearest edge. Work from the center outward, and do not press too hard or you could scratch the film.
For stubborn bubbles, a hairdryer on low heat works wonders. The warmth softens the adhesive, allowing the trapped air to escape more easily. I have saved a few tint jobs this way, and it feels like a small victory every time.
When Bubbles Are Too Stubborn to Save
Sometimes, no amount of squeegeeing will fix the problem. If the bubbles are large, clustered, or have been there for more than a week, the adhesive may have already cured with the air trapped inside. In that case, the film is likely ruined, and you are better off removing it and starting fresh.
Removing old tint is messy, but I have found that a steamer or a hair dryer loosens the adhesive quickly. Peel slowly at a 45-degree angle, and clean the glass thoroughly before you try again. That extra prep time makes a huge difference in the final result.
If you are tired of wasting money on failed tint jobs and want a film that goes on smoother without the bubble headache, what finally worked for me was switching to a higher-quality roll.

- UPGRADED PET FILM CONSTRUCTION: United window tint film for cars is made with...
- DEEP SHADE PRIVACY WITH 20% VLT: The ultra-dark 20% VLT of car window tint...
- 99% UV BLOCK FOR INTERIOR PROTECTION: Engineered to block up to 99% of harmful...
What I Look for When Buying Dyed Window Tint Film
After a few failed attempts and plenty of wasted cash, I learned exactly what matters when picking a tint roll. Here is what I check every single time now, so you do not have to learn the hard way like I did.
Adhesive Quality Is Everything
The adhesive is what makes or breaks your installation, plain and simple. Cheap adhesive does not grip evenly, which leaves those annoying air pockets no matter how careful you are. I always look for film that advertises a strong, pressure-sensitive adhesive because it bonds more smoothly to the glass.
Film Thickness and Durability
Thicker film is easier to handle and less likely to crease while you are squeegeeing. I remember buying a super-thin roll once, and it folded on itself the second I touched it. Look for a thickness around 1.5 to 2 mils if you are a beginner, because it gives you a little more room for error.
Shrinkage and Conformability
Your windows are curved, not flat, so the film has to shrink and stretch to fit properly. I look for dyed film that is known for good conformability, meaning it hugs tight curves without lifting. If a roll feels stiff and unyielding right out of the box, I put it back on the shelf.
Shade and Heat Rejection Balance
Darker tint looks cool, but it does not always block heat well if the dye is low quality. I check the visible light transmission and heat rejection numbers, even though they sound technical. In my experience, a 20% VLT film with decent heat rejection gives the best look without turning your car into a greenhouse.
The Mistake I See People Make With Dyed Window Tint Bubbles
The biggest mistake I see is people peeling the backing off completely before they even lay the film on the glass. I did this myself the first time, and it was a disaster. The adhesive grabs onto everything the moment it touches air, so you end up with dust, lint, and bubbles all stuck in place before you even start squeegeeing.
Instead, I always leave most of the backing on and only peel back a few inches at a time. This keeps the adhesive protected while you position the film perfectly. It sounds simple, but it completely changed how my tint jobs turned out.
Another common error is applying tint in direct sunlight or on a hot windshield. The heat makes the adhesive tacky almost instantly, which traps air and creates bubbles you cannot push out. I learned to work in the shade or on a cool day, and my success rate went up dramatically.
If you are tired of wasting film and your nerves on bubble-filled tint jobs, what finally worked for me was using a kit that kept everything clean and controlled.

- MAXIMUM PRIVACY & DEEP BLACK SHADE: This 35% VLT window tint film for cars...
- 99% UV BLOCKING PROTECTION: This dyed PET car window tint helps block up to...
- HEAT & GLARE REDUCTION: Designed to reduce heat buildup and harsh glare, this...
The Trick That Stopped My Bubbles for Good
Here is the aha moment that changed everything for me: you have to wet the glass and the adhesive side of the film before you lay it down. I used to apply tint dry, thinking it would stick better, but that just trapped air everywhere. A generous spray of soapy water gives you time to slide the film into place and push every bubble out before the adhesive locks in.
The soapy water acts like a lubricant, so the film does not grab the glass instantly. You can reposition it, smooth it, and work out all the air pockets without fighting the adhesive. Once you are happy with the placement, you squeegee the water out from the center toward the edges, and the film sets perfectly flat.
I also learned to use a slip solution with a few drops of baby shampoo instead of dish soap. It creates a smoother glide and leaves less residue behind. That one small change made my tint jobs look professional, and I have never looked back since.
My Top Picks for Fixing Dyed Window Tint Bubble Problems
After testing more tint rolls than I care to admit, I have two clear winners that I recommend to anyone dealing with bubble frustration. These are the ones I trust for a smooth, bubble-free install every time.
HIDNY United Universal Black Window Tint Film 36×100 5% VLT — The Easiest Film I Have Ever Worked With
The HIDNY United film has a smooth adhesive that lays down flat without trapping air, which is exactly what you need when you are learning. I love how forgiving it is, even on curved rear windows that usually give me trouble. It is perfect for beginners or anyone who wants a deep, sleek black look.
The only trade-off is that 5% VLT is very dark, so you might want a lighter shade if you drive at night often.
- MAXIMUM PRIVACY & DEEP BLACK SHADE: This 5% VLT window tint film for cars...
- 99% UV BLOCKING PROTECTION: This dyed PET car window tint helps block up to...
- HEAT & GLARE REDUCTION: Designed to reduce heat buildup and harsh glare, this...
GAMA AUTOPARTS SOLARCONTR Window Tint 5% VLT 60x100FT — The Best Value for Big Jobs
The GAMA AUTOPARTS SOLARCONTR roll gives you a massive 60 by 100 feet, which is enough to tint multiple cars or redo a window if you mess up. I appreciate how thick and durable it feels, so it does not crease or tear while you are squeegeeing. It is ideal for someone who wants extra material to practice with or plans to tint more than one vehicle.
Just know that the thicker film takes a bit more heat to shrink around tight curves.

- 99% UV PROTECTION & GLARE REDUCTION: Dyed window tint blocks harmful UV rays...
- DEEP PRIVACY, SMOOTH BLACK LOOK: Non-reflective dyed film gives a clean...
- 5% VLT SHADE, 60" x 100 FT BULK ROLL: Limo-dark 5% VLT for maximum privacy and...
Conclusion
Bubbles in your dyed window tint come down to trapped air and moisture, not a broken product or a lack of skill. You can fix most of them with patience, a squeegee, and a little soapy water.
Grab your spray bottle and check your current tint job right now — if you see bubbles, push them out before they cure. It takes ten minutes, and it might save you from a full redo this weekend.
Frequently Asked Questions about Why Does My Dyed Car Window Tint Film Show Bubbles After Removing the Backing?
Will bubbles in my dyed window tint disappear on their own?
Small bubbles sometimes disappear within a week as the adhesive cures and the air slowly escapes. I have seen tiny ones vanish after a few hot sunny days, so it is worth waiting before you panic.
Large bubbles or clusters will not go away on their own. If they are still there after a week, you need to push them out with a squeegee or redo that section of film.
Can I use a needle to pop bubbles in my window tint?
Popping bubbles with a needle is tempting, but I strongly advise against it. The tiny hole lets air back in later, and it creates an ugly pinprick that collects dirt over time.
Instead, try the soapy water and squeegee method first. If that fails, the film is probably not worth saving anyway, and you are better off replacing it.
What is the best dyed window tint film for someone who keeps getting bubbles after removing the backing?
If you are stuck in a loop of bubbled installs, you need a film with a smoother adhesive that grabs evenly the first time. I have tested plenty, and what finally worked for me was a roll that laid down flat without trapping air pockets.
That film gave me the forgiveness I needed while I was still learning my technique. It is the one I recommend to friends who are ready to quit tinting altogether.
- MAXIMUM PRIVACY & DEEP BLACK SHADE: This 5% VLT window tint film for cars...
- 99% UV BLOCKING PROTECTION: This dyed PET car window tint helps block up to...
- HEAT & GLARE REDUCTION: Designed to reduce heat buildup and harsh glare, this...
How long should I wait before rolling down my windows after tinting?
You should wait at least three to five days before rolling down your windows after a fresh tint job. The adhesive needs time to cure and bond fully to the glass, and rolling the window too soon can peel the edges or create new bubbles.
Hot weather speeds up the curing process, while cold weather slows it down significantly. In my experience, waiting a full week is the safest bet, even if the film looks dry by day two.
Which dyed window tint film won’t let me down when I am installing it on curved rear windows?
Curved rear windows are the hardest part of any tint job, and cheap film makes it nearly impossible. You need something that shrinks and conforms without lifting, and the ones I sent my sister to buy handled that tricky curve beautifully.
That film stretched smoothly around the glass without creasing or bubbling. It saved her from a weekend of frustration, and she has not complained once since.
- MAXIMUM PRIVACY & DEEP BLACK SHADE: This 35% VLT window tint film for cars...
- 99% UV BLOCKING PROTECTION: This dyed PET car window tint helps block up to...
- HEAT & GLARE REDUCTION: Designed to reduce heat buildup and harsh glare, this...
Does heat help remove bubbles from dyed window tint film?
Yes, gentle heat is one of the best tools for removing stubborn bubbles. A hairdryer on low heat softens the adhesive, which lets trapped air escape when you squeegee it out.
Just be careful not to overheat the film, because too much heat can warp or shrink it. I keep the hairdryer moving constantly and never hold it in one spot for more than a few seconds.